ModelRailroadForums.com is a free
Model Railroad Discussion Forum and
photo gallery. We cover all scales and sizes of model railroads. Online since 2002, it's one of the oldest and largest model railroad forums on the web. Whether you're a master model railroader or just getting started, you'll find something of interest here.
Northern Pacific history enthusiast
Thanks for the reply Hawkes--I hung the thread from the ceiling and weighted the bottom. Then I spread a thin coat of glue down the thread by putting the glue between my finger and thumb and running them along the thread. That gets the fuzz down that usually shows up, and also slightly stiffens the thread so it will sag naturally. Hopefully this weekend I will get around to the stringing of the line.
I am still up in the air as far as how much detail I will go into, as far as the individual lines going to the separate shops and industries.
I am trying to figure out how to make the little cap that covers the service where the wire attaches to the building.
Hey Logan, here's two pictures showing my future connection (will only do once in place on the layout)
I used the shield of a wire for the pipe on the shack
View attachment 50422
Here I have 3 wires (thread) leaving the transformer which will be glued to the inside of the pipe on the shack
View attachment 50423
Hope this makes sense
Northern Pacific history enthusiast
Yes, Hawkes, that top photo is the structure I am trying to figure out. I thought about using 14 gauge wire for this structure but not sure yet. I am going to drive around town and get a couple photos of a couple older homes where I can see the wires well.
On our house it is on the side of the house, and there is a (suspension) wire that holds the wires. Not sure if I am going to that level of detail yet.
I did get these meters that I will be using somewhere:
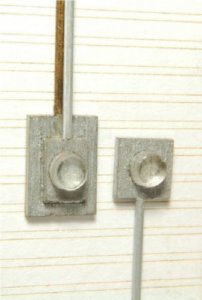
I like those meters.....NICE.
I also thought about the wire holding the wires and thought it was a bit to much.
I also thought of a mid span brace and said........ NNNAH.
If it was up front on the layout maybe, but it will be 4' away from the edge.
The shack is the only aerial connection, all others are going into a conduit to feed buildings for now. (except my big building for the box cars yard)
GL with the utility polls
Northern Pacific history enthusiast
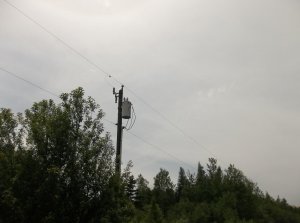
Pics of a couple "prototypical" utility installations, the first one is the proper era for my model. The second one is the way they do it today, I was going for that little cap over the top of the conduit, but in the 50's it must have been optional:
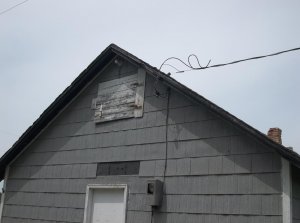
I am not sure if they used the conduit in the 40's and 50's, based on the photo.
Northern Pacific history enthusiast
Here are some pics of my utility poles, not happy with the way the lines turned out but maybe I can get some suggestions. I used the thread coated with glue method outlined my Model Railroader magazine but ended up with not that perfect sag but a few imperfections:
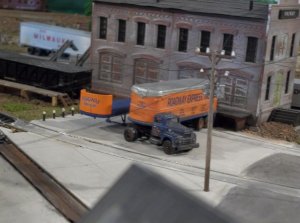
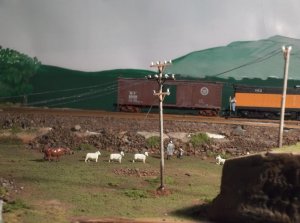
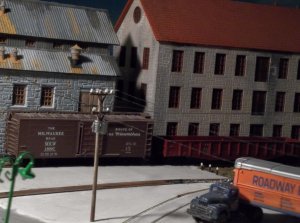
The bottom line is a little wavy and hope it will sag better after hanging for a couple weeks. The biggest problem with the wires is they don't show up too well in photos.
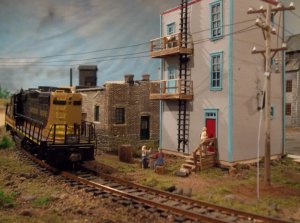 Let me know if you have a better product for the utility wires
. I used thread and the technique outlined in the model railroader magazine.
Thanks for looking--lasm
Hey lasm,
Still not bad
The only thing i would see is that when you put the glue on the thread, was the wire vertical?
I would of strung the wire from left to right and then applied the glue to give it the sag you wanted.
By doing it vertically, you are making a rigid wire and if the glue wasn't spread equally, then you would have that kind of result
I THINK, just thinking out loud here.
You're my tester...lol
I will be doing my wiring in about 3-4 weeks, not ready yet.
If you want to try a section of your wires (if you have the time) the horizontal way, sure would like to see the difference
GL
I saw an article in either MR or on MRH about using a thread that can stretch in case you were to accidentally hit them while working on your layout. If I can find the article, I'll let you know. You could also probably check with a local fabric shop also.
Looking good. I have been contemplating doing the same thing for years but have been a bit reluctant because of the fear of tearing things apart accidentally. Keep the pictures coming.
LASM .. Nice shots of your work. I like what you have done.
What make is the Roadway tractor/trailer? Good looking truck.
Carry on Sir!
Northern Pacific history enthusiast
Chet, Sherrell; Thanks for the comments!!
Sherrell-- The trucks/trailers are Classic Metal Works
Hawkes--I hung the threads from the ceiling and put a weight on the bottom, and spread some 1/2 glue 1/2 water mixture because I did not have any full strength glue.
It seemed like there weren't any of the slight kinks until I started handling the strings, then I think if I put it in a tight arch it wanted to remember that and would not forget it. Maybe if I had been more careful.
The only thing i would see is that when you put the glue on the thread, was the wire vertical?
I would of strung the wire from left to right and then applied the glue to give it the sag you wanted.
By doing it vertically, you are making a rigid wire and if the glue wasn't spread equally, then you would have that kind of result
GL
I tried saturating the hung strings with wet water last night but it did not seem to make any appreciable difference. Some of the lines turned out better than others.
I will let them set for a while and if they don't lay the way I want I will re do the offending sections.
Thanks for the feedback!!!!
Lasm,
Your poles and wires look incredible in their own right as stand alone items, but on your layout, they truly are amazing!
Nicely done, those will look awesome when complete. I'd be scared of snagging a sleeve or something on them and ripping them out!
Steve
Sent from my iPhone using Tapatalk
Northern Pacific history enthusiast
TONY--Thanks for commenting!!
Chet, Steve, you both brought up the sleeve in the line problem. They are really pretty tough, I snagged them a couple times and nothing went haywire.
The poles are either drilled in a little and/or or affixed with a gob of JB weld epoxy, I cut off the flat bases that they came with.
As far as attaching the thread to the insulators; I first used a little hobby tack to stick the line then added a drop of CA to make a permanent bond. The lines are held very tightly.
STEVE--I have another brand I will be using in another part of the layout but I am pretty much done with this area, the line runs onto the layout from nowhere and runs across the entire industrial section and makes a 90 by the checker game and exits the layout, Since most of the wire runs through the center of the layout, it is less apt to get in the way as well.
THANKS for looking!
Northern Pacific history enthusiast
I found out an alternative product to the thread for utility lines, E-Z line that comes in 100' spools and is flexible as well, also shouldn't have the kinks, I ordered them from here:
http://www.fiferhobby.com/html/scenery_details_n_scale.html
Here is a picture of the item on a sample layout (jBob Lawson's) , they said white showed up better than black:
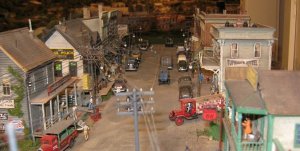
I've seen good results with fishing wire and metal craft wire off a spool .... The wires look good on mobile ... Weather heads are the typical now used to be a insulator cup and a hole in the attick that was insulated and tub and socket wiring. A lot depended on the contractor\utility and local requirements
LASM,
The E-Z Wire looks like just the thing and I like how it comes in a variety of sizes and colors as well. Will be interested to here your thoughts on it.
Hey logan,
Let me know when you have the EZ line installed, I'll wait for your opinion.... you're the guinea pig (tester)
You say white is better seen than black, what about grey?
Later
Northern Pacific history enthusiast
Monkey, Tony, Hawkes--thanks for commenting--The website recommended white so we will see, I am a little skeptical but for 7.99 it isn't going to set me back too far. Most of my background is dark and they said it showed up best on a dark background.
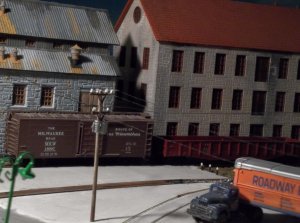
I know the black thread that I used is pretty hard to see in the photo, although it doesn't show up too bad in person
Northern Pacific history enthusiast
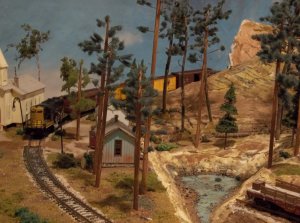
Some pics of the new trees I added. Waiting for the new utility wire to show up so decided to add a bunch more trees to the forest and logging area:
Here is the before photo:
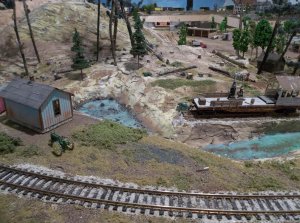
Here are a few more pines added, these are straight ones (made from dowels rather than sticks) and are supposed to look like Red pine:
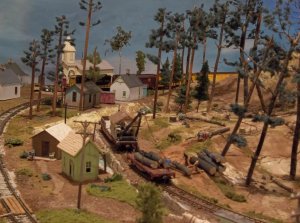
The one tree is made using a fiber product as foliage (the one nearest the locomotive), wheras the dark green ones it is torn scouring (scotch) pads:
Excellent!
Sent from my SAMSUNG-SM-G920A using Tapatalk

Affiliate Disclosure: We may receive a commision from some of the links and ads shown on this website
(Learn More Here)



