ModelRailroadForums.com is a free Model Railroad Discussion Forum and photo gallery. We cover all scales and sizes of model railroads. Online since 2002, it's one of the oldest and largest model railroad forums on the web. Whether you're a master model railroader or just getting started, you'll find something of interest here.
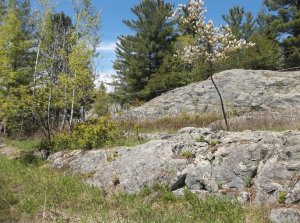
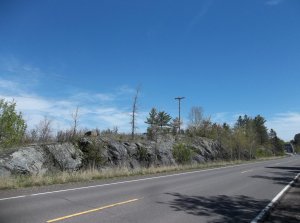
Thanks for looking, Chet, Hawkes...I took a couple photos yesterday to try to match the colors to what I want to build, also get it in my head about the vegetation that I see,
Here are a couple pics showing some local rocks, we have some really large faces as well more jagged but I couldn't get a shot of them
The color seems a lot darker "in person", I guess I shouldn't too stressed out about the exact color because it depends a lot on the lighting and moisture
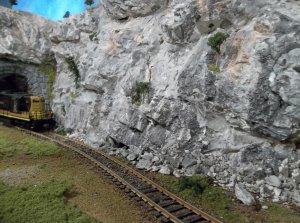
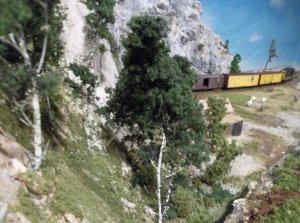
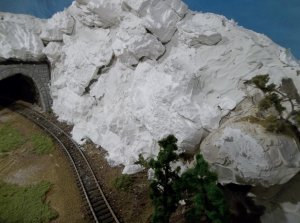
I got a bunch of the rock work done and added some aspens on one of the hillsides (see pictures) and I am afraid that is going to steal the show:
This shows the talus and the finished rock:
Here is the aspens, I used the Woodland Scenics fine foliage package and painted the larger pieces for the scraggy aspens that inhabit the steep and dry slopes:
Here is how it looked when I was patching the rock pieces together:
Hi David, Things look real good, looks like it's really coming along. I like your attention to details too such as denoting the various locations as well as your ability to match the look your trying to achieve. I'm planning on on putting little signs up for the various locations too. I think that really adds to the realism.
Keep up the good work and sorry for not having followed your post earlier. Oh, the fellow that taught me to build turnouts modeled 'N' and was also hand laying his rail in code 55 for the main line and code 40 for the sidings. He also build a working Hump Yard. He was aslo an Engineer for the Southern Pacific at the time too.
I like your attention to details too such as denoting the various locations as well as your ability to match the look your trying to achieve. I'm planning on on putting little signs up for the various locations too. I think that really adds to the realism.
Thanks for the comments, David; taking some pictures (of the real thing) really helped me get it cemented in my mind some of the elements I was trying to achieve.
As far as signs go, I was suprised how easy they were to make and how they made the area look a lot more real!
Looks great David, so realistic! Much better the second time on those rock faces. I've been toying with the idea of redoing some of mine too. You learn so much as you progress, sometimes you almost have to go back and do the first ones again.
Thanks for the comments, David; taking some pictures (of the real thing) really helped me get it cemented in my mind some of the elements I was trying to achieve.
As far as signs go, I was suprised how easy they were to make and how they made the area look a lot more real!
Taking some shots of an area your trying to model/recreate is a great way to have ready references to work from. A very good point!
I also agree the signs are rather easy to create, especially if your have a program for doing desk top publishing. The signs do add considerable realism to a layout. I've also thought adding mile posts would again help to create even more realism. Of course the problem is that most of us, myself included, don't really have a scale mile of track let alone two or three so I guess we just have to compress distance/s to fit within the real estate we have in our layouts.
I also plan on adding old square type telegraph poles, without much in the way of actual lines, along my track-age to try and ad even more realism. Well that's a fair ways off for me but I've always liked the realism it brings out.
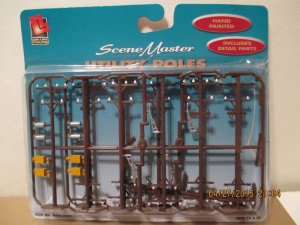
David TRUSSROD: Funny you would mention power lines, I just purchased some last week and that is my next addition to the layout. I am going to go crazy and run the strings as well. I think I will try to make the poles removable so when I am doing other alterations I won't get caught up in them...
Love the idea of adding poles to your already realistic layout. Not sure what you are going to use for the "lines" or how realistic you want them but maybe buying some thin stranded wire to run between the poles. Might take a little time to unravel it but think it would look great if you have the patience, and I am sure you do
Your idea of making them removable is a practical one as well and I'll be interested to see how you do that while making them "sturdy" on the layout. Perhaps getting narrow tubing for them sit in and keep them positioned?
Love the idea of adding poles to your already realistic layout. Not sure what you are going to use for the "lines" or how realistic you want them but
Your idea of making them removable is a practical one as well and I'll be interested to see how you do that while making them "sturdy" on the layout. ?
I read that I can use regular thread, coated with a light coat of white glue or beeswax, to make the lines. I guess you weight down the end and hang one end from a rafter and apply the glue with your fingers.
I will drill a small hole in the plywood to fit the bottom of the pole into, won't make everyone movable just some that may get in the way.
HAWKES: I think I saw your power posts but will go back over it and check it out!
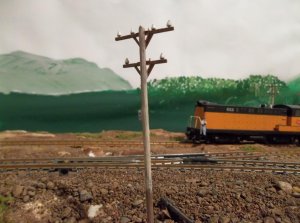
Some early pics of my utility pole project, I painted the poles and decided to set them on the layout by cutting off the flat base and using JB weld epoxy to stick them to the layout.
These are model power poles that have the insulators pre painted. The June Model Railroader had a good article and they recommended painting the plastic poles. I went with a lighter brown wash to help the wood grain show and also give the poles a faded look. The bottom is darker for the creosote look. The picture shows a plastic tab on the side I will be cutting off.
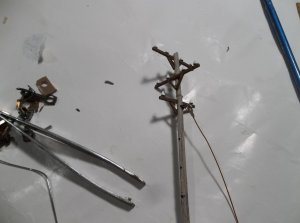
Here I am trying to get a corner pole where there is a 90 degree change in direction. I cut the pole and glued on a section. I would like to get the transition better. I am also working on the guy wire, but I think the eye connector I used might be too big.
WIRE: I will be adding wire, should be the next photos I post. I used black thread and coated it with glue as per the magazine suggestion. The weighted thread is hanging from my basement ceiling and I think it will add a lot!!
I like the color of the pole
I didn't use any eye connector, I drill a small hole and bended the wire into it, added a dab of glue and a dab of grey paint and it looks like the utility pole in front of my house
When you coated the thread with glue, did you make a little sag for between the poles? as you don't want tight straight wire
Haven't done my wires yet, need to finish my scenery first