ModelRailroadForums.com is a free Model Railroad Discussion Forum and photo gallery. We cover all scales and sizes of model railroads. Online since 2002, it's one of the oldest and largest model railroad forums on the web. Whether you're a master model railroader or just getting started, you'll find something of interest here.
I have colored my roads a few ways. The first way I did it was to put down the woodlands asphalt top coat and, while it was still wet, put a coat of 'pale grey' over it. I then let it dry and put another coat of pale grey over the whole lot then sanded that back to let the previous coat show through in places.
I then leave it for however long and let everything get onto it, plaster dust, anything at all and rub it in with my finger to give it a worn and used look. If there were any white spots showing through, I'd put a 'drop' of black on it and spread it around a little, over the road itself then wipe what got onto the road surface with a damp paper towel to almost remove it.
Lastly, I will put a black wash over the whole thing and wipe 90+% of that off so it fills any small voids and 'tints' the road color.
PS: Have always enjoyed following your thread mate and have learnt a lot from it
David, You could run something down the middle of the road, THEN put the for sale styrene down. That'd give you your crown. Most of my highways and roads are for sale styrene. I thought about crowning them, but didn't. The rest are drywall mud sanded and painted. The styrene was WAY easier to get down.
Terry in NW Wisconsin
TERRY thanks for the idea. I like your road setup on your layout. If I had something that big I would surely do what you did with the stryrene. It sounds like the back roads are like how I am doing mine.
I am going for something very rural and not like Highway 53 caliber or anything, more like some of the back roads around Solon Springs that I drove on in the late 70's. There is also one a lot like it running through the Lac du Flambeau Reservation that is a blacktop road that just ends in the forest, no homes even on that one. It has about a 20' wide driving surface and no shoulders or ditches, the road is about a foot above the ground in the area and no paint lines on that one either.
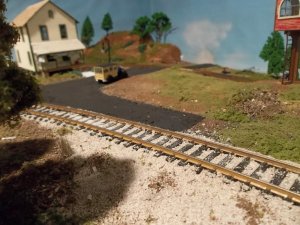
I only have a couple short stretches of asphalt. Here is my first little area that I may still put a little white acrylic wash on, but I think it does look remarkably like asphalt:
I may take some of the larger particles off, I didn't notice them until I got the photo:
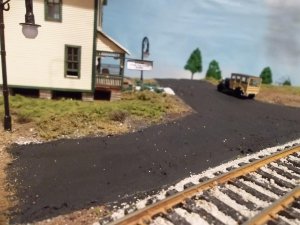
This rural boarding house used to belong to a rich lumber baron. The mill is right next door. When he passed away, it was turned into a boarding house. He hated mud and had the road blacktopped.
A few grains of ballast need to be brushed off, but I think the texture of the surface looks a lot like asphalt. It may fade naturally, not ready to mess with yet to get it more faded; lets say it is new or recently seal coated.
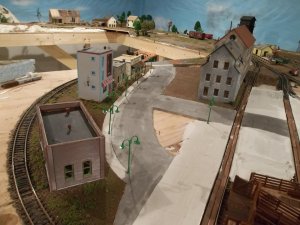
Here are a couple pics of the weekend progress, I got one of the streets painted, the sidewalk, and a few more buildings landscaped in:
Here is an overview:
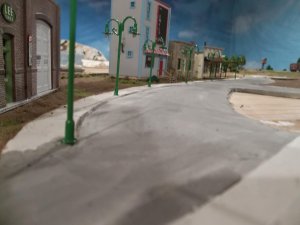
Close up of the sidewalk, the curb lines don't show up too well. Plywood area to the right may be gravel or a small park? It looks like I have to add some gravel in front of the garage door, etc:
Stuff will be parked on the right, for the repair shop, maybe some junk too. Couldn't find the back steps yet.
Your roads look great and fit right in with the area. I like your street lights as well just not sure about the color Just out of curiosity, your spacing of them looks very nice - how far apart are they in real inches if you don't mind me asking?
Thanks, mate; it looks like they are about 7" apart along the street. I thought they were going to be black, I suppose I could paint them, but I am getting use to the color and maybe fade them down a bit over time.
The details in the sidewalk do not show up in the photo like they do in real life. I probably need more than a $25 camera.
Thanks, Johne; I thought the lamps would be a bit much but I bought them and was determined to use them. In a couple more weeks have this whole industrial area done and will be working on the yard, the last section in the layout.
Thanks, Johne; I thought the lamps would be a bit much but I bought them and was determined to use them. In a couple more weeks have this whole industrial area done and will be working on the yard, the last section in the layout.
I will go back around and add a bunch of details, starting from the beginning again. I might put a bunch of brush and trees on those hillsides, too, make them look like Minnesota rather than Wyoming.
I have to put a skirt on the whole thing, too, my wife and I are going back and forth on what to use for that.
Nothing wrong with the street lamps. I have some similar to them that I have had for quite a while. They will be used. I also picked up some double arm lights that will be used near the passenger station and in the yard and engine service area. Like you said, you bought them and are going to use them.
Thanks, Chet, for checking it out--Here is a video showing all the progress since the last one and the first part of it shows the early stages of putting in the road and the process; most of you guys know this stuff allready,
then I go around and show the other stuff added since I put the saw mill in.
Thanks for that lasm, appreciate it. The color isn't that bad actually. Consider this, back in the day they would have been brass and brass turns green if not cleaned regularly - therefore, it's all good!
Looks like I have the same street lights that you have, but yours are a bit greener. The street lights will go along the main street in town and the double boulevard lamps will be put in near the passenger station and in the engine servicing area. I'm thinking the boulevard lamps might be a bit modern for 1957, but they're going in anyway.