New Layout for LASM

ModelRailroadForums.com is a free Model Railroad Discussion Forum and photo gallery. We cover all scales and sizes of model railroads. Online since 2002, it's one of the oldest and largest model railroad forums on the web. Whether you're a master model railroader or just getting started, you'll find something of interest here.


Thanks Johne--

I wonder if the street (drawn in on your left) needs to be straight with right angles or if the curve as drawn is ok? Doesn't sit right with me but the buildings fit in better with the curve.
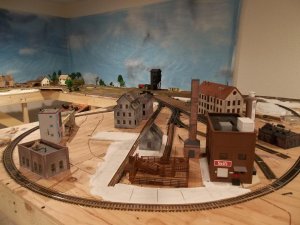

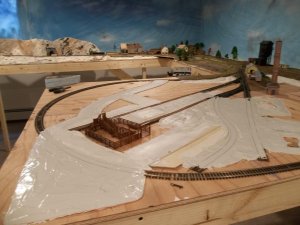
buildings 002.jpg

I think I will move the big smokestack to the big iron works building on the right and put a smaller smokestack on top of the processing plang
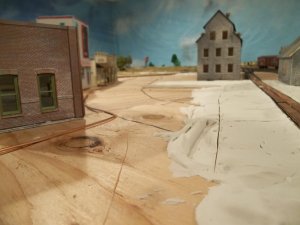
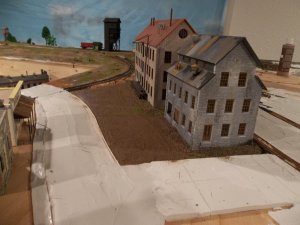
buildings 006.jpg


This is the first "pour" of cement and the road will be cement. It will be weathered with water/india ink

There will be a loading chute to the sliding door and that is where the live beef enter the building:
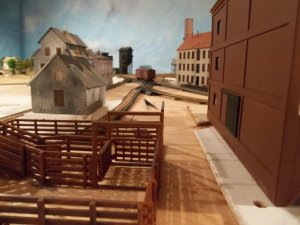
buildings 008.jpg


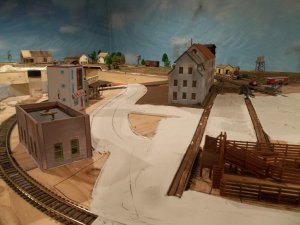
The cruve track will be embedded in cement and the trucks can back up into door 1:
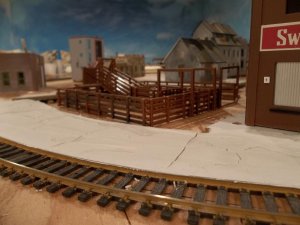
buildings 005.jpg


Let me know about the street, straight or curved? THANKS lasm

I am staging the rest of the buildings and got going on some "cement" pouring and wanted to get these pictures before I got too far along.

I am trying to have places for semi trailers to back in also some parking. I am realizing that is essentially a point to point as far as operations go, sawmill to woods, yard to industry, sawmill to yard, sawmill to industry, gravel pit to yard, gravel pit to town, town to town.


lasm,

I'm definitely or the curved street. It adds to the character of area and as has been said, not all streets are straight so a curve will look very natural
 
THANKS for all the feedback and curved it is, that was my initial thought but sometimes overthink stuff...
 
Hey LASM,

If I find myself over thinking things I remember the advice I give to my little leaguers. "look for a good pitch, see and hit, it's that easy"

By the way I like the curved road too. Living in one of Americas oldest cities we have several old curved roads and angled streets.
 
Curved wins, I got the initial layer of mud down for the roads and staged a couple buildings over the weekend:


Here I got on the initial layer of mud. I used 14 gauge copper wire to get the edges nice:

wagon,road 002.jpg


Here is after one day of drying and the addition of the initial coat of the sidewalk. I used gravel around the buildings and made some wheel marks in it, too:

wagon,road 006.jpg


Seeing how some of the other buildings will fit:

wagon,road 007.jpg


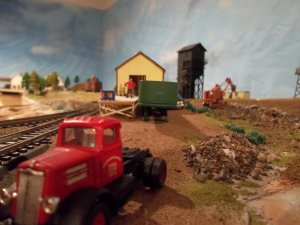
Like to have some fun, too:

wagon,road 008.jpg


Thanks for viewing!!! lasm
 
Looks good I like the gravel around the buildings I am thinking of doing the same maybe with some concrete walks instead of full sidewalks.


Thanks, Johne, the concrete would have been a little too much. I am thinking about having some of the main road asphalt, I had to check wickepedia to see when they started using the blacktop and it dates back to like 1840 so I can easily justify it to the transition era.

In my area, it seems like a lot of the early roads were concrete so I wasn't sure. I want to be able to make the scene so I can mold it into a couple different time periods by changing the rolling stock and automobiles without looking too fictitious.

Thanks, Chet, for checking it out. Hope to get the final coat of mud on the roads tonight and maybe paint/wash/weather them in the middle of the week.
 
lasm,

Ironically, some places are returning to concrete for roads. I'm not sure why but think it is quicker, cheaper and easier to lay. Either way, your layout is looking great and looking forward to seeing the roads completed.
 
lasm,

Ironically, some places are returning to concrete for roads. I'm not sure why

.

This happens to be my area of employment, building roads and bridges: concrete is more expensive but lasts way longer.

Thanks for checking out my thread, Tony!!!! lasm
 
Thanks, Lynn; I made a blacktop road using the joint compound on the other end of the layout and I think it turned our real nice but I need to tone down the black a little, although I guess it looks like they recently blacktopped it. I just rubbed that one with the blade until farily smooth and painted it with watered down black acrylic paint. I can maybe use a white acrylic wash to fade it a little.

This is supposed to be rural village and rural scenes and around here they sometimes are not even striped or shouldered, just blacktop and maybe a foot of gravel with grass then woods or weeds.
 
Last edited by a moderator:
lasm when I did my black top I mixed the black acrilic paint into it until I got a real dark crarcoal color and with the color mixed in if you scratch it you wont see any white.
 
Good idea Johne too bad I allready have the mud down. I have to put another layer on but in some places the base coat will show.

I read about other guys adding the color to the mud but I am afraid of having leftover and am such a tightwad about some stuff that I have a hard time dealing with that.
 
What I use for Asphalt color is grey primer in rattle cans. Once asphalt has been down for even a short period time, it lightens considerably. I'm getting ready to start work on the town of Logan on my layout, and the main street will be a concrete color, but all side streets and driveways will be asphalt. Krylon grey primer could be a hair light, but really doesn't look bad. This isn't a very close up picture, but if you look at the bottom of the picture, the alley ways behind the buildings were painted with the primer and the sidewalks are a concrete color.

attachment.php


I am going to try a new idea on this town. The bases that the building are now sitting on were cut from a heavy "for sale" try sign I got from a local hardware store. The "sidewalk" areas were scribed for seams in the concrete sidewalks, and then the alley ways were sprayed with the gray primer for the asphalt color. For the street is have picked up a number of thinner "for sale" signs. They will be painted the concrete color after the seams have been scribed for the main street. The primer color will be painted for any intersecting side streets. These will then be contact cemented to the plywood surface. I have never tried this before, but all that can happen is that I screwed up. That's never happened before (yeah, right).


CHET:

I remembered about the for sale signs you were using and thought about that, but because of the irregular areas and the curve I thought it would be easier to shape the somewhat rigid 14 gauge wire to get a smooth curve and use that as a form for the mud.

And by building up the road a little more in the center I can create the crown effect which is seen and evident on the blacktop roads here in MN, some of our rural roads have a very pronounced crown, I think because they did not grade them down a lot from when they were gravel, but did minimal prep and put the blacktop right over the class 5.

I know the crowns are not as evident on concrete roads, maybe those are better engineered.


Plus I am doing a much smaller area and wish I had a photo of the other blacktop road because I thought the texture of using the sheet rock mud and scraping it smooth with the knife rather than sandpaper created an excellent result.

THANKS for including your description here because others reading the thread may want to opt for your method.


Affiliate Disclosure: We may receive a commision from some of the links and ads shown on this website (Learn More Here)

Back
Top