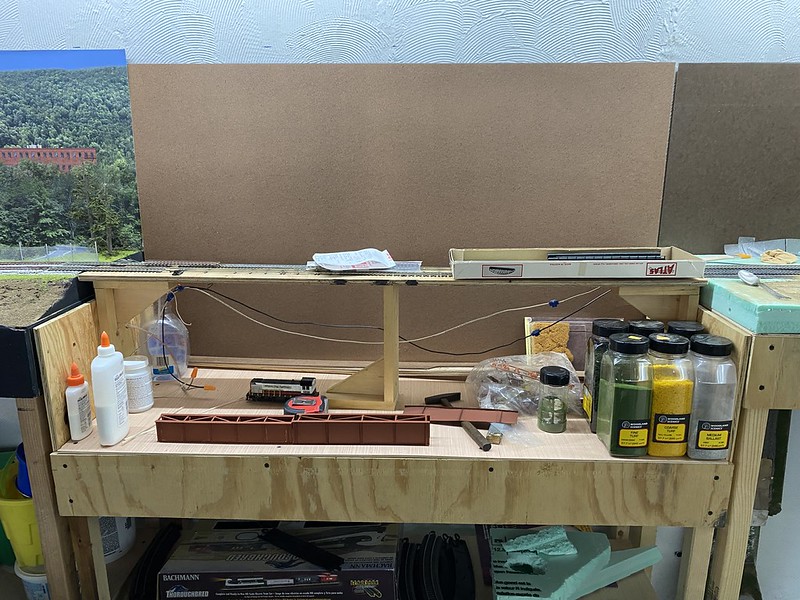
My Sectional Layout - Please Mind the Gap.

ModelRailroadForums.com is a free Model Railroad Discussion Forum and photo gallery. We cover all scales and sizes of model railroads. Online since 2002, it's one of the oldest and largest model railroad forums on the web. Whether you're a master model railroader or just getting started, you'll find something of interest here.


Our society is way too divided. Time to build some bridges. :D
The start:
55046384486_29cf6d7152_c.jpg


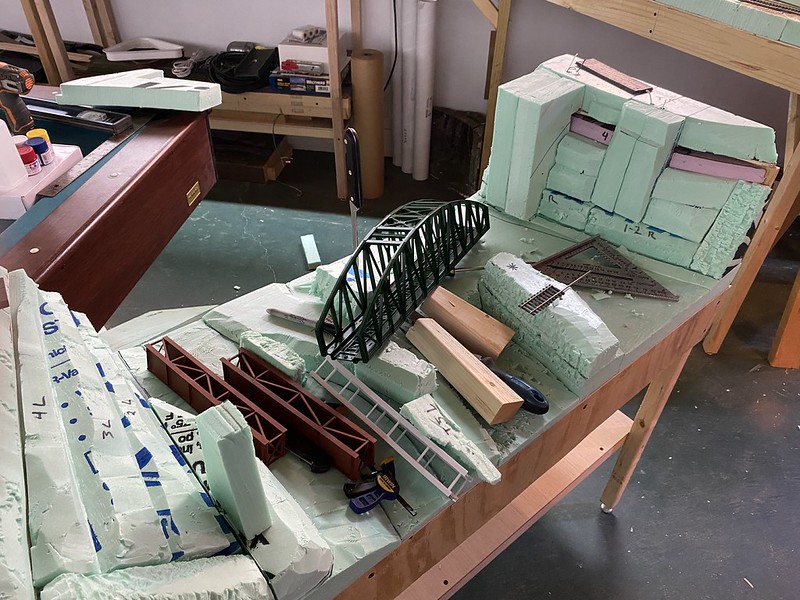
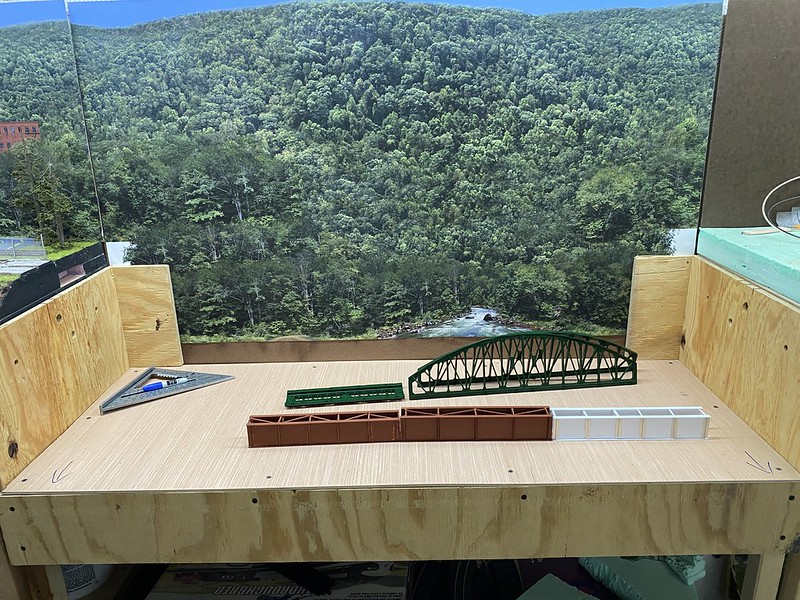
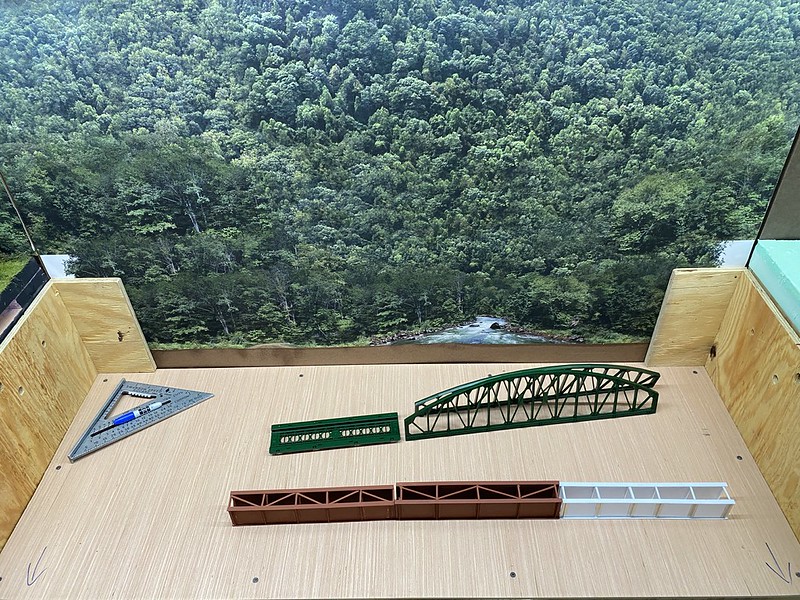
I worked with Joey at Trackside scenery on a custom backdrop for this one. On the last two backdrops, there were roads that I had to adjust my scenery to after I had installed them. This time I figured I would get the backdrop first then build to it. As stated in my thread "What Bridge to Build," I was thinking of doing a double track bridge of some kind. I have changed my mind on that one and have decided to go with two separate bridges. The tracks will separate from each other a bit to break up the monotony. I have started scratch building an open deck girder bridge which will be in three sections. But instead of building six sections, I realized that I do still have a nice truss bridge that I bought two years ago that I haven't built or used yet. I think it will look pretty cool when all is said and done.
55046573383_51168ff931_c.jpg

55046649084_60745ac3a3_c.jpg

The first coat of green paint is still drying on the truss. The girders will end up being black.
 
I don't know... What do you think? Too busy?

55054317051_8d5cfdf010_c.jpg


The river will come down and split around a rock where the forward bridge's middle pier will be. Then a dirt road off to the left.
I think with normal sized piers vs 2"x2"(ish) blocks of foam, it will open up a bit, but it just feels little crowded right now.
KB. Looking good so far. Since the river in the background looks to be widening, how about making the forward bridge a truss also until the roadbed gets to the road, then girder? You can see through them to the BG whereas the girder bridges somewhat hide stuff. Since you have a canyon going below normal height that is going to be an eye-catcher and people will look into it. Of course, that just might be me as I am a truss bridge junkie.

L8r


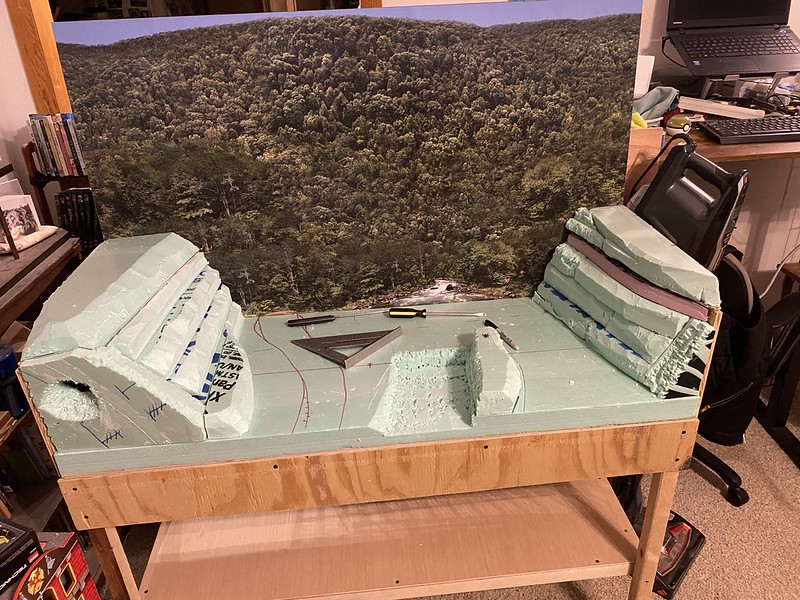
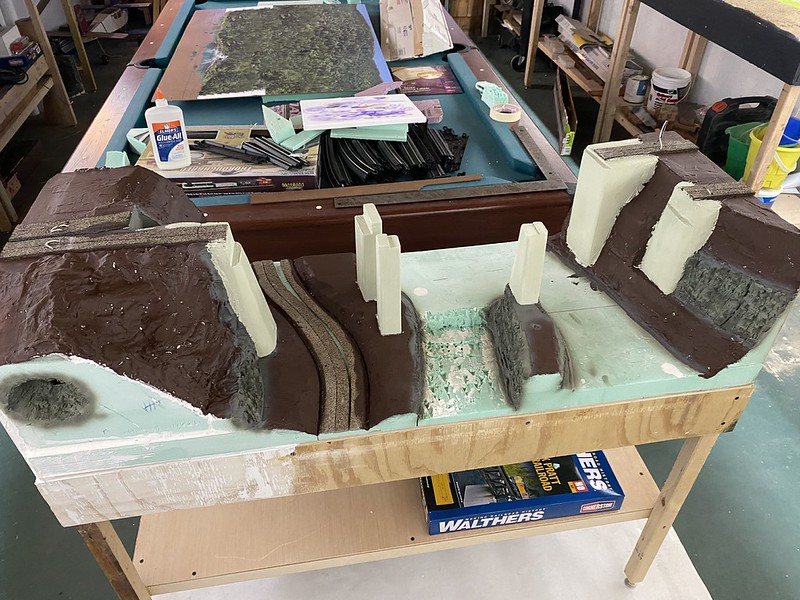
Brought the module up to the family room. My wife is recovering from knee surgery, so this let work on the module and still be within earshot if she needed something. Set in on cutting form and the valley walls have been formed.
55069404377_bcdbd5ddca_c.jpg


Now I've got to work on carving up the valley floor. The dirt road on the left will slightly descend while the river splits into two: a falls into rapids in the middle and flat(ish) and level on the right. Right now all the foam is just set in place. I want to make sure I have power feeders set up on each side before I glue any of it down.
 
I was trying to figure out the best way to work the topography of the bottom layer, and came to the conclusion that cutting it up into section would be the best bet.
55073223040_598dd2b88a_c.jpg


This let me carve down individual sections, make a gradual elevation decline of the road and lower the river just a touch. When it was done, I had this:
55072863851_a870fecb6b_c.jpg

With the valley sides back in:
55073114794_c8dfd2b7f7_c.jpg


Then I sort of paced back and forth in front of the module for the better part of half an hour trying to figure out the next step. I wanted to glue the foam in place, but I had to work the wiring up through either before during or after that step. I want to have feeders on either side of each bridge. The left side was easy as I have a sort of natural cave to work with. On the right, I had to carve channels in the foam for the buss and feeder wires to work through. No fun pics of that, but the process is nearly done. Once I have that in place and the valley sides all glued down, it's onto bridge abutments and towers.
 
This all worked beautifully in my head, but in practice, it's not working out so great... :(

Working on the forward bridge first. Got the mid piers all build. Going to be concrete piers as they are popular around here. I made them out of 2x4 as I have found I am much better at shaping wood than I am foam. 😁
55084504886_fcefc7ce25_c.jpg


Then I set in on making the abutments. The right side went... well-ish. The slope of my canyon walls and the size of the abutments are not quite "doing it" for me. The slope itself is fine, but the abutments are having to come much further out than I had envisioned.
55083610132_1d10880c05_c.jpg


That's when I looked to the left and figured I had two choices: 1.) Build crazy, no-one-builds-them-THIS-big abutments, or 2.) completely re-design the canyon walls. I am somewhat locked into the forward bridge as I have already have the bridge sections built. For the rear truss bridge, I still need to build a second section which can be done the right way: build the topography first, then build the bridge to match. A Pratt truss deck bridge section will carry traffic from a mid pier to the right (or at least that's the plan). Gonna have to do a bit more thinking on this one...
 
I do the same with 2x4 or 1x4 wood piers but I “bury” mine and screw them to the base then cover in modeling putty.
As for spanning the gaps I’ll either add more piers, lengthen girders, extend the styrofoam base, or all the above.
I know you know what you’re doing and it’ll come to you after a break. 😃
 
When I built my layout with the upper Rhätische Bahn narrow gauge route I thought it would be great to mimic the many viaducts, bridges, and tunnels found on the RhB. I did a lot of video watching, studied the design I was using, and decided it was just too much of a PITA to try and do this. I settled on tunnels, and even those have hidden entrances and exits.

You'll get this figured out. You've come too far to scrap it now.
 
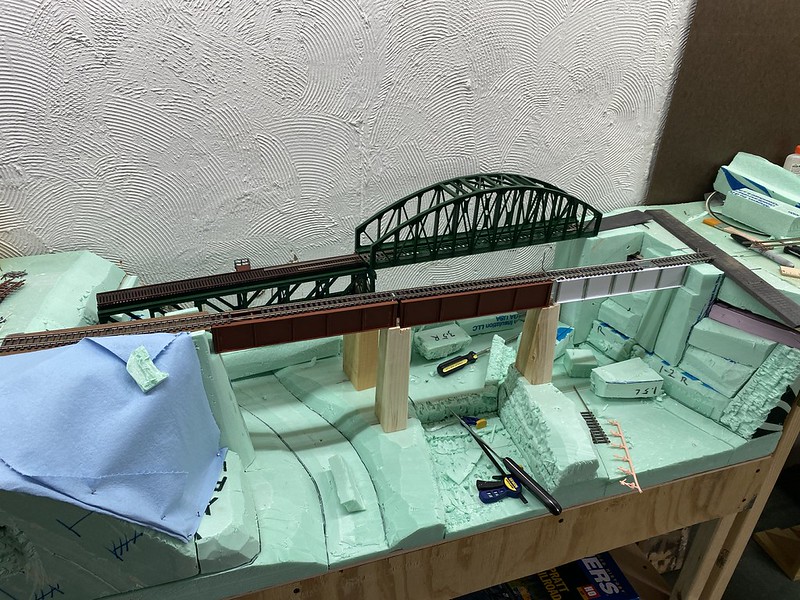
Spent some time staring at the gully for a while the other night. Think I have come up with a plan that works for me:

55092679145_447cf71c42_z.jpg


I'll use some plaster to mold the blue towel into place. That will (should) give it a nice, organic feel (I think). I'm pretty happy with the visual at least, so I think I'll go for it.

As for the back side truss bridge... well... I had a small handful of styrene I-beams I was going to use to scratch build a Pratt deck truss bridge section. Looking at them online, they seem pretty simple to build. Then yesterday morning I got an email flier on a sale at Walthers.
109_single-track_pratt_deck_truss_railroad_bridge_933-4520_big.jpg

My scratch built one would be about 1" shorter than this and I would still have the crazy big pier to the right and I would need to buy a butch more styrene... so... fine... I dropped a little money on the kit.

Got a nice, long weekend coming up and the expected delivery date is... of course... Tuesday. 🤦‍♂️ 🤣🤣


Yesterday was spent building the Pratt deck truss bridge and painting it the same color as the truss. Today was making plans and cuts and getting it set into place.
55098029378_8e45fa7930_c.jpg


Had to make a bit of a relief cut into the left side, but I figure that's what a real RR would do to get to a solid footing.
55098197670_604500c08e_c.jpg


By the end of today I had the approaches set on each side and started in on plastering the canyon walls.
55097822741_5ff27dd282_c.jpg


Lots more plastering to do, but I feel I'm headed in the right direction.
 
The plastering on the module is done... ish... I think... I also got my roadbed laid - both the rail and car roads. I used old, recycled roadbed for the auto road in the gully. New stuff for the trains.
55110246608_25a2824947_c.jpg


Most of the plaster go put down yesterday and some of it is still not dry. Using the DAP drywall mud. It's been my go-to for this kind of thing for a while. This particular gallon of mud is very wet and takes a while. The thicker the worse. Kind of makes me wish I had just used more plaster of Paris. Oh well, nothing like cracking a cold adult beverage on the weekend and watching plaster dry... right?

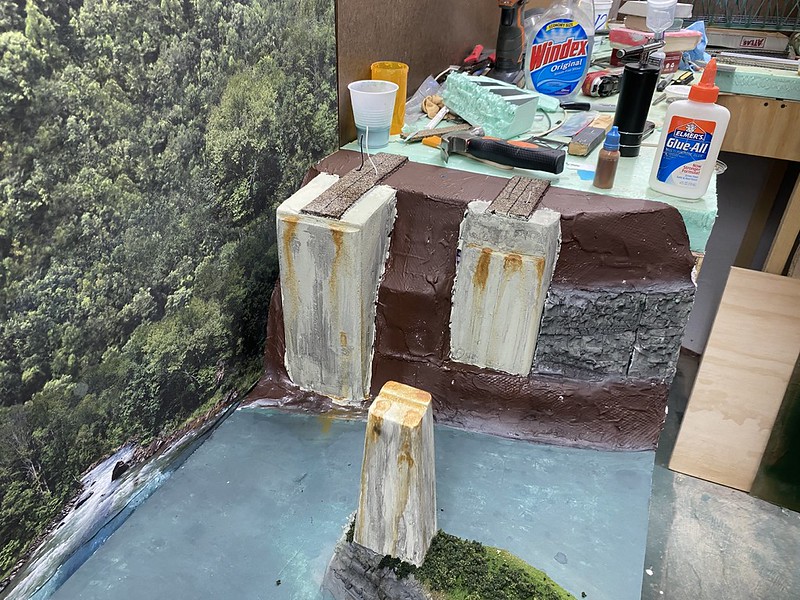
As you can I see I also got my bridge piers put into place. Rico's comment above made me realize I really hadn't thought through the securing of the piers. Didn't feel like making new ones so I just went with what I had. Drilled pocket holes on the back sides of the piers and then screwed them down into the foam with a good amount of glue in between. Using bags of ballast as weights on the rear two and a jar on the front.
55109159952_b8d6572884_c.jpg


The piers also got their first coat of concrete colored paint. As is typical with wood, the paint raised the grain a little bit, so they all needed a light sanding, so a second coat will be needed anyway. I also need to mix some more up to paint the rear right abutment, too.

Then I turned on the backdrop. With the way I carved down the river and the road in the foam, a small sliver of the backboard could be seen underneath the picture. Did some more paint mixing and brought the image down a little bit so the scenery will match up a little better. I only need to cover a few millimeters, so I figure this will do.
55110254063_eb7d49e932_c.jpg
 
Been busy painting.
55116487311_52589e3bf3_c.jpg


After I got the brown done, my eldest came down into the train room and asked what I was doing. My response: "Building a chocolate sculpture, apparently..." 🤣
With the rocky ledges greyed up and the bridge piers & abutments concreted, it doesn't look too bad.
Next step, I think, will be getting the backdrop back in place and start painting in the river.
 
This morning's work:
55121061404_3cbe00362a_c.jpg


The glue is still wet in the road ditches. I went a little too heavy with the glue, so I sifted a little extra dirt on top. You can see the spots where the glue was absorbed more efficiently.
The background to layout transition is not quite as good as I had hoped, but when I put the bridges in place, it's mostly hidden. :D
 
Rock and pier weathering was today's task.
55123705225_c2ff8cae84_c.jpg

55123311321_943514d322_c.jpg


The process went really well. Well to the point that I had to stop myself before I started being concerned about the structural stability of my bridges. 🤣

Then I ordered some epoxy from Walmart. Should be here is a couple of days. Want to get the water done before I lay in the track.I ordered the 2 gallon set (gallon each of epoxy & hardener). Think it will be enough?
 
Two gallons should be more than enough.
I know you know to seal everything tight and put a plastic sheet under the layout just in case.
First time I tried pouring epoxy I found out next day it didn’t like styrofoam, yikes what a mess! 😆
 
Got some more painting done on the river and rock rabbled the edges. Epoxy pouring is nearly complete. Got to decide if I want one more layer or not. Also need to keep my fingers crossed that my mold release agent worked on the dams I used.

I did a test pour on my swamp module. It did not come out that well. :( Not only did I tint the epoxy too dark, but I forgot to add a mold release to the plastic I used as a dam. Dam removal was very difficult and at one point when I trying to brute force a section off with a putty knife, it broke free allowing the palm of my hand to come down with force onto on the dead trees in the swamp. It only sunk into the heel of my palm about half a centimeter, but at least the caulking compound I used as a sealant removed a bunch of plaster I had used to smooth out the front of the module.
...yeah... 😞

I guess once I'm done with bridges, I'll head back to the swamp. I'll try to post some pictures of my progress later today.
 
The swamp:
55134316210_5f3eaaa7ca_c.jpg

It doesn't look as bad in the picture as it does in person. I may decide to rip the whole thing out and redo it. We'll see.

The river came out much better. :)
55133925441_fde366bf31_c.jpg


I was able to pull of the back Plexiglas dam without issue... almost. The release agent I used was a simple, home made thing using dish soap and rubbing alcohol. Seemed to work fine. The front dam was not ready to come off yet, so I put the rear back in place to give it a bit more cure time. Only about 60 in the basement, so curing times are longer.

And I finally got the girder plate bridge in the foreground finished and weathered. That cheap little air brush has been a wonderful tool on this project.
55133034592_0f29a0010e_c.jpg


A WORD TO THE WISE...
If you are carving out foam for scenery, DON'T use a red Sharpy marker to lay out any lines. The ink will not soak into the foam and will absorb UP into any acrylic paint put on top of it. I had a couple of layers of paint down and thought that I was safe with no sign of the red when I was ready to pour epoxy. Then this morning, I saw this:
55134316205_de37b087da_c.jpg

:mad::mad::mad: Apparently as the epoxy soaked into the paint, it reactivated the ink and let it soak through. A couple spots showing through in the back as well. Oh, well. I was going to do some ripply wave action anyway. Looks like it might have to be a little extra wavy in this spot with white caps and everything.
 
A moment of excited relief:
I slapped the back drop back on and put the module back in it's place last night after painting the facade and side black. Wanted to get the feel for how it was coming along. I put the bridges in place and was excited to find that the shadow from the girder plate bridge landed right on that red line! It completely masks it; it's great! 😁
Local train show this weekend and then I hope and plan to get some scenic'ing work done.
Really fighting a battle between doing scenic work and laying track. I want to run trains across these bridges so bad, but with bridges in the way, it will make certain area a little harder to reach, you know?


Been about two weeks since a picture update. Been getting some work done with ground cover and got the bridges in place and track laid.
55158704277_f99da7d4bb_c.jpg
[/url]

yeah... about the track...
It's all glued down, of course. And I was paying really close attention to tie placement on the rear track with the arch bridge and on the left hand side of the front bridge. That's when eagerness overtook me and by the time I had half the front track glued down I realized I hadn't taken any such consideration on the front track from midway to the right. 🤦‍♂️ I may end up pulling up the track and re-doing it. We'll see how much it bothers me (it will probably bother me).

On a positive note: The transition from backdrop to the road came out really well. I had a HUGE gap that I ended up having to fill in with some colored plaster. The river, on the other hand... is still a work in progress. I've got to lay some waves and do a little dry brushing for white caps. That should help it blend much better. Still super psyched on how well the bridge piers came out. The rust staining looks amazing (to me, at least).


Affiliate Disclosure: We may receive a commision from some of the links and ads shown on this website (Learn More Here)

Back
Top