My Sectional Layout - Please Mind the Gap.

ModelRailroadForums.com is a free Model Railroad Discussion Forum and photo gallery. We cover all scales and sizes of model railroads. Online since 2002, it's one of the oldest and largest model railroad forums on the web. Whether you're a master model railroader or just getting started, you'll find something of interest here.


Been doing a little work on the warehouse scene.
I picked up one of those cheap static grass applicators off Amazon. There is certainly a learning curve, and I am slowly figuring it out, but I am getting there. Looks better than just the flat green ground cover I have been using.
54431073029_1c4afd81e3_b.jpg


Of course, after taking this picture, I started thinking I probably should have ballasted the track first... Oh, well. It will all get done in the end.

Did some weathering on the warehouse and started running the vine up the corner of the building. I was going to put up a chain link fence along the track to keep those warehouse people off the tracks, now I'm second guessing myself. Mainly because I forgot to prep for the fence before I started laying set-dec all over the place. :rolleyes: Live and learn. Still might happen... we'll see.
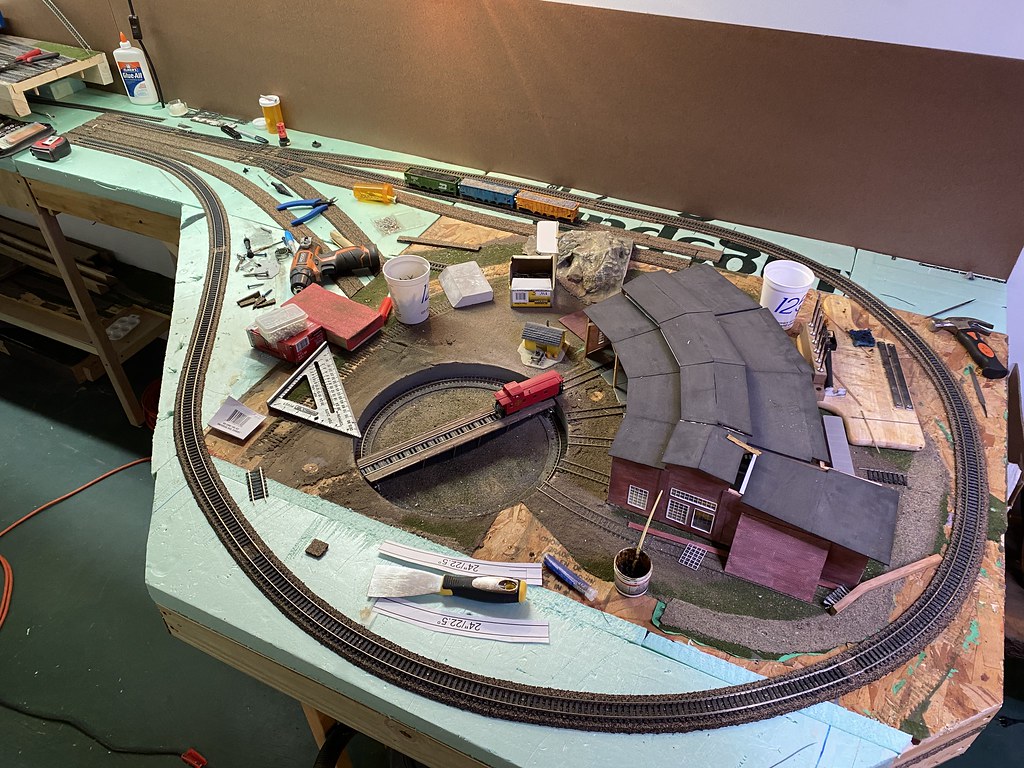
 
Took a little break from the warehouse scene to work on the end section. I finalized my track plan, glued foam and roadbed into place. When I was done, I come up with this:
54448775193_8a77fe59d0_b.jpg


The rear two lines will split off to a refueling shed (where the gondolas are sitting) while the roundhouse sits in the foreground. The entire loop has been isolated for an electrical revering section. And there will be two tracks leading to the round house pit. I've got some temp track laid getting up to this turn. Now I've just got to connect it all.


I successfully ran not one, but two, locomotives fully around the layout yesterday in an uninterrupted flow! YAY!

... then I torn down a big section of the track... 🤦‍♂️

I wasn't entirely happy with the way I had some of the temporary track laid out and I wanted to be able to use all four leads I had created into the turn around/round house section, so up a bunch of track came and out came the rail snippers.
The good news: I've only got one small section to reconnect to get continuous travel flowing once again.
The bad news: I'm almost out of rail joiners.
One battle at a time, right? I'm just glad I haven't glued any of this track down and just used track nails into the foam. With the temp track at least, who knows when I'll change my mind again.
 
Finally got a chance to grab a pick of the trackwork:
54493931639_9f11cd2306_b.jpg


In the pic two posts ago, you can see a bit of tighter curve in the lower left. I managed to get that straightened out slightly for a more smooth flowing curve. And all the tracks are powered up to, but excluding, the turntable & roundhouse. I need to get another reverser for the turn table, then I can wire the turntable back up and all the roundhouse & Storage tracks. Should be a much more functional roundhouse vs what I had before.
Where the little red caboose is sitting will be the refueling shed/locomotive parking area. That's where the local RR parks their locos, so why can't I, right? ;)
 
Got back to the warehouse scene today. Finally finished laying down the sod and then drive the posts for my fence:
54510338643_ee0ae73f53_b.jpg

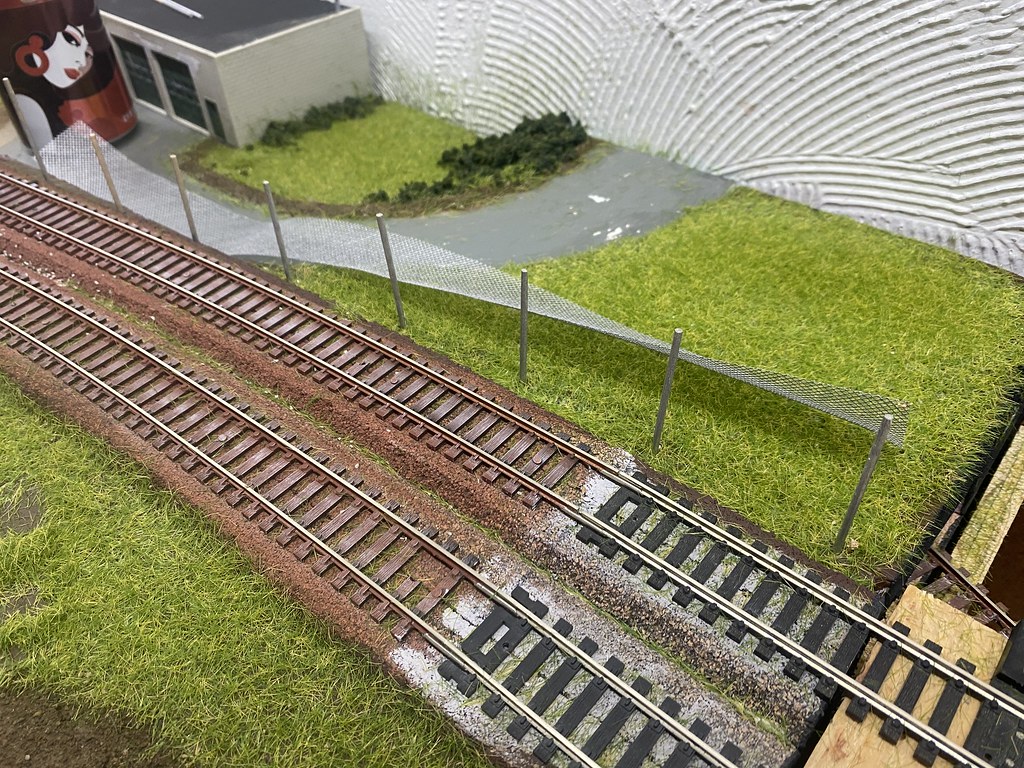
Then hung the fence:
54509205377_0058c0867e_b.jpg

54510338668_aa7953c0e6_b.jpg

I think I have enough CA glue on my finger tips after installing that fence that no forensic scientist would stand a chance of identifying anything that I have touched. :rolleyes: Oh, well... it will peel off... eventually.

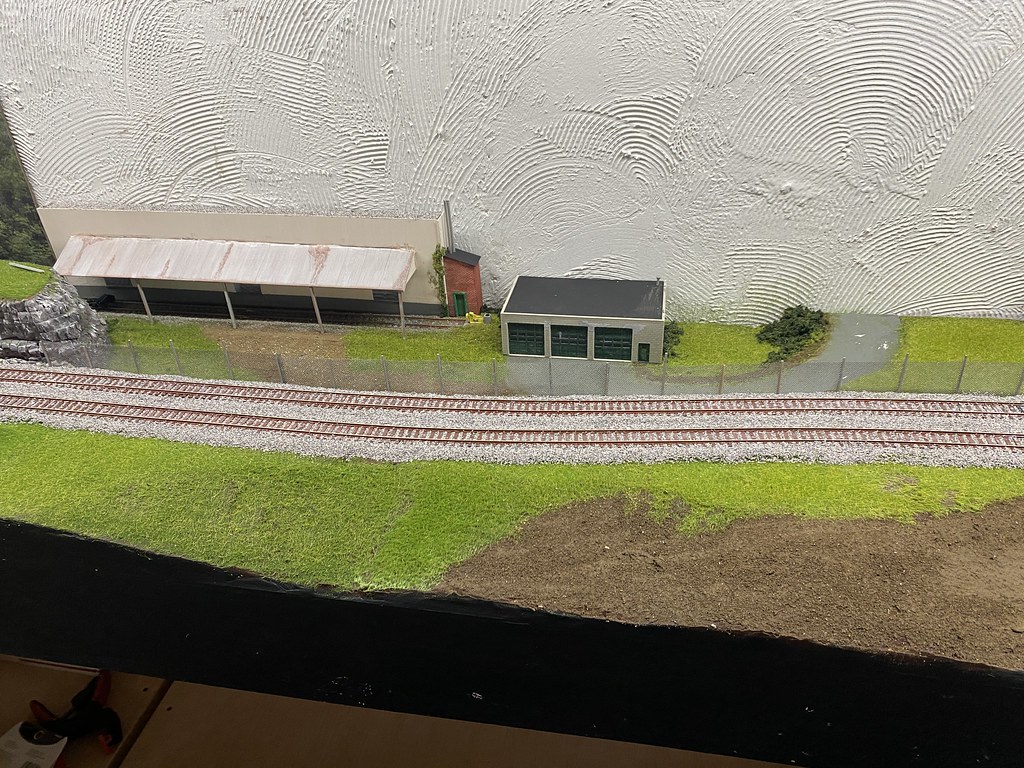
I was just about to walk away when I figured I only had one more thing to do, and that was the ballast:
54509205417_d90db00431_b.jpg


For now the scene is done until I get the back drop in.
 
Been a whirl wind busy summer full of lots of stuff that has kept me busy and not really working on anything fun. :(
Finaly got a backdrop ordered for the warehouse module. Need to work on blending in the road a bit. The backdrop had a slightly wider road than I had built, so a little work left to do there. Lots of shrubs, trees and general blending left to do, too, but I'll get there.

Here's a pic of the new background:
54727086761_07d3117df7_b.jpg
 
Lookin sharp !! What color did you use on the tracks?
Rattle-can brown primer. Don't remember the exact color, but I'll have to run to the layout tonight and see. Just painted the whole track and cleaned off the tops of the rails. Quick & dirty, but effective. Just need to do a little weathering on the ballast.

That's looking really good! The backboard is a really good match to the scenery colors you used.
Yeah, I kind of lucked out on that one. :D
A cautionary note: If you plan to have your backdrop work into your scene, order your backdrop first. That way it's easier to build to the backdrop vs adjusting to the backdrop later. ;)


Been a bit since I've been in the train room. Since it was cold as heck today, I figured it would be a good day to work downstairs.
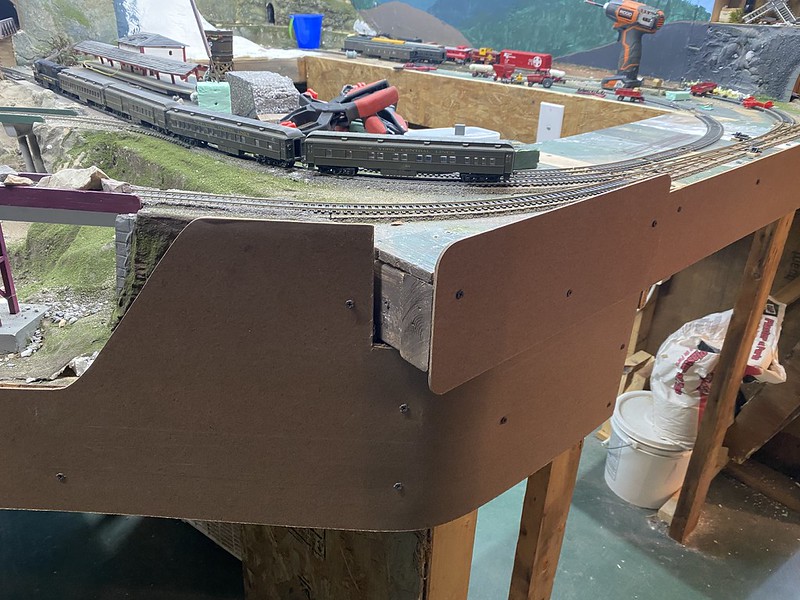
Took a break from the modules and turned my attention to a task that I have been avoiding for, literally, years. Finally time to address the fascia on the old section of the layout. This is a bit that I built up/rebuild during COVID. The front has always been a bit ugly, so I figured a little hard board was finally in order. Especially since, you know, I actually bought the hard board to do this... um... maybe, last year... possibly? (details...)

Anyway, had to get a little creative for this section, but here it is:
54984460224_0656289c34_c.jpg


This little jut-out had to be worked around. The only other option was major surgery to clip the corner.
54984503605_7e29979b7b_c.jpg


I was happy with the general outcome, especially the lift bridge. Not only is it seamlessly integrated, it actually made the bridge a bit stronger. Then I kept looking back at that jutting out section and figured something had to be done. Since it does look over a bit of a cliff, and there was no border wall there, I figured the only way to keep a couple of wanna-be Romeo & Juliet's from turning this into some kind of Lover's Leap would be to build a fence. ;)
54984460194_d73dd723d6_c.jpg


The 2x4 ends sticking out might get a little dressing up at some later date, but for now, I am much happier with my day's work.
 
The whole thing was shot with an Insta360 GO GS. Been wanting something like that for a while now and I came across a Christmas deal that was too good to pass up. I scratch built a camera car for it. I'll try to remember to post a picture. The rest was fancy editing.


Affiliate Disclosure: We may receive a commision from some of the links and ads shown on this website (Learn More Here)

Back
Top