I refer you to earlier examples of my soldering skills...Actually I have filled gaps with solder. Just not big ones.


I refer you to earlier examples of my soldering skills...Actually I have filled gaps with solder. Just not big ones.
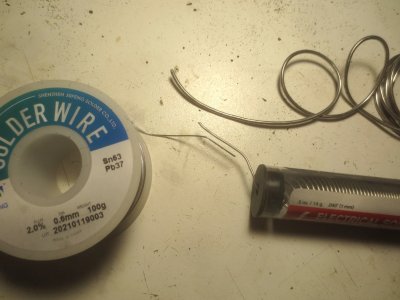
Soldering - After I bought a fine tip for my soldering iron I was still making a mess. Then I tried the smallest diameter solder I could find. It worked for me there was less solder to deal with.I refer you to earlier examples of my soldering skills...

When you stagger the joins, how much do you stagger by?Very interesting thread, I didn't know track laying was so nuanced.
My trains run great on track not meeting exacting standards, however I am HO and model rural areas pre 1940, some dingy track is part of my aura.
I always stagger joins on curves. I often drill small holes in ties and use track nails to maintain a smooth radius.
There is plywood under my roadbed and that provides a firm bed for the nails. Always slightly elevating an outside rail on curves deters derailment.
Being a minority on solder, I dont touch the stuff. Do not own a soldering iron and no plans to purchase. On this layout, I have over 200' of track and no derail areas.
As they say, there is more than one way to skin a cat. I have always been outcome oriented. Not so focused on doing things like everyone else.

When you stagger the joins, how much do you stagger by?
How do you do electrical stuff without soldering, including feeders?
For the most part, peco joiners with the wires pre soldered. They come in packages of 5 sets, each with black and red wire, I bought mine off Amazon for around $20. Best value I could find.How do you connect the wires to the rails, though? (aka feeders)
I learned that the hard way. One of my locos, a Broadway Limited heavy Pacific, is exquisitely sensitive to the least amount of adverse camber, even at low speeds.Always slightly elevating an outside rail on curves deters derailment.
BINGO !Naw, I think roadbed is important. I've settled on wood strips, it doesn't matter what it is, but it gives the ballast some realism. If it's tedious to ballast, it might just be too tall. I will have to Google Woodland Scenics track bed because I don't know what it is.
There were some comments about the track being not inside the joiner and unless I'm mistaken you aren't seeing it. So I highlighted it:View attachment 240197
Actually it is. Check my pics further down thread. This is a weird thing Peco code 55 does, the pics should show what's going on.BINGO !
Good catch.
...and as soon as I posted that I realized you had already seen it. Just ignore me.Actually it is. Check my pics further down thread. This is a weird thing Peco code 55 does, the pics should show what's going on.
Mind you, I have missed in the past, mistakenly thinking it was just the weird Peco thing. I missed on a connection to a turnout once and it was carnage until I realized.


Much better!Anyway, thanks again to everybody for the advice and the encouragement. I feel like the next time I hit a glitch like this (and I will), I will have the confidence and experience to tackle it.

I am in this camp also. Always stagger joints on curves. Use brads or even scale spikes to make smooth. Don't usually solder, but if I do it is AFTER everything is all lined up how it is supposed to be. The solder maintains a good connection against vibration and the like, it does not make a good connection.I always stagger joins on curves. I often drill small holes in ties and use track nails to maintain a smooth radius.
Being a minority on solder, I dont touch the stuff.
Wow, you can come over and work on mine now!A brief coda to this thread: encouraged by my success with fixing the poor joint, I was emboldened to tackle the second-worst joint on my layout. (The main problem was not the gap, but that somehow there was a "hump" where the two pieces met, which caused the leading truck of my Pacific to lift off as the driving wheels reached the hump, and then sometimes not come back down on the rails. Very annoying.) I cut out a section of track and relaid it, and got the joins really tight, I think.
Anyway, thanks again to everybody for the advice and the encouragement. I feel like the next time I hit a glitch like this (and I will), I will have the confidence and experience to tackle it.
View attachment 242780View attachment 242781

Sliding rail works best on the inside.
@Jacob Z because everything else I read/watched before now said that the sliding section should always go to the outside.