Module #1

ModelRailroadForums.com is a free Model Railroad Discussion Forum and photo gallery. We cover all scales and sizes of model railroads. Online since 2002, it's one of the oldest and largest model railroad forums on the web. Whether you're a master model railroader or just getting started, you'll find something of interest here.


KB02

Well-Known Member
With most of my modules built physically created for my new layout (Rebuild thread here), I have a vast array of blank canvases to work with. Each one is 18"x48". Time to get started.

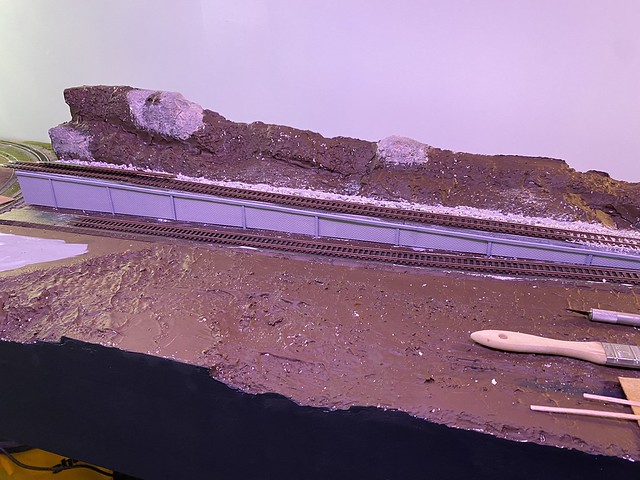
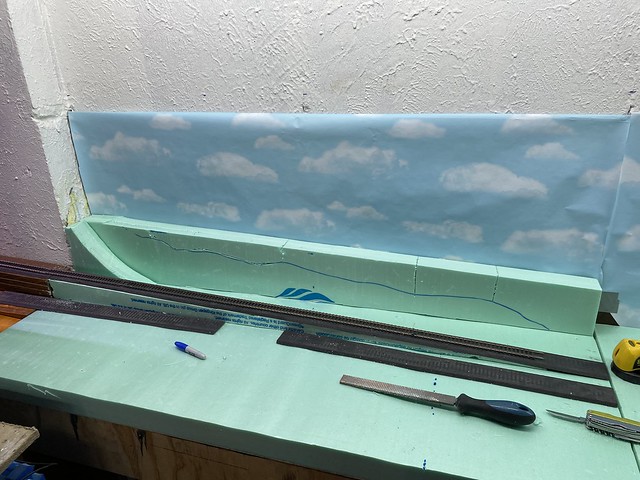
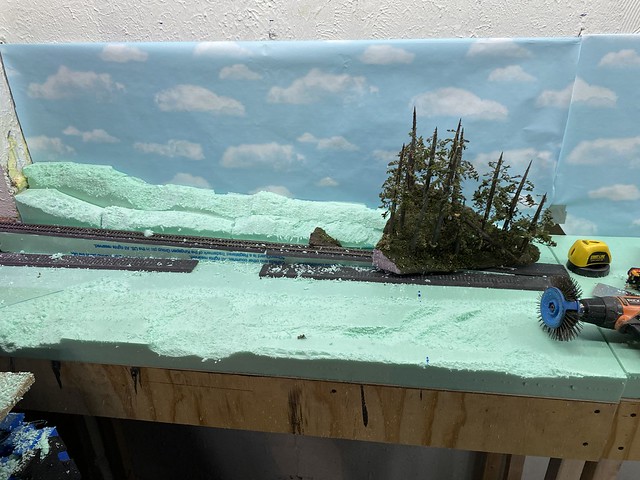
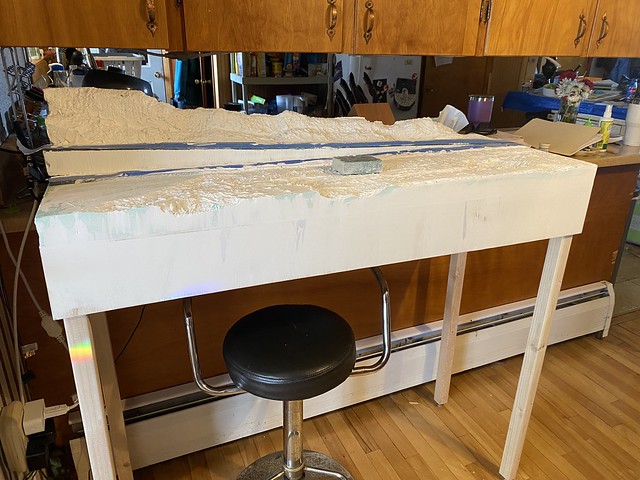
Module #1 will come off the bar where I have two tracks with a 2" height difference. So, I figure a nice, woodsy scene to get started with. I grabbed a few scrap pieces of foam as a starting point:
53547294719_249957da78_z.jpg


That's when the "fun" started and I decided to carve up the foam a bit to shape it. You can see my chosen weapon of destruction laying on the benchtop.
53546092022_911f4a4049_z.jpg

And by "Fun," of course, I meant the hours, if not years, of cleaning up little crumbs of green foam I have ahead of me in my basement. Really should have known better than that, but the effect was successful in the end.

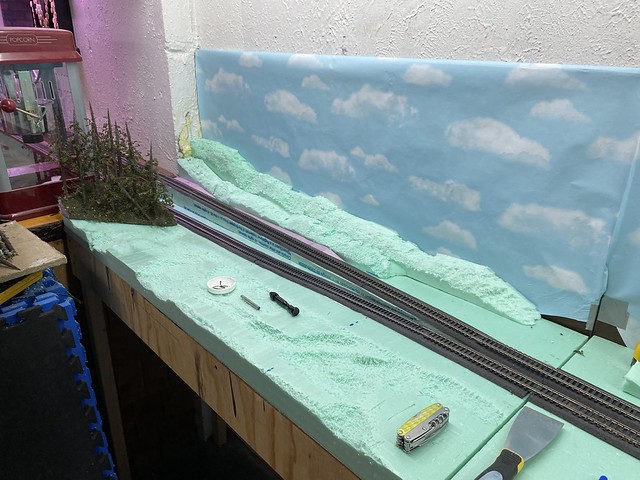
After round one of cleaning, I laid in some track and added a old scenery aspect that the rest will, hopefully, match up to.
53547153538_cd054f3fe6_z.jpg


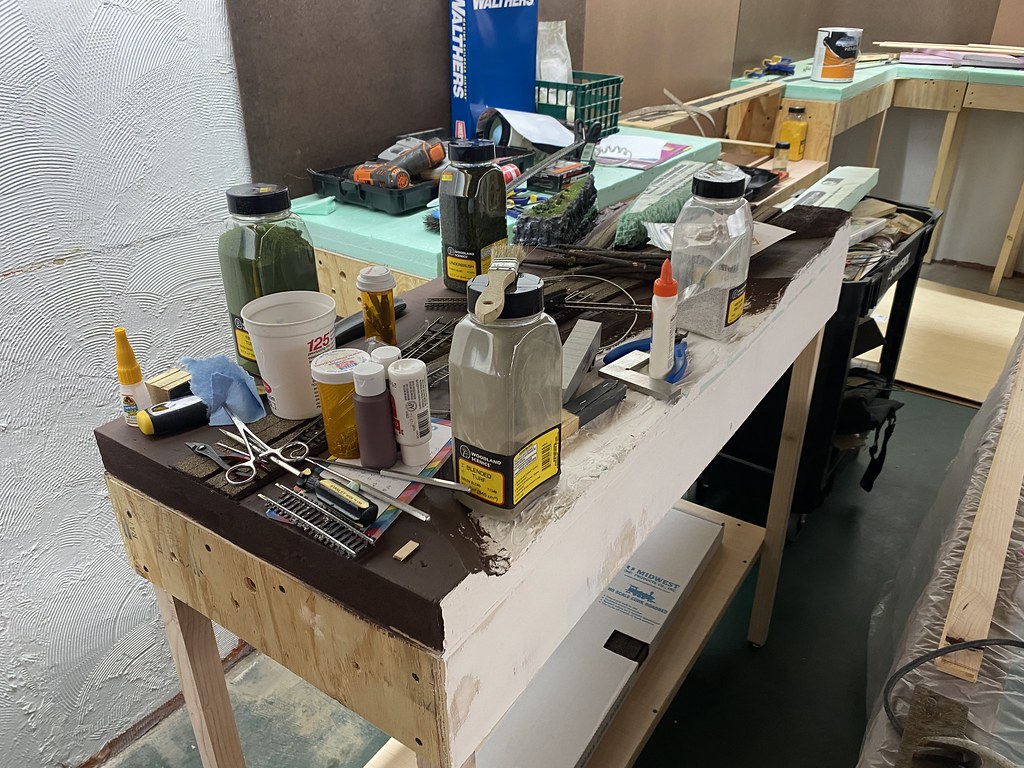
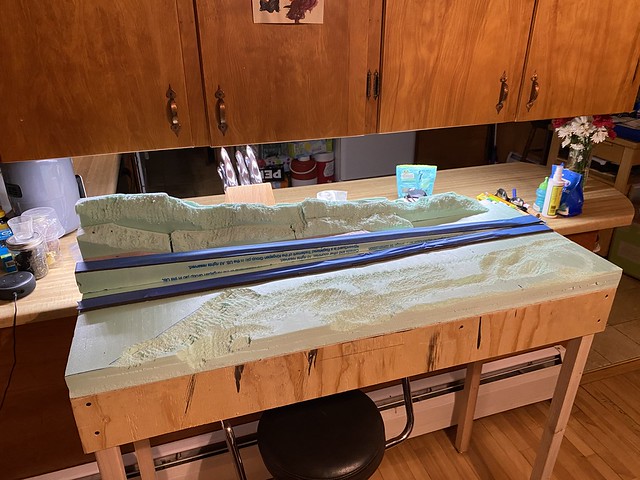
Then the big benefit of going modular: I moved the whole thing upstairs so that my family didn't think I was trying to hide from them.
53546091967_36086edc22_z.jpg


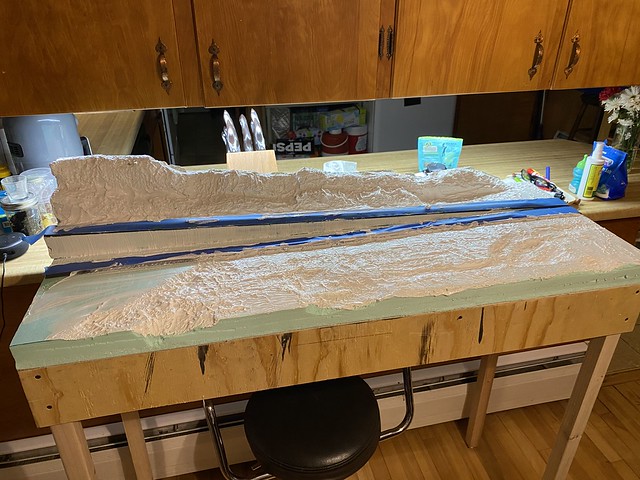
and... admittedly, where it was warmer so the plaster would cure slightly quicker.
53547402520_fa73bbf035_z.jpg


I literally threw on some rubber gloves and globbed handfulls of drywall compound over the foam. I smoothed and shaped it all by hand, then stippled it with a paint brush to remove the finger marks. A few of the spots were a little deeper than I had anticipated, so some points are taking longer to dry than others, but so far no one in the house has complained about it being the in the way, so, win - win! :D
 
Some decent progress for the weekend. Added some more drywall compound on the front edge and sanded it down. I was debating on adding a front facia to the modules, but after considering the work of carving them to match the front of the module, I figured that just painting them would be easiest. No tracks should be too close to the edge, so I should be okay.
53551980571_6df19afc3a_z.jpg


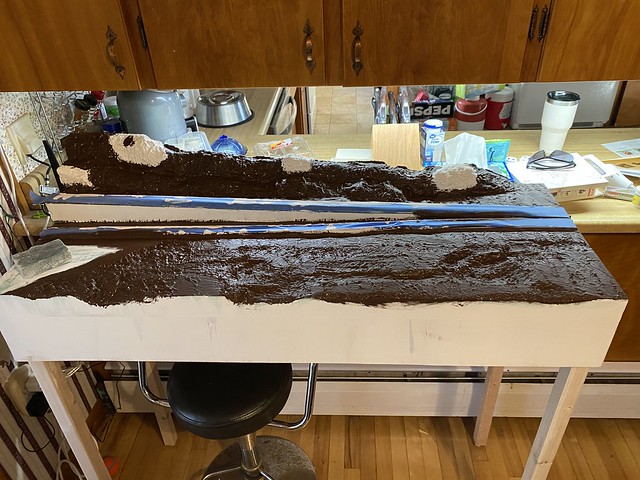
Then after an all-to-brief meet & greet with a fellow member of these boards, I was able to get a base coat of paint down on the module:
53552298019_4a53df50b5_z.jpg

The white spots will be rocky outcroppings.

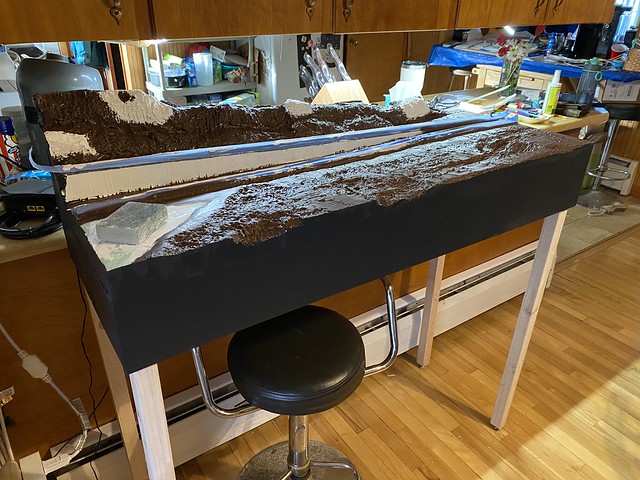
Once, that dried, I added a coating of flat black to the front and sides. The picture almost makes it look photo-shopped, but it's not.
53552298014_704dc0916e_z.jpg


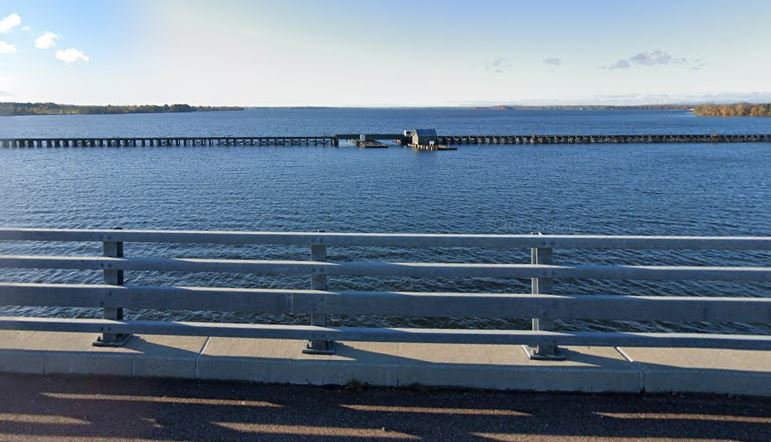
And on another note, I was able to do a little bit of rail fanning on the way home. When crossing the bridge from Alburg, VT to Highgate, VT, there is an old wooden pier bridge that crosses lake Champlain along side the nice, new, big, tall car bridge. The Google Street View car gets a great shot of it:
53551981031_4f08959045_o.jpg

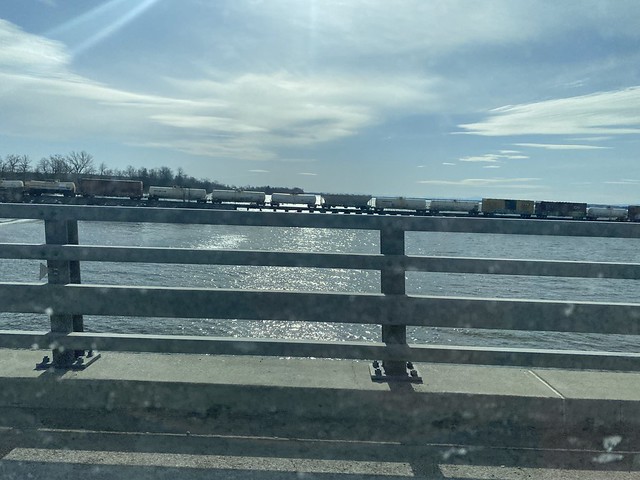
That bit in the middle is a turn-table bridge to allow boats to cross. Pretty cool. My Mom was my passenger, and I had her try to snap a photo of the train crossing the bridge. This is what she got:
53552298039_e9a26b4ec6_z.jpg

I have to laugh! It looks like someone placed a bunch of model train rolling stock on the railing and took a picture. 🤣 🤣 🤣
A couple of big 'ol CN SD-70M's were hauling this train at roughly 5mph over the old bridge. Tried to get them, but missed.


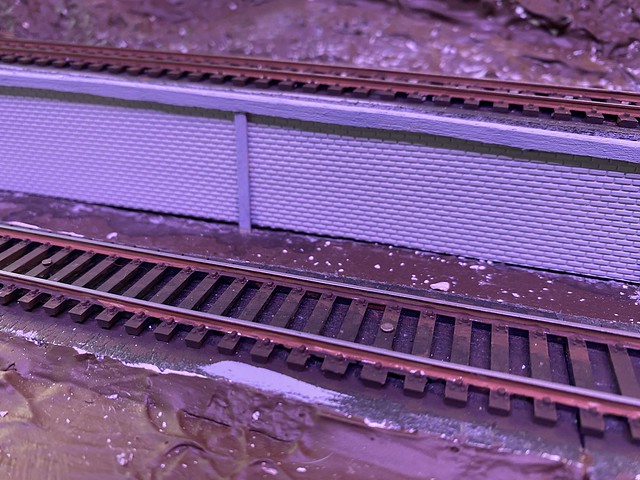
Started in on the decoration of this scene. The raised upped track needed a retailing wall. I had some brick sheet left over from another project, so that, a few little balsa strips and some paint and I had this:
53576630882_e412fa9a0d_z.jpg

53577824774_6d96d1aaec_z.jpg


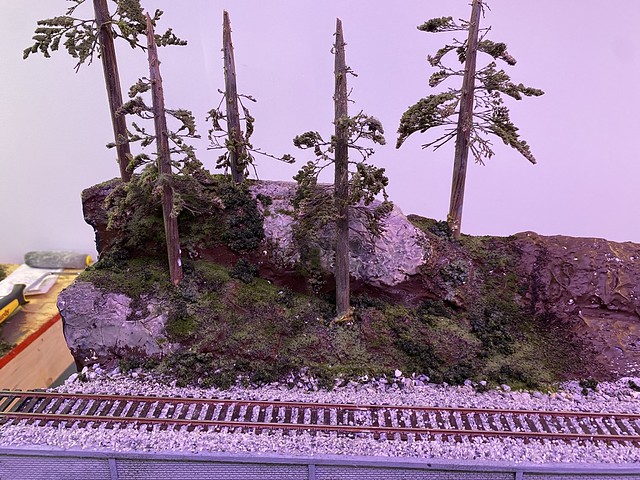
The rails have also been painted. And I started on some riff-raff on the back edge of the track. Next step will be ballasting. Then onto ground cover. At least that's the plan.
 
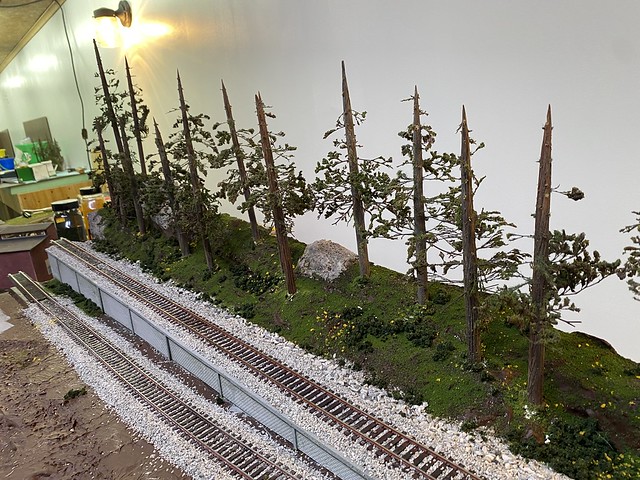
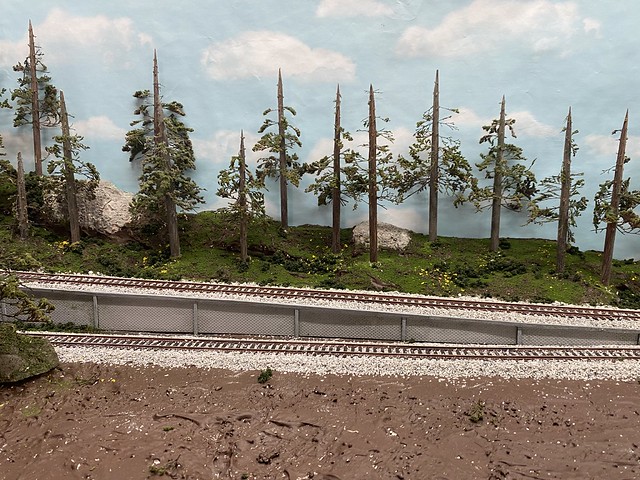
The arborist showed up and helped me completed the back row and I added the temporary backdrop:
53586651537_3fc4f38eb9_z.jpg

53586651532_b3d27c6ce9_z.jpg


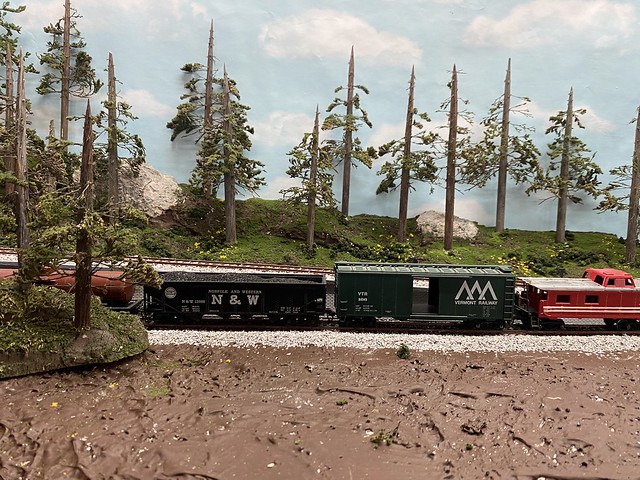
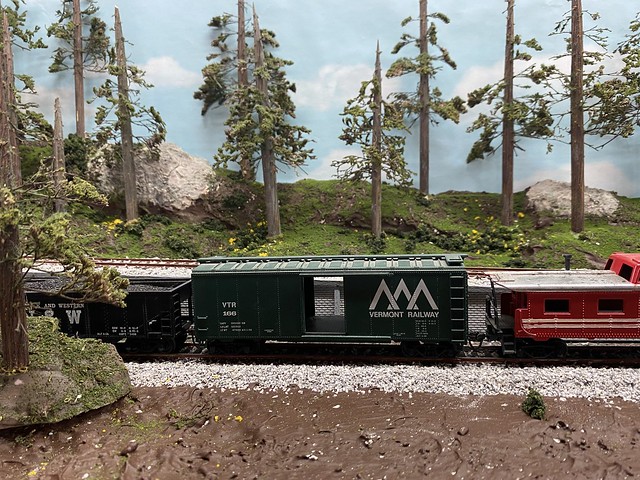
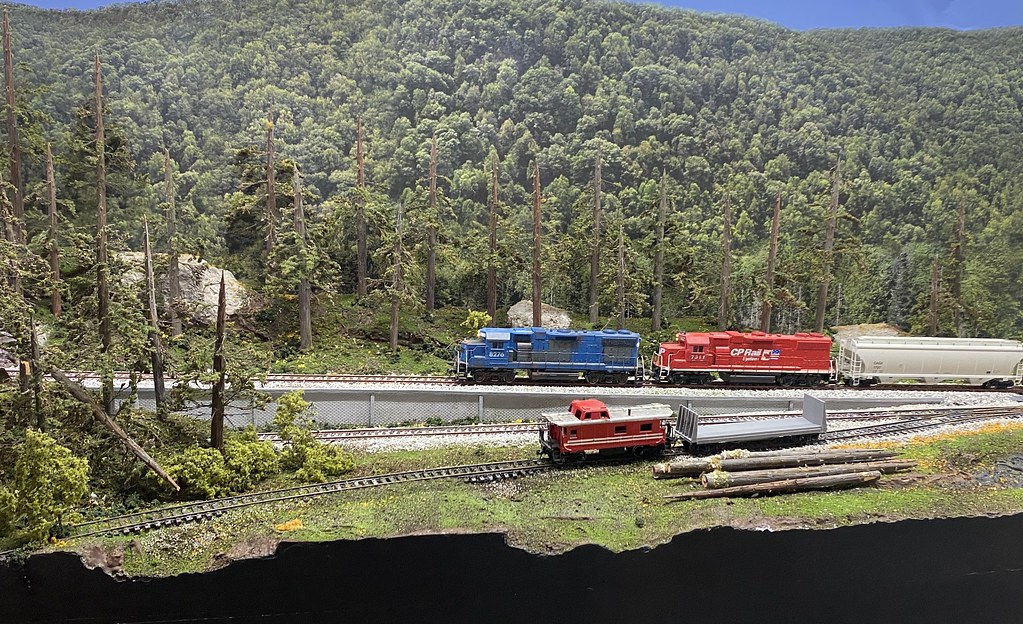
And just to add some trains to it:
53587517891_37c5c0f4a1_z.jpg

53587517881_d63617cb68_z.jpg


Hoping to get some better backdrops. Thinking Trackside Scenery, but we'll see. I've had success in the past with just printing backdrops out with my regular inkjet printer in the past. Don't think that's the way I want to go this time, though. For now, this bulletin board paper will have to make due.

I'm thinking of making the foreground a clear cut lumber yard area. As I was going through my supply of trees, I was starkly reminded of the number of trees my youngest though looked better bare; 😖 so, I've got a decent supply of lumber for a logging company. Lemonade out of lemons, I guess; right?
 
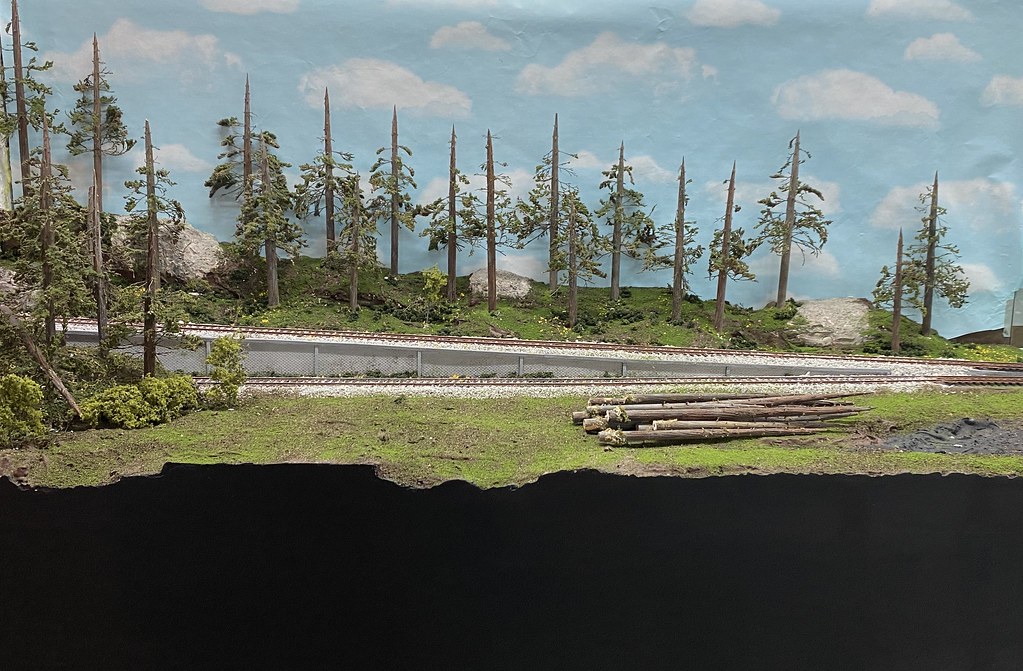
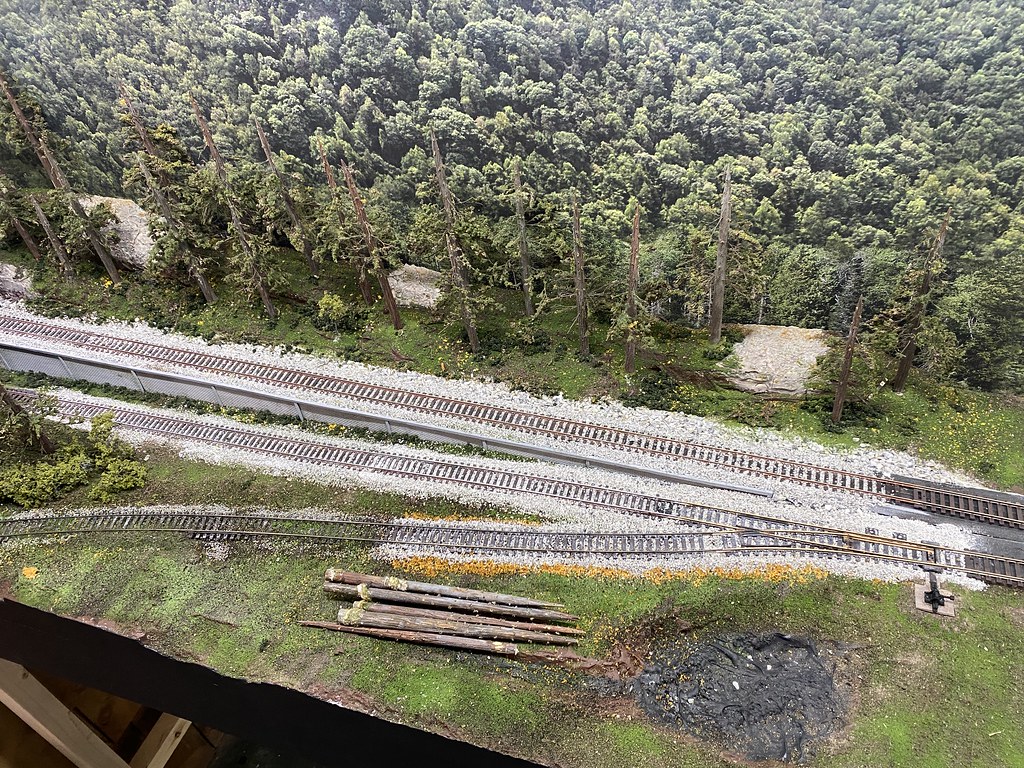
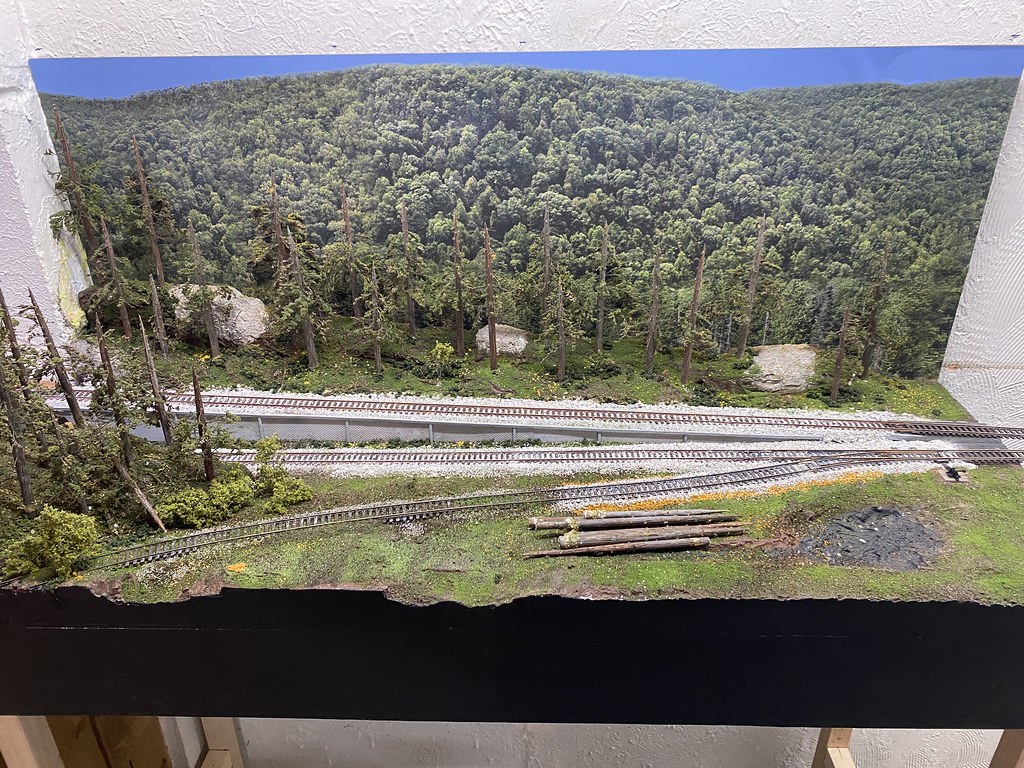
Well, Module #1 is basically done.
53606127374_8bbbee56b5_b.jpg


The dark section in the lower right will be a muddy pond once I pick up some epoxy. And there might be a road coming for the logging crew to pick up all those trunks they left laying there, but other than that, I think it's basically done.
Now to figure out what module #2 will look like.


With most of my modules built physically created for my new layout (Rebuild thread here), I have a vast array of blank canvases to work with. Each one is 18"x48". Time to get started.

Module #1 will come off the bar where I have two tracks with a 2" height difference. So, I figure a nice, woodsy scene to get started with. I grabbed a few scrap pieces of foam as a starting point:
53547294719_249957da78_z.jpg


That's when the "fun" started and I decided to carve up the foam a bit to shape it. You can see my chosen weapon of destruction laying on the benchtop.
53546092022_911f4a4049_z.jpg

And by "Fun," of course, I meant the hours, if not years, of cleaning up little crumbs of green foam I have ahead of me in my basement. Really should have known better than that, but the effect was successful in the end.

After round one of cleaning, I laid in some track and added a old scenery aspect that the rest will, hopefully, match up to.
53547153538_cd054f3fe6_z.jpg


Then the big benefit of going modular: I moved the whole thing upstairs so that my family didn't think I was trying to hide from them.
53546091967_36086edc22_z.jpg


and... admittedly, where it was warmer so the plaster would cure slightly quicker.
53547402520_fa73bbf035_z.jpg


I literally threw on some rubber gloves and globbed handfulls of drywall compound over the foam. I smoothed and shaped it all by hand, then stippled it with a paint brush to remove the finger marks. A few of the spots were a little deeper than I had anticipated, so some points are taking longer to dry than others, but so far no one in the house has complained about it being the in the way, so, win - win! :D
Very therapeutic!
 
And then, in the same afternoon as I took that pic, I tore up some tracks.
54291162978_0d2d5c7f1b_b.jpg

Thus proving that these layouts are never truly "Done." ;)

The lower track was bit too tight against the upper track right where it was coming down off the ramp. A couple of engines and few cars would be close enough to rub against the ramp. I guess 2" on center spacing is a bit too close, so 2.25 it is!

Then, since track were torn up, there needed to be some way for the workers to get those logs out of there, so a small siding was in order.
Track placement still TBD. Not sure if this will just be a short siding, or an old abandoned line that is getting "re-purposed." I'm leaning more in the direction of the latter.
54290035257_4ec2649ec4_b.jpg
 
I really can't leave well enough alone. 🤣

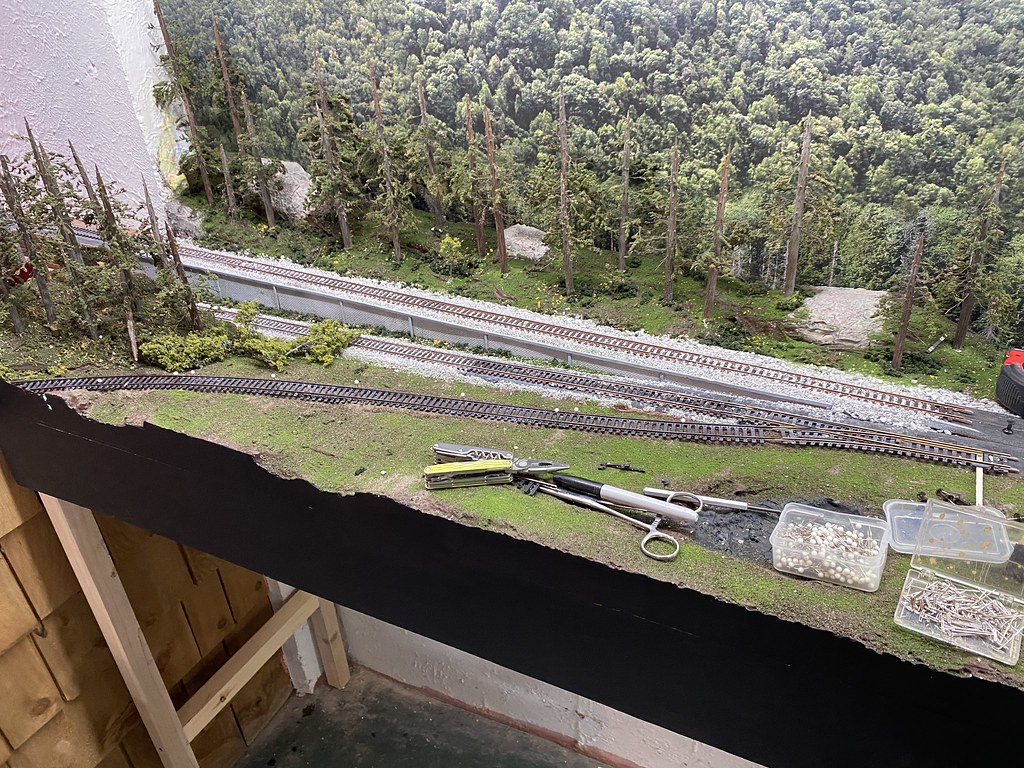
Decided to go the re-purposed, abandoned line route. Started by digging up a little bit of the scenery to create the "Old" route:
54298127730_85b83fb2ae_b.jpg


Painted the dug up spots with a little brown paint and laid in a thin layer of dirt to level out the line just a little bit:
54297950378_20688a8248_b.jpg


Had a used piece of brass flex track that I figured would be perfect for this purpose. Started by using some Cold Bluing fluid to tarnish the tracks. It works on brass, but not as well or as quickly as it does on regular steel.
54296822912_d2f6c7bf26_b.jpg


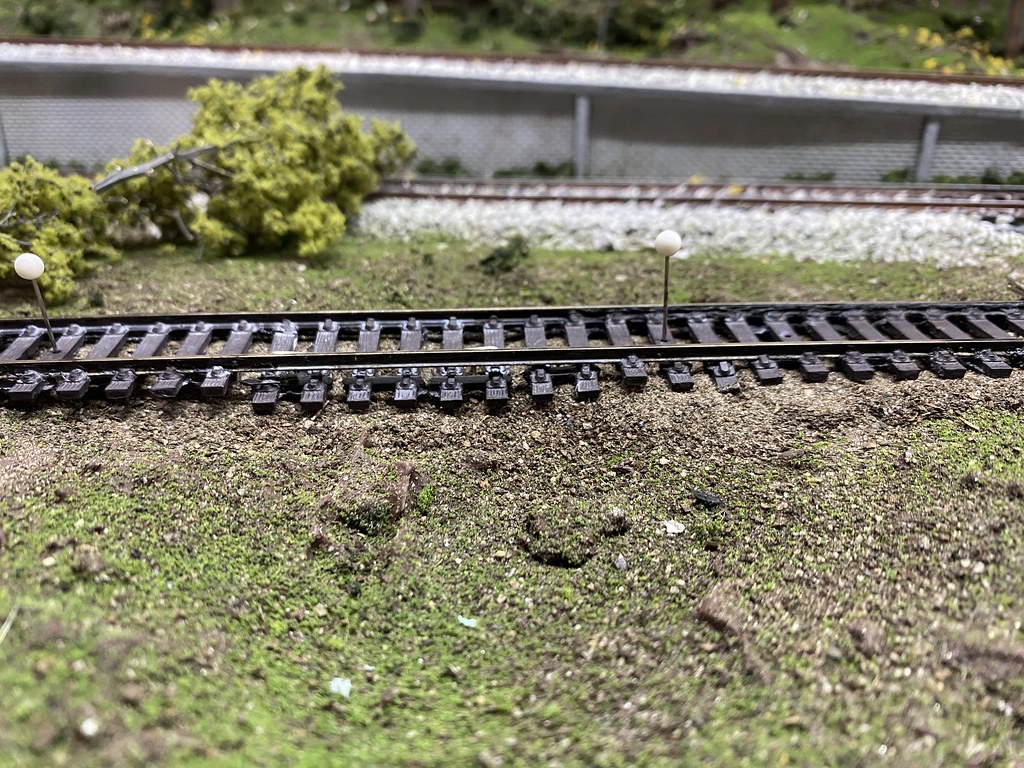
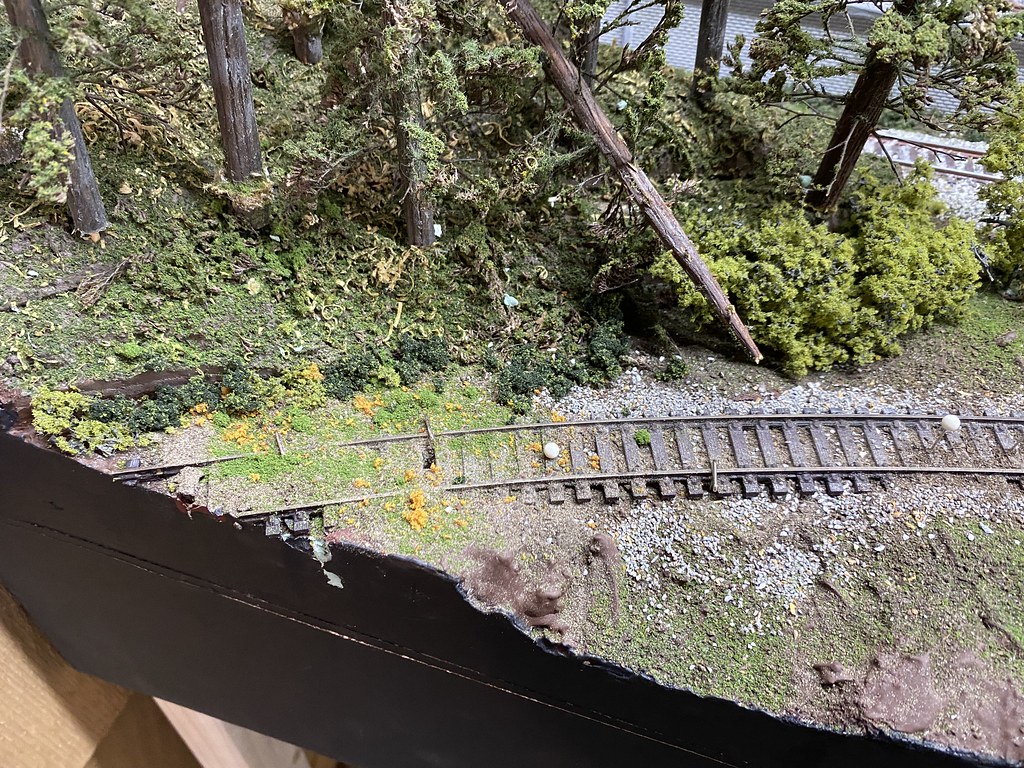
I knocked down some ties in a couple of spots for where the ground has given way and the rail just hangs in mid air:
54297700036_80ace509ee_b.jpg


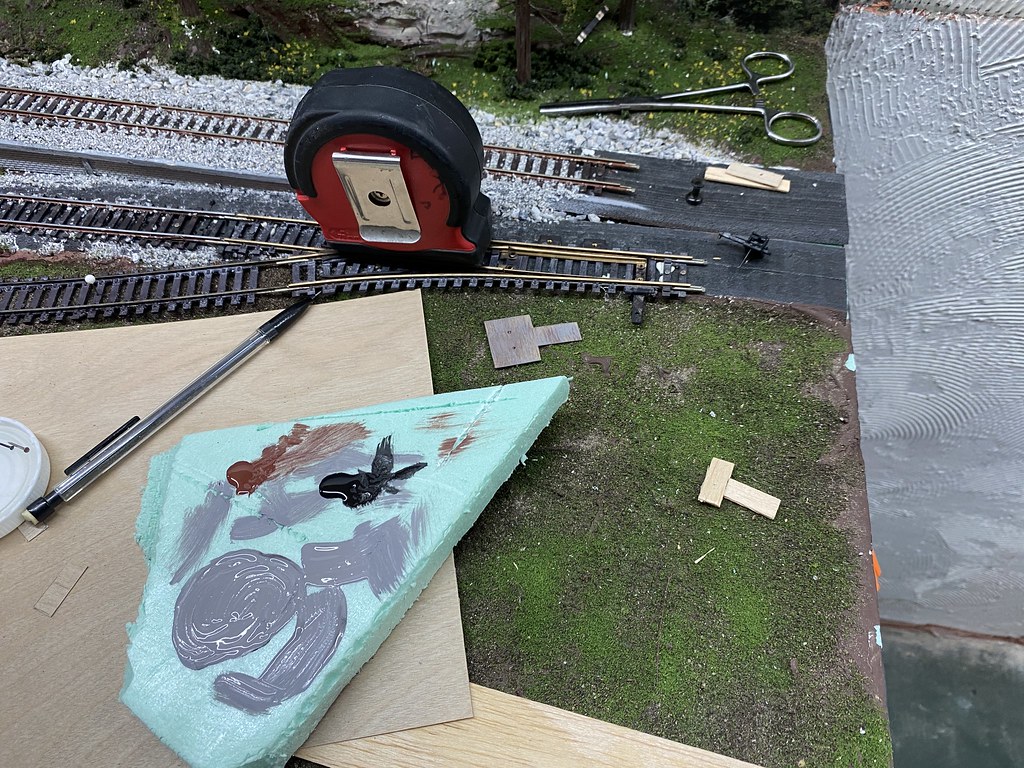
Used an old snap switch I had lying around. Had to replace the pull bar to the diverging side with a home-made one. Put a ground throw on a wooden deck. Then painted it up a bit.
54296822922_6b056c5efc_b.jpg

54298127745_012c50b50c_b.jpg


Then re-ballasted the main line and part way down the siding.
54297936719_d0913aa6cc_b.jpg


I was going to leave it there for the night, but didn't.
The other end of the line needed some scenic work:
54297700181_5e90c69c63_b.jpg


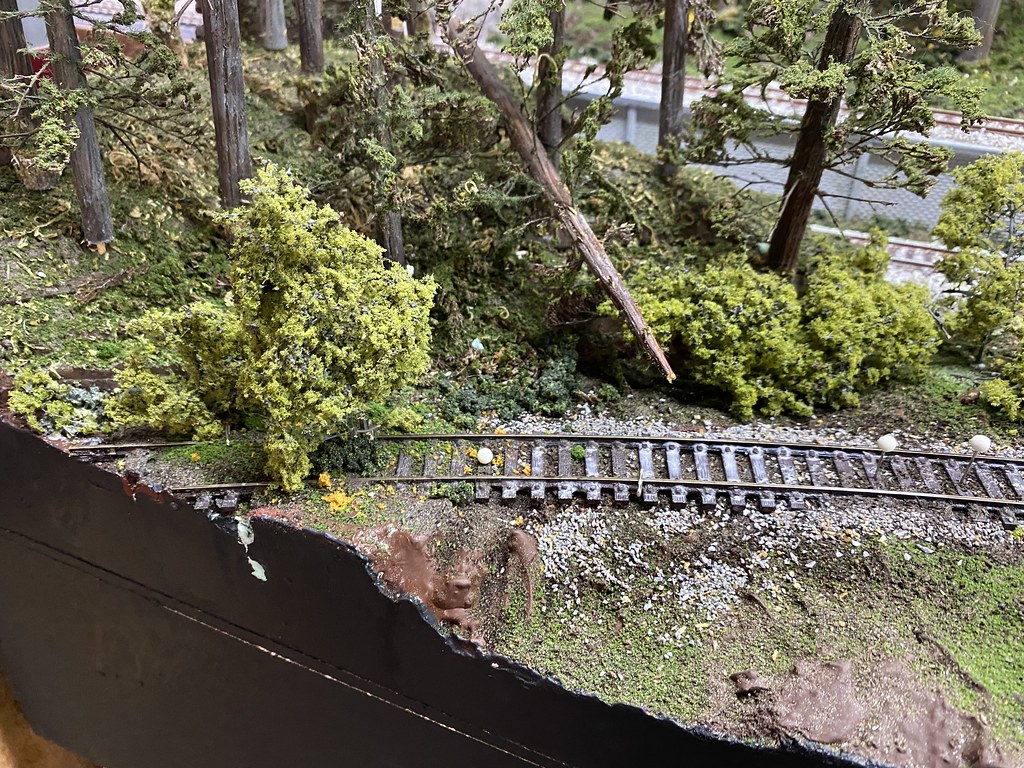
Then just to make sure no one drives down this line, a couple of small trees grew up between the ties.
54297950358_4df09b9b8e_b.jpg


A little ballasting and leveling up the line towards the main, but that's when I forced myself to walk away for the night. I think it's coming out rather well.
 
I really can't leave well enough alone. 🤣

Decided to go the re-purposed, abandoned line route. Started by digging up a little bit of the scenery to create the "Old" route:
54298127730_85b83fb2ae_b.jpg


Painted the dug up spots with a little brown paint and laid in a thin layer of dirt to level out the line just a little bit:
54297950378_20688a8248_b.jpg


Had a used piece of brass flex track that I figured would be perfect for this purpose. Started by using some Cold Bluing fluid to tarnish the tracks. It works on brass, but not as well or as quickly as it does on regular steel.
54296822912_d2f6c7bf26_b.jpg


I knocked down some ties in a couple of spots for where the ground has given way and the rail just hangs in mid air:
54297700036_80ace509ee_b.jpg


Used an old snap switch I had lying around. Had to replace the pull bar to the diverging side with a home-made one. Put a ground throw on a wooden deck. Then painted it up a bit.
54296822922_6b056c5efc_b.jpg

54298127745_012c50b50c_b.jpg


Then re-ballasted the main line and part way down the siding.
54297936719_d0913aa6cc_b.jpg


I was going to leave it there for the night, but didn't.
The other end of the line needed some scenic work:
54297700181_5e90c69c63_b.jpg


Then just to make sure no one drives down this line, a couple of small trees grew up between the ties.
54297950358_4df09b9b8e_b.jpg


A little ballasting and leveling up the line towards the main, but that's when I forced myself to walk away for the night. I think it's coming out rather well.
Looking great! Keep up the good work!
 
I really can't leave well enough alone. 🤣

Decided to go the re-purposed, abandoned line route. Started by digging up a little bit of the scenery to create the "Old" route:
54298127730_85b83fb2ae_b.jpg


Painted the dug up spots with a little brown paint and laid in a thin layer of dirt to level out the line just a little bit:
54297950378_20688a8248_b.jpg


Had a used piece of brass flex track that I figured would be perfect for this purpose. Started by using some Cold Bluing fluid to tarnish the tracks. It works on brass, but not as well or as quickly as it does on regular steel.
54296822912_d2f6c7bf26_b.jpg


I knocked down some ties in a couple of spots for where the ground has given way and the rail just hangs in mid air:
54297700036_80ace509ee_b.jpg


Used an old snap switch I had lying around. Had to replace the pull bar to the diverging side with a home-made one. Put a ground throw on a wooden deck. Then painted it up a bit.
54296822922_6b056c5efc_b.jpg

54298127745_012c50b50c_b.jpg


Then re-ballasted the main line and part way down the siding.
54297936719_d0913aa6cc_b.jpg


I was going to leave it there for the night, but didn't.
The other end of the line needed some scenic work:
54297700181_5e90c69c63_b.jpg


Then just to make sure no one drives down this line, a couple of small trees grew up between the ties.
54297950358_4df09b9b8e_b.jpg


A little ballasting and leveling up the line towards the main, but that's when I forced myself to walk away for the night. I think it's coming out rather well.
I like what you are doing but have a question .On the line that is going uphill the side of the track has a sloping retainer of some type, not sure what it is and could you explain how you did it?
 
I like what you are doing but have a question .On the line that is going uphill the side of the track has a sloping retainer of some type, not sure what it is and could you explain how you did it?
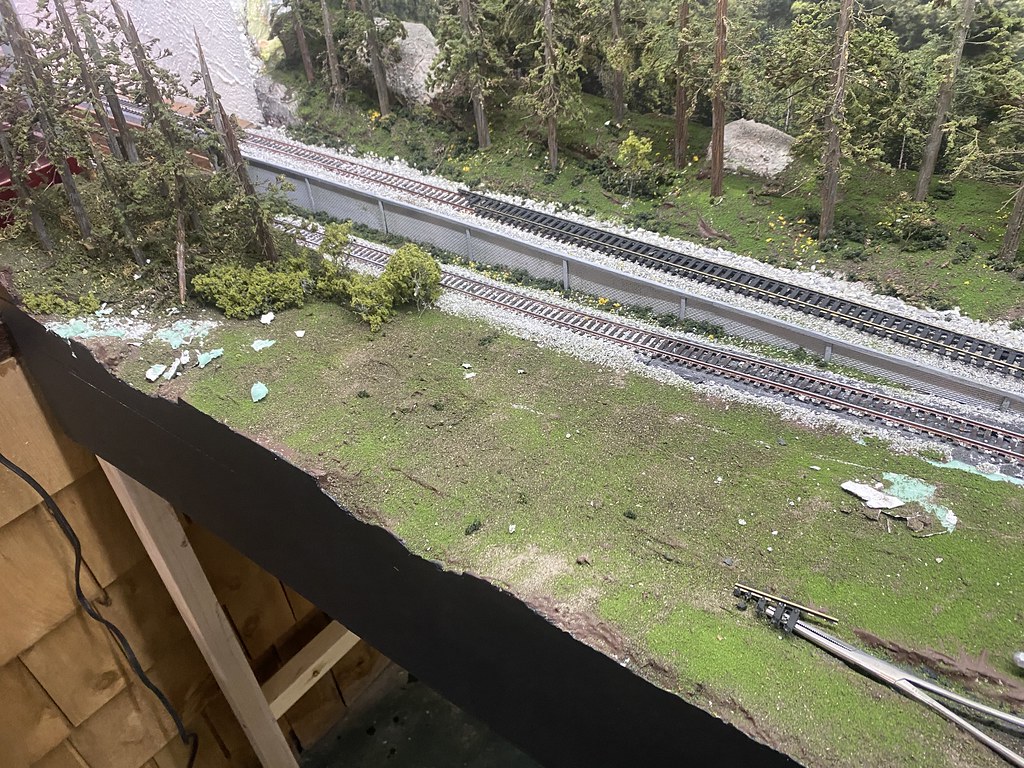
If you look back up above, you can see it's construction. Basically just a foam ramp. I then covered the forward edge with some styrene brick sheet and "framed" it in with balsa strips. The weathering didn't come out as well as I had hoped, so my story line say the MOW crews have been cleaning up the wall with all the recent work in the area. ;)
54300400435_1c7a530c43_b.jpg


-------------------------------------

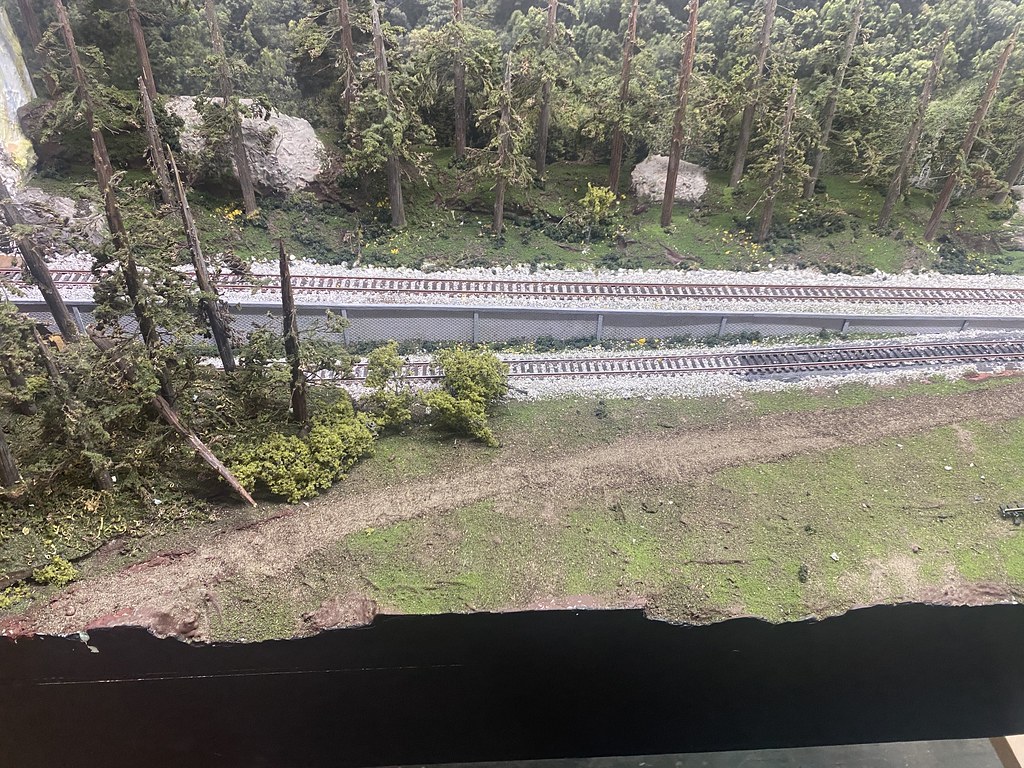
Finished up the ballasting on the siding. The reclamation work has only gone far enough down the line to hold a single loco. You can see the remains of vegetation along the edges of the ballast from the weed killer they use. I've been told by the MOW crews that since the rolling stock weighs less, the old rail can still hold them while they get more clearing work done.
54299076812_91ebee8774_b.jpg


And here the "Currently-Completed" scene (until I come up with some other brilliant idea :rolleyes:):
54300378170_561c901321_b.jpg


And, as always, better with trains. :D
54299076697_e01b62fcd5_b.jpg


Now back to working on Module #2 so that I can run trains through this scene.
That is... um... if I can find it...
54299948306_b693f6fa1c_b.jpg
 
If you look back up above, you can see it's construction. Basically just a foam ramp. I then covered the forward edge with some styrene brick sheet and "framed" it in with balsa strips. The weathering didn't come out as well as I had hoped, so my story line say the MOW crews have been cleaning up the wall with all the recent work in the area. ;)
54300400435_1c7a530c43_b.jpg


-------------------------------------

Finished up the ballasting on the siding. The reclamation work has only gone far enough down the line to hold a single loco. You can see the remains of vegetation along the edges of the ballast from the weed killer they use. I've been told by the MOW crews that since the rolling stock weighs less, the old rail can still hold them while they get more clearing work done.
54299076812_91ebee8774_b.jpg


And here the "Currently-Completed" scene (until I come up with some other brilliant idea :rolleyes:):
54300378170_561c901321_b.jpg


And, as always, better with trains. :D
54299076697_e01b62fcd5_b.jpg


Now back to working on Module #2 so that I can run trains through this scene.
That is... um... if I can find it...
54299948306_b693f6fa1c_b.jpg
Thank you . Post 6. Missed it.
 
Started in on the decoration of this scene. The raised upped track needed a retailing wall. I had some brick sheet left over from another project, so that, a few little balsa strips and some paint and I had this:
53576630882_e412fa9a0d_z.jpg

53577824774_6d96d1aaec_z.jpg


The rails have also been painted. And I started on some riff-raff on the back edge of the track. Next step will be ballasting. Then onto ground cover. At least that's the plan.
Can I ask whose brick styrene you like using? I'm thinking about scratch building and I need a source of nice looking styrene brick for HO. Thank you! John


Wow... I haven't been on here in a while. Granted, haven't done much model RR'ing either. Been a busy year.

As far as I recall, I think it was just Everygreen styrene brick sheet. It was labeled as HO/O scale. In HO scale, it a bit of an over sized cynder block. But, with a little willful-suspension-of-disbeleif, it works.


Affiliate Disclosure: We may receive a commision from some of the links and ads shown on this website (Learn More Here)

Back
Top