
You are using an out of date browser. It may not display this or other websites correctly.
You should upgrade or use an alternative browser.
You should upgrade or use an alternative browser.
Magilla’s first layout build.
- Thread starter magilla12
- Start date
ModelRailroadForums.com is a free Model Railroad Discussion Forum and photo gallery. We cover all scales and sizes of model railroads. Online since 2002, it's one of the oldest and largest model railroad forums on the web. Whether you're a master model railroader or just getting started, you'll find something of interest here.



Affiliate Disclosure: We may receive a commision from some of the links and ads shown on this website (Learn More Here)

magilla12
Well-Known Member
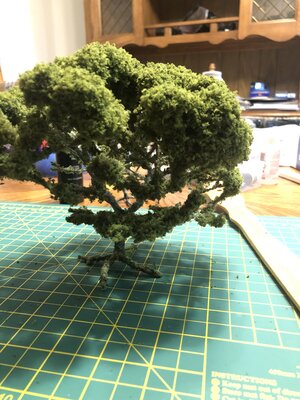
I plan on planting them in plaster Or clay.You’re doing a bang up job on the layout , I’m super impressed with your trees. Planting the trunks may be a bit of a task depending how you go abouts it.
Seeing the cookie cutter bench work brings back memories, works well when you’re working off a solid bench top.
logandsawman
Northern Pacific history enthusiast
You may consider an epoxy like JB weld. I use that to plant things on my layout if they are irregular. I will put down a glob and before it hardens get my object straight. "JB quick" is the specific product I have moved to since it starts to get hard in a minute or so and within 5 minutes I can take away any support (usually). If it trees I am putting in, I will apply some glue product and sprinkle ground cover on top and I have never been disappointed.I plan on planting them in plaster Or clay.

HO Scale MILW
A Normal, Regular, Train Fan
Lookin' good, Lookin' good. Everytime I come on this thread you've made another 20 steps in the layout process.
magilla12
Well-Known Member
I’ll glue them down with something. I plan on glueing the track to the bridges, so I’ll have some, clear silicone maybe.You may consider an epoxy like JB weld. I use that to plant things on my layout if they are irregular. I will put down a glob and before it hardens get my object straight. "JB quick" is the specific product I have moved to since it starts to get hard in a minute or so and within 5 minutes I can take away any support (usually). If it trees I am putting in, I will apply some glue product and sprinkle ground cover on top and I have never been disappointed.
wombat457
I'm the one
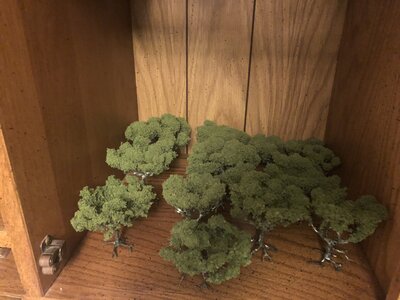
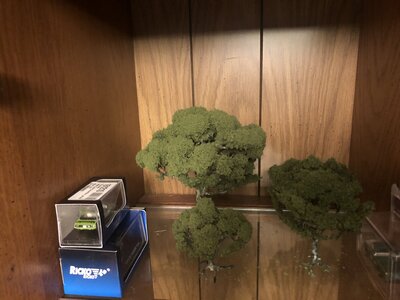
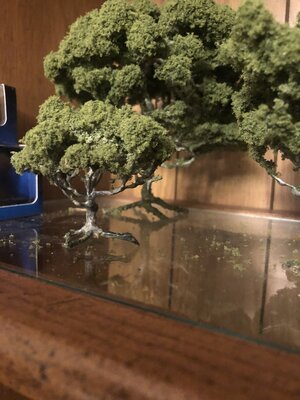
@magilla12 um so ahh, when are you taking orders, cos I'll take 250 assorted please 
Excellent job mate - seriously good stuff!
Excellent job mate - seriously good stuff!

JeffH
Well-Known Member
Those tree look amazing! I really enjoyed twisting up trees using wire. They look like mature trees you would see in a park, or along an old boulevard style road with huge Victorian style homes.
For water, be sure to do your research. Most product doesn't do well with a deep pour. Most product will only do well if you pour about 1/8" or less at a time.
I researched and researched, and ended up using Acrylic Gloss Medium and added a little burnt umber to add silt to my river. I poured right about 1/8" thick, and ended up with a lot of cracking/fissures, as the surface formed a "skin" as it dried a little faster than than the, still liquid, pool beneath it. This stuff shrinks a bit as it dries... If the surface dries too quickly, it will crack, and teh crack will continue to get larger as the product continues to cure.
For water, be sure to do your research. Most product doesn't do well with a deep pour. Most product will only do well if you pour about 1/8" or less at a time.
I researched and researched, and ended up using Acrylic Gloss Medium and added a little burnt umber to add silt to my river. I poured right about 1/8" thick, and ended up with a lot of cracking/fissures, as the surface formed a "skin" as it dried a little faster than than the, still liquid, pool beneath it. This stuff shrinks a bit as it dries... If the surface dries too quickly, it will crack, and teh crack will continue to get larger as the product continues to cure.
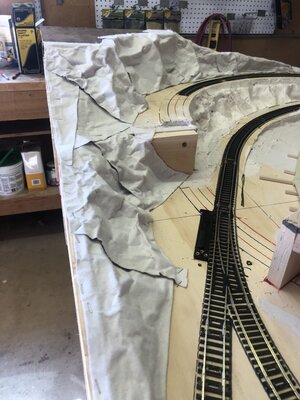
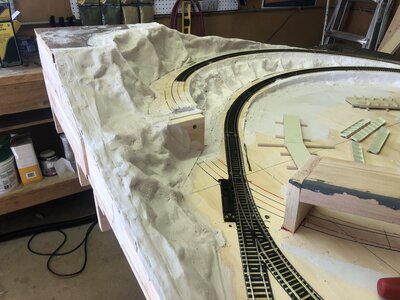

magilla12
Well-Known Member
I’m going to use the Mod Podge resin that I got at Walmart.Looking good mate - it is coming along very nicely and keeping us in suspense for what is next
By the way, what did you decide on for your water? Only asking because JeffH is right, some stuff doesn't play well if poured thicker than an 1/8th of an inch

Iron Horseman
Well-Known Member
Why so deep?Mod Podge recommends 1/4” pours, I’m 3/4-1” deep so I’ll do 3 or 4 pours.
JeffH
Well-Known Member
Here is some information I found in regards to Acrylic Gloss Medium. I have no idea if Mod Podge resin is the same or not...
Acrylic Gloss medium is just like acrylic paint, but it has no pigment. It comes a milky white liquid, but dries hard and crystal clear. It shrinks a bit as it dries, so it contains polymer binders that try to keep it from cracking (called glazing) as it dries. If the pour is too deep, the skin dries too quickly compared to the pool beneath it, it will overcome the strength of the binders, and a crack will form. As the product cures, the crack gets bigger until it all has fully cured. The deeper the pour, the wider the fissure.
Thinning the product can also cause cracking, as it also thins out the binders.
Also... using heat or moving air to speed up the drying is not advices either... Basically... It's not meant to be used too thick.
Here is a picture of a pour I did that was right about 1/8" think. This was 2 quarts of Envirotex Acrylic Gloss Medium, with a little bit of raw umber color, poured over a blue/green painted river bed. The fissures are deep and wide. You can see where I added some more product into the fissures to try to obscure them a bit. The stuff I added is still milky white.

Acrylic Gloss medium is just like acrylic paint, but it has no pigment. It comes a milky white liquid, but dries hard and crystal clear. It shrinks a bit as it dries, so it contains polymer binders that try to keep it from cracking (called glazing) as it dries. If the pour is too deep, the skin dries too quickly compared to the pool beneath it, it will overcome the strength of the binders, and a crack will form. As the product cures, the crack gets bigger until it all has fully cured. The deeper the pour, the wider the fissure.
Thinning the product can also cause cracking, as it also thins out the binders.
Also... using heat or moving air to speed up the drying is not advices either... Basically... It's not meant to be used too thick.
Here is a picture of a pour I did that was right about 1/8" think. This was 2 quarts of Envirotex Acrylic Gloss Medium, with a little bit of raw umber color, poured over a blue/green painted river bed. The fissures are deep and wide. You can see where I added some more product into the fissures to try to obscure them a bit. The stuff I added is still milky white.
Affiliate Disclosure: We may receive a commision from some of the links and ads shown on this website (Learn More Here)