Building the Pinnacle Creek Mining & Timber Co. RR

ModelRailroadForums.com is a free Model Railroad Discussion Forum and photo gallery. We cover all scales and sizes of model railroads. Online since 2002, it's one of the oldest and largest model railroad forums on the web. Whether you're a master model railroader or just getting started, you'll find something of interest here.


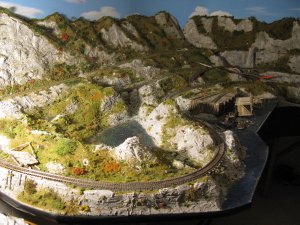
Jim, please say it's not true. Not the dock and the ore tipple scene in the garbage. I refuse to believe it. It's like one of my favorite scenes in "Brother Where Art Thou", George, not the livestock... Man, I've got to sit down and catch my breathe, this is almost to much. You take care - Chris


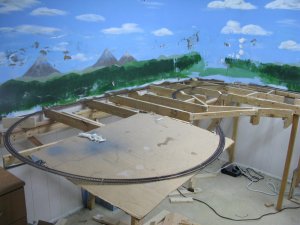
lol. toot, I've heard that phrase somewhere before. Anyway, here's a photo of the layout as of day before yesterday. I'm going to have to buy an orbital sander to get all the stuff off the backdrop. Yes, the dock scene is in the garbage dump. Jim :)

IMG_5754.JPG
 
Last edited by a moderator:
lol. toot, I've heard that phrase somewhere before. Anyway, here's a photo of the layout as of day before yesterday. I'm going to have to buy an orbital sander to get all the stuff off the backdrop. Yes, the dock scene is in the garbage dump. Jim :)

IMG_5758_zps74721f38.jpg


Yep , looks real familiar from the ACTRR about 5 years ago.

Mike
 
Thanks Mike, I remember photos of your layout then on NSO.

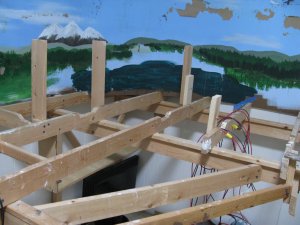
I thought I would share the photo below showing an example of open frame bench work. You can see the higher risers that held the plywood road bed base for the upper track to the upper mine.

IMG_5759.JPG

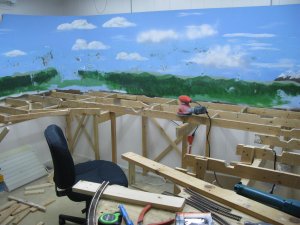
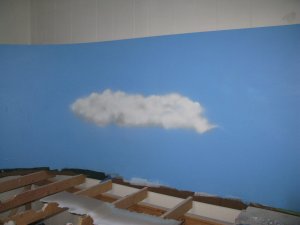
I've taken the risers off and now have just the original bench work. I have a sander arriving tomorrow and I will sand down the backdrop and will repaint it. I'm tired of the same old clouds and this layout will not have the vertical relief to cover the mountains and trees. Jim:)
 
Last edited by a moderator:
Sanded the back drop with my new sander. I just finished. I'm pooped. I will fill in holes and chipped filler next after I wipe the backdrop down with a damp cloth. Jim:p

IMG_5760_1.JPG
 
Last edited by a moderator:
Hi Sherrel, Not too good that's for sure. I just added the spackling. I'll let it dry for a couple day and will paint the backdrop on Tuesday. Jim:)
 
Jim, that's a good idea to rest the old back for awhile. Have you decided what brand of track you will be going back with, or for that matter what gauge? - Chris


Chris, Atlas Code 83 for the track and Peco Code 100 for turnouts. I still have to use the Peco #4s because of the size the layout room. I will just clean up the turnouts and buy all new track. The tunnel portals and bridge clearances will accommodate my On30 fleet as well. I will run the On30 privately and take pictures of it. This will be an HO layout otherwise. Jim:)
 
Jim, I think that is an excellent choice. My first layout was Atlas code 83 with Peco 100 turnouts and never any problems. My second layout was Atlas code 83 with Atlas code 83 turnouts and nothing but problems. I run small engines with small wheels and some, not all, want to stall as they enter the turnout, as if they hit a dead spot. Or you run them through the turnout at such an unrealistic speed so they can make it without stalling. Anyway, good choice. - Chris
 
Thanks Chris, all correct. This time around I will be running a Consolidation (2-8-0) so I shouldn't have too much trouble even at slow speed. All the Code 100 turnouts worked great on the PCM&T layout.

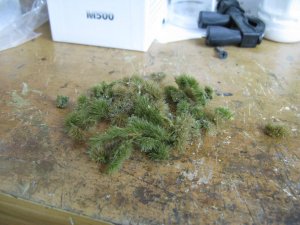
I was ask if I saved anything from the tear down. Well not too much. I saved all the mining equipment and mining camp buildings and the engine house. The tipple scene is long gone. However, other than the trees and shrubs which is a no brainer, I did consciously save as many of my grass tuffs I could. These are not cheap and although it took a pair of pliers to get most of them off the layout I think it would be worth it for this next 'drier' layout. Jim:)

IMG_5761.JPG
 
Last edited by a moderator:
There are many ways to do a track plan. Some folks like computer cad programs and some, like me, simply draw the plan with a pencil. In my decade of model railroading I've come across guys that are into year two on their 'cad' plan! Some are in year two with their pencil plan. I have a layout built and torn down in two years. Not that they are wrong however. The way we spend our time is a personal thing but I fear many of these "long term" planners may be afraid to finished their plan and get to the next step.

After I pencil in my track plan, usually a less than 10 minute job, I draw out the plan and rough scenery ideas on the 'plan' paper that you've seen. This paper is my map and I will try, but not always succeed, in adhering to it. The first thing I do before any building is to buy the approximate amount of curved track I will need. I then solder all the curved pieces together. Hiding the soldering on the inside of the loop of course. Then I layout the curves out on the bench work to see if they fit. Like this:
IMG_5762.JPG

When I see that all the curves will fit I put all the curves away until I need them. I do it this way because I know they will fit and when it comes time to build the subroadbed I will have the curves as templates. No guessing during the subroadbed building stage. This, to me, is a critical sequence in building layouts more quickly. Jim:)
 
Last edited by a moderator:
Works for me!
As Larry would say, "Get-er-done".
Just my opinion, but I have never understood the need of a computer plan for a layout. Freehand on a sheet of paper, a ruler, and a pencil with a big eraser seems to work well.
 
There are many ways to do a track plan. Some folks like computer cad programs and some, like me, simply draw the plan with a pencil. In my decade of model railroading I've come across guys that are into year two on their 'cad' plan! Some are in year two with their pencil plan. I have a layout built and torn down in two years. Not that they are wrong however. The way we spend our time is a personal thing but I fear many of these "long term" planners may be afraid to finished their plan and get to the next step.

After I pencil in my track plan, usually a less than 10 minute job, I draw out the plan and rough scenery ideas on the 'plan' paper that you've seen. This paper is my map and I will try, but not always succeed, in adhering to it. The first thing I do before any building is to buy the approximate amount of curved track I will need. I then solder all the curved pieces together. Hiding the soldering on the inside of the loop of course. Then I layout the curves out on the bench work to see if they fit. Like this:
IMG_5762_zpsfe2b87dc.jpg


When I see that all the curves will fit I put all the curves away until I need them. I do it this way because I know they will fit and when it comes time to build the subroadbed I will have the curves as templates. No guessing during the subroadbed building stage. This, to me, is a critical sequence in building layouts more quickly. Jim:)

That is a great technique and why I love unitrack.
Mike
 
Thanks guys. It is a time saver for sure.

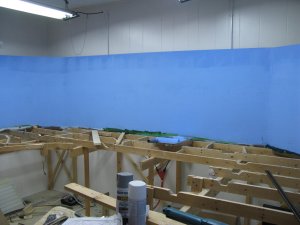
In this photo you can see the new paint on the backdrop. Still wet in the photo. When dry it will be an even blue. I painted it with a roller in thirds. The top third was straight out of the can. The middle third I added some white and the lower third added more white. Remember sky lightens toward the horizon because of air molecules. Jim :)

IMG_5767.JPG
 
Last edited by a moderator:


It was once said that there is a fine line between genius and insanity :p so I'm not taking any chances. THEY LOOK GREAT!


Seriously - very good.


Affiliate Disclosure: We may receive a commision from some of the links and ads shown on this website (Learn More Here)

Back
Top