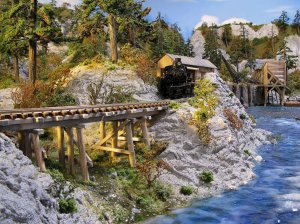
Building the Pinnacle Creek Mining & Timber Co. RR

ModelRailroadForums.com is a free Model Railroad Discussion Forum and photo gallery. We cover all scales and sizes of model railroads. Online since 2002, it's one of the oldest and largest model railroad forums on the web. Whether you're a master model railroader or just getting started, you'll find something of interest here.


Who's JTT Jim, not familiar with. You've probably mentioned them previously but can't find the reference.
 
Finishing Up with Super Trees

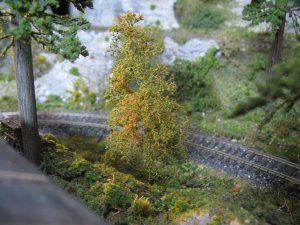
Here is a photo I call Oct 1st. Notice the tree has multiple colors. It is not full Fall so different colors make for a nice tree.

IMG_4401.JPG

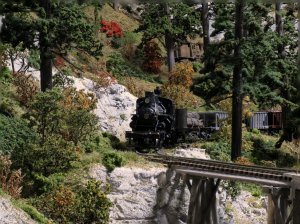
Finally I have some 'high country' on the PCM&T Co. layout. It stands to reason that trees would 'turn' sooner in the high country even on the same date.

44 through the trees.jpg

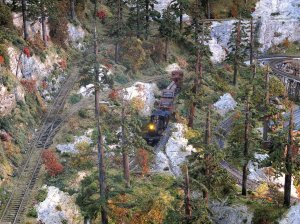
When you put all the tree coloring tips together you can have a layout that looks more like real life. Which leads to this photo:

coming at us.jpg

Enjoy, Jim:)
 
Last edited by a moderator:
Toot, Prizes where sent yesterday.

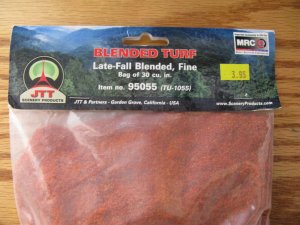
As for JTT check out this photo. I only had late fall left over. Check out the website in the right hand lower corner. Jim:)
IMG_4402.JPG
 
Last edited by a moderator:


Thanks Jim, I shall keenly await them, let's see if the postal services can beat the 8 days that they achieved for the MTH flat cars I bought from Smithburg MD. :)
I can see why you didn't want to block the light coming in from the window, really brings that scene to life.

Enjoying this tutorial, especially when modelling a country far removed from my locale. Trees here in SE Qld don't seem to loose their leaves for any great length of time so don't change color much (except when they get burnt off and were moving into a very bad bushfire season now).
 
Natural light is usually the best light. I left some light coming through the window on my wife's suggestion. Good move. I realized early this was a dark room and put in a tube-type skylight. I sometime put a shade on it. Most photos I take are just before sun up and just after sundown. Of course I use my desk lamp for highlighting. Jim CM&T:)
Photo found, but won't publish. One of my best naturally. thanks photobucket. Jim 12/26/17
 
Last edited by a moderator:
When we built this house, we put in three suntubes. I wish we'd put some in for the basement too. They're really nice.
 
Last edited by a moderator:
What's that dark patch directly above the loco Jim? I looked back to the pic with the Makita lying down on the job but couldn't see what it could be, can't be the tunnel entrance 'cause the track to that is visible between the loco and it. Appears to be in the area of the connecting track to the top level.

By the way I found the easy way (after forgetting it before) to make your pics into desktop backgrounds. Just right click the pic and select 'set as background' from the menu. The resolution of your pic is exactly right for my 22" monitor. (not all pics from the internet are).

The resolution is set at the recommended 1680 X 1050
 
Last edited by a moderator:
Well, this photo looks like I'm really getting down to the finish line.
I got some Modge Podge Gloss this time around for the water. On the ore tipple water I use non gloss. I repainted the ore tipple water this morning with the gloss. It will give a more realistic water.

On the left of the photo in the new section you can see more white. That is the ModgePodge I poured last night. Jim :)

water front.jpg
 
Last edited by a moderator:


The contest prises arrived mid-day today (thurs)(just a couple of hours ago) AOK, although the chimney had fallen out of it's hole in the shed roof (easy fixed).

Now to find a suitable display case, a bit of backwoods track and have a go at making a diorama. (much re-reading of Jim's scenery tutorials coming up).
 
Toot, That was quick. Glad they arrived safely. Not bad, about a week and the price was right. Have fun with them. Next contest at 75,000 if I live that long!:eek: Thanks to you all. Jim:)
 
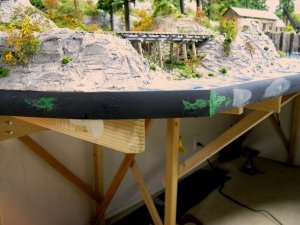
I took out the nails holding this molding strip to the layout while the glue dried. I filled cracks and holes with Squadron Green putty. I let it dry overnight and you can see some sanding going on. I will paint the molding again and it should come out looking good. Jim

IMG_4466.JPG
 
Last edited by a moderator:
You used plastic molding? Great idea. Just wanted to drop a line to say how much fun I’ve had following this thread, and say thank you. I keep coming back for information and inspiration. Don’t quit, even if the layout is (90%?) finished!
Steve
 
Steve, Thank you. Yes, the molding is that weird plasticy stuff from Lowe's. It broke on me a couple of times so that's dealt with using the Squadron Green. Once painted it will be alright.

Actually, the layout is about 98% finished. I thought I would do something on track tuning and there is ONE spot that may need some major (another thread segment) rework to get the track right.

Other than that not much to do. My lower fascia board ends under the ore tipple now. I only need about 3 feet to reach the desk. Naturally, I don't have any more board! Hurts to think of 28 or 29 square feet of facia board laying around. Still thinking on that dilemma. Stick around there will be more. Jim:)
 
Just to remind folks, I didn't invent all this. Some, as far as I know, is original and much of it is just my improvements on techniques of others. When I started this game in 2005 I had absolutely no idea of how to do anything.

Hobbies weren't in my lifestyle. I knew zero about railroads and really today don't know much more about them. My brain told me how I wanted model railroad scenery to be because of my outdoors pursuits. Putting this 'scenery' down on a layout, diorama, or module was a different story.

I read everything about scenery. All the Kalmbach books. I joined model railroading sites. I view thousands of photos of the work of others. Some really good, and some not so. I suppose scenery is like art. We may have the 'gift' or we may not. That's okay. But, as stated before here, I think that with practice we can all become better scenery modelers.

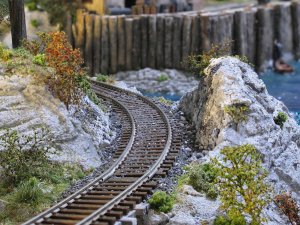
To that end I find in my searching through layout photos I've come across probably the least modeled item in model railroading. In fact I searched this morning for over an hour and could not find an example and that is: Rock Cuts. In real life they are everywhere. I noticed I didn't have one before the redo so here you go.
Cuts.jpg

It was much cheaper to dig/blast a cut than tunneling. These cuts are on highways, roads and streets. They are everywhere if you look for them. Railroads did them all the time. Labor was cheap and cuts straightened the track, thus saving money.

This cut portrays the blasting through some rock near the water. This is very common in the Columbia River Gorge where I'm from, but cuts are everywhere. I imbedded some different rocks on the interior cuts while the stucco patch was drying. Looks good to me. Try some cuts. Your model railroad buddies will be impressed. Jim:)
 
Last edited by a moderator:
Great stuff once again Jim, and depending on how "young" the cut is will determine what the substrata looks like.
 
HOexplorer: I must admit that after reading from page 1 to 77 your posts is one of the bigger reasons why I joined this forum. Your great detail and how-to will come into handy while working on my layout. Thank you for putting YOUR TIME into this thread.


Affiliate Disclosure: We may receive a commision from some of the links and ads shown on this website (Learn More Here)

Back
Top