Building the Pinnacle Creek Mining & Timber Co. RR

ModelRailroadForums.com is a free Model Railroad Discussion Forum and photo gallery. We cover all scales and sizes of model railroads. Online since 2002, it's one of the oldest and largest model railroad forums on the web. Whether you're a master model railroader or just getting started, you'll find something of interest here.


Winner, Winner, Chicken Dinner.

Sorry RL, but tootnkumin just got you.

The correct answers are: wood pile different and steam/smoke from the steam donkey has turned the opposite direction.

toot, send my your name and address via PM and will see if the cabin and log car can get Downunder. Congratulations, toot.

RL, very close. Maybe next time. I notice the loco has moved. Somehow it seems to be uncoupled. I never noticed it until now. I took the photos 5 min. apart. Mystery! My answer to your first guess should have been enough to pin the real answer down. The smoke is fairly obvious.

I don't know if only the two of you tried looking, but thanks to you and all the others for making this thread worthwhile. Jim:D
 
Last edited by a moderator:
Thats what it is, smoke. I never even noticed the boiler. Just thought the gable on the building had been colored white. Time for a better monitor and maybe some new glasses.LOL

You can see how long it took me to spot the boiler, couldn't make up my mind if it was a reflection in the camera lens or what, just didn't look like paint on a building. In fact it looks like it's the smoke in the 1st pic that's been "doctored"in the 2nd. Wasn't till I spent some time really looking hard at it that I even connected it to the boiler stack.

Funny other thing is, I counted the items in the various piles of stuff around the place and only gave that little pile of lumber a cursory glance, so rlundy90 got that one before me.
 
I saw something going on with what looked like a wisp of steam or smoke.....but I couldn't really tell otherwise.....and congrats to one and all! :)

Great looking diorama Jim!


Mike


That was a good contest. One of the "tricks" to doing hidden objects or changes between pictures is to get things to blend in or not look like what they are and there's no rule that says the 1st pic has to be the "normal" one.

You had me looking for lumberjacks hidden up in the tree branches. Lets hope we can encourage some more contestants for the next one, with the rate of hits it shouldn't be far away.
 
Last edited by a moderator:
As a previous contest winner I kind of held back. I thought that the wisp of smoke was a photographic glitch. I almost posted that early on. Now I'm glad I stayed out of the conversation.
Great job Toot and a fun diversion Jim.

Steve
 
Thanks Steve, my pleasure.

I'm still trying to figure out why the photos didn't print to the site at 1500 yesterday! My wife was playing with her Garmin GPS downloading updated maps. Not her fault, but I don't think the router could handle the load.:o

Anyway, tomorrow I will post the building photos of the "last bridge" as promised for those that are looking forward to them. Jim :)
 
Time for building 'Last Bridge.'

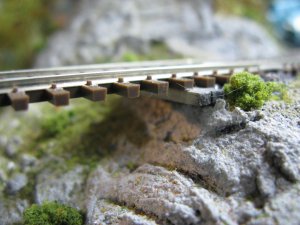
There are eight bridges and two culverts on the PCM&T Company layout. Because the room is only 11'x10' I've had to make the bridges curved to make everything fit.. The through truss being the only straight bridge.

All the rest were built by hand. The log bridges matching as close as I could to the probable way the loggers and miners would have built their own. Not pretty necessarily, but adequate to the task.

I've covered the log bridges and some on the cliff bridges and the bigger trestle. Now is time for the "Last Bridge," so named because it is the last to be built. Last Bridge is on a curve. It is only about 39 feet long, but must still hold the load on the curve.

First thing I build on any bridge is some sort of abutment. These keep the land from falling and the ends of the track from sinking. Some abutments are stone, cement, or in this case, finished wood. The mainline is a low classification and a trains will only go 25 mph on it.

As always I built with track in place. This helps building the rest of the bridge in the correct curve and is less likely to have to be done over because a prebuilt bridge wouldn't fit.

IMG_4223.JPG

Now, for all you engineers out there. I'm not one. In all my layouts and all my bridges, mostly all hand built, I have adhered to one rule: It's my bridge on my layout and I will build it so it looks like it will hold the load. That's it. I don't mind hearing that it may not, but I build them to suit me.

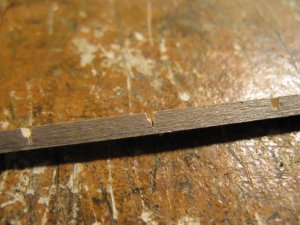
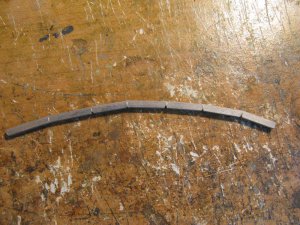
I could cut the ends of a number wood sections and fit them together to make the proper curve, but I prefer to notch the bass wood lumber.

IMG_4224.JPG

By doing this with my saw I am able to bend a curve.

More later.
 
Last edited by a moderator:
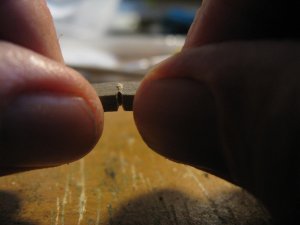
The notching with the saw is one thing. I like to put in a bit more with the blade bisecting the groove. Almost through but not quite. Be careful.

IMG_4225.JPG

This final cut allows us to bend the wood without breaking it. Between your fingers on both hands carefully and slowly bend the wood at the notch over your thumbs. This may take some practice.

IMG_4226.JPG

Do each notch. If you snap the wood because you bent it too fast it may snap. Hopefully it didn't break alll the way in half. Even if you did break it in half continue bending the rest. (more carefully this time!) When you are done you should have this:

IMG_4227.JPG

If you broke the wood clear through glue it back together. The wood will fit quite nicely.

More next post.
 
Last edited by a moderator:


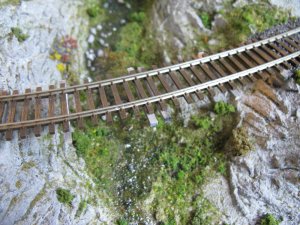
I put wood under some of the ties. I will attached the bent wood to these seemingly 'extra' ties. This may not be prototypical but I didn't want this little bridge to look like all the rest, plus it is even with the wood used for the abutments. I think this will look good and have the strength to hold up the train. I use WS Foam Tack Glue. Let it dry a bit before attaching the wood to the plastic.

IMG_4228.JPG

Next while this wood is drying. Build two more wooden pieces. Remember the middle and inside will each be shorter because of the curve. Doesn't matter where you start. Go ahead and glue the curve piece to the bottom of the wood attached to the ties.

IMG_4229.JPG

I used three curved wood pieces. It is enough. Four is okay, but two is not enough. After these have dried I glue the tops of the trestle bents to the bottoms of the three curved pieces. What this is doing is building the bridge from top to bottom. The plusses are everything will be square.

IMG_4270.JPG

More next post.
 
Last edited by a moderator:
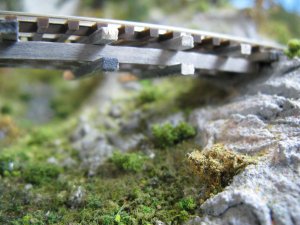
Almost finished. I used round wood (barbeque skewers) for the bents. I measure and cut until one fits. Since I'm using four bents if I mis-measure, my wood will probably fit in another place. Tweezers are very important to this bent building.

When all the glue is dry. Attach the cross members. I just put them on one side and opposite from the bents on the other side. Don't worry about gaps at ground level. Ground cover will fill the voids.

IMG_4271.JPG

The inside curved piece will have the notches showing a bit. Think. Will anyone reasonbly see the notches on the other side of the bridge? Not on mine. Some Woodland Scenics Foam Putty will fill the notches if they are a bother. Then you can add color and weathering after it dries. Also because this bridge is a curve I angled in the outside wood on all the bents more than on the inside.

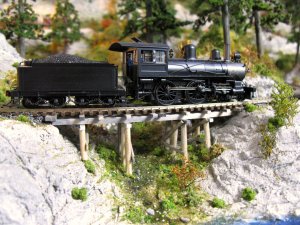
Finished with Last Bridge. Now let's look at the 'builders' photo.

IMG_4309.JPG

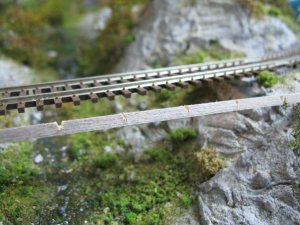
Here is a hint: If you want to make this outside curved piece look like "pieces" simply scribe down every eight HO scale feet or so. Add some more wood 'dye' product and it will fill in the scribe nicely.

Questions? Jim:)
 
Last edited by a moderator:
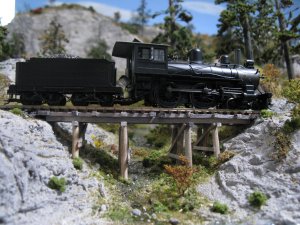
Toot, Hate to have you say that!:D My enginers from the Alaska Territory have assured me that for this classification of railroad this bridge is adequate for low speeds and projected loads. The bridge is made of fine Alaskan Spruce. Very strong and the beams are 12"x12".

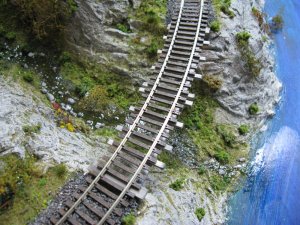
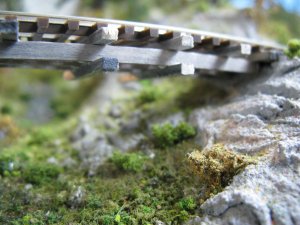
This bridge is quite small. The center span is only 11 feet. I long jumped 17' in highschool. Notice there is no sag in photo!

IMG_4270.JPG

I suppose this is a good example of 'scale' in model railroading. In the Builders Photo there was little to show how small this bridge is. In fact something this size wouldn't rate a name on a real railroad. So I'm going to still sleep well tonight knowing my engineer and fireman are not in harms way.:eek: Jim:)

PS I'm off to the post office in an hour. Send your name and address via a PM please.
 

Attachments

  • IMG_4322_1.JPG
    IMG_4322_1.JPG
    332 KB · Views: 295
Last edited by a moderator:
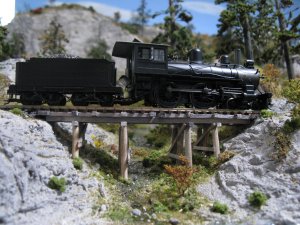
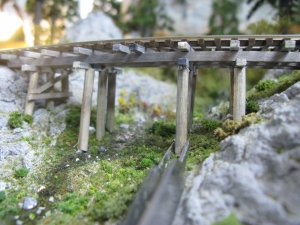
fcwilt, Actually it is a big deal. I've looked at the bridge and admired it for a piece of nice art, for lack of better example. You've pointed out something that I gave some, but not enough, thought too. We just can't have ties floating in air. :o

Someone can hunt for 'ties in the air' I'm sure they exist in the real world. I will go along with you and forsake an artsy bridge for a more practical one. Thanks, Jim:)

IMG_4322_1.JPG
 
Last edited by a moderator:
Toot, I need your address.

Next up: Super Trees The Ultimate Tutorial

What are they? How to 'do' them. Different techniques.

Maybe today, but probably tomorrow. Jim:)
 
Super Trees

When I started model railroading in the Fall of 2005 I had never heard of Super Trees. I pretty much stuck with Woodland Scenics products because my LHS carried them and they looked good to a beginner. I don't even know if Super Trees were in existence then. But somewhere along the line I 'discovered' them. Here you can see the good sized box and some of the tannish color trees themselves.

IMG_4323_zpsc2da8f91.jpg
Sorry picture cannot be found. Jim 12/26/17

Super Trees are available through Scenic Express. SE is not cheap, but they offer many scenery items seen all over the PCM&T Co. layout.

Probably the most interesting scenic improvement for model railroading is Super Trees. It grows in Finland or some place. One can make bushes large and small. Trees can be made. Good sized trees even in HO. I was never fond of lichen found on so many layouts built after WWII. Unless you made your own trees or had sage brush available lichen was about it for deciduous trees. Whenever I see it my eyes always saw lichen, not a tree or a bush. Super Trees has helped cause the demise of lichen usage.

I will show many ways to make convincing deciduous trees, bushes to.

Jim:)
 
Last edited by a moderator:
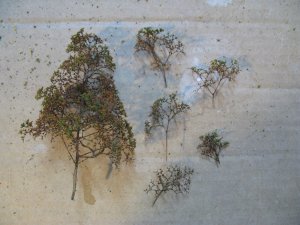
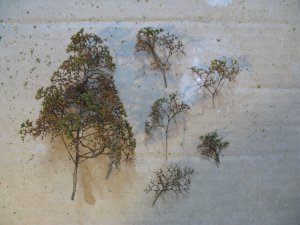
Next you need to spray paint some brown on your Super Trees. I use Rustoleum Brown Satin. Any brand any brownish or brownish gray color will do.

IMG_4399.JPG

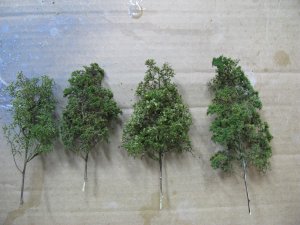
Most modelers tend to model mid-summer so I thought I would start with Green. Not all green is created equal however. Study these trees.

IMG_4397.JPG

On the left is the most common example of a Super Tree I see on layouts. This is the shaken method. I used a nice fine grained green and simply shook it on the tree. Naturally hairspray was sprayed on first. After the green is done another hairspray spray to fix it. Not a bad tree.

Compare the first tree with the second from the left, the one next to it. Bingo! Something is different. Color is a bit darker and you may see specks of yellow. (dead leaves?) Also this trees was rolled in the ground cover, which in this case was Woodland Scenics Green Blend. It is a medium sized grain. I like this look. It actually shows some resemblance to a tree in the real world. The 'leaves' for the most part are on the ends of the branches just like real trees. When you shake this stuff on a tree it attaches a bit to the limbs.

The third tree is a shaken, but could be rolled, tree. This time I used Woodland Scenics Light Green Coarse Turf. I get a different 'look' using this product. I could have used Dark Green or Burnt Grass color as well. In fact most "Green" seasoned layouts should not have all the same colors.

The last green tree is different again. First step was to roll it in WS Green Blend like the second tree. Then I sprinkled WS Dark Green Static Grass on the tree to form yet another tree.

The point here is that Super Trees can be done in many ways. Don't get trapped filling your layout with tree number one above. Experiment. Combine colors and techniques. Mother nature has all types of trees mixed in with the prominent tree of a given area. More later. Jim:)
 
Last edited by a moderator:
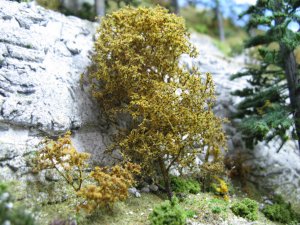

Next up is Late Summer. In most parts of the country the leaves just start to turn around Labor Day. Not for me in San Diego, just at this point now.


IMG_4400.JPG
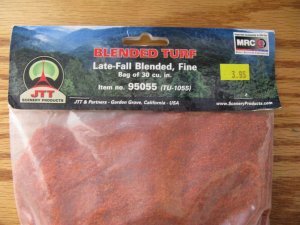
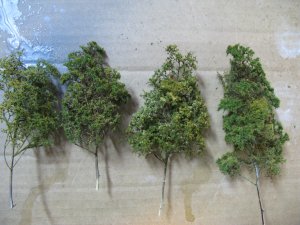
Here we can see just a touch of yellow on our four trees. On the far right tree I used WS Harvest Gold Static Grass. On tree #3 I used WS Coarse Yellow Grass. On the two left trees I used Autumn color from JTT.

Early Fall can be portrayed by simply adding more of the above colors. I start using more of JTT Autumn because it is not the gawdy red and yellow of WS Fall colors.

IMG_4398.JPG

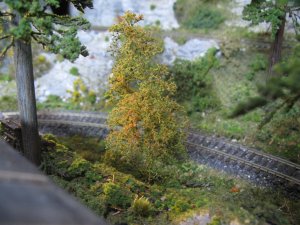
Many of you have this Fall look right now. I did this tree a bit different. I rolled it in WS Earth Blend. I only rolled it once and very lightly. Now you can see some of the green leaves, but most of the color is from JTT Autumn and JTT LateFall blend which gives a more reddish appearance.

IMG_4399.JPG

Not all deciduous trees are created equal. On this tree because of a light roll I've opened up the interior of the tree creating a lighter airy tree. Many things can be done with Super Trees.

Hint: In this last picture you see some 'branches' I plucked off. I recommend doing the tree with these ground covers and then pluck off some branches if you want. This way you've save a step by having some bushes already finished for you. Jim:)
 

Attachments

  • IMG_4401.JPG
    IMG_4401.JPG
    350 KB · Views: 359
  • IMG_4402.JPG
    IMG_4402.JPG
    404.3 KB · Views: 347
Last edited by a moderator:


Affiliate Disclosure: We may receive a commision from some of the links and ads shown on this website (Learn More Here)

Back
Top