ModelRailroadForums.com is a free Model Railroad Discussion Forum and photo gallery. We cover all scales and sizes of model railroads. Online since 2002, it's one of the oldest and largest model railroad forums on the web. Whether you're a master model railroader or just getting started, you'll find something of interest here.
You wanna see my workshed, I've got left over bits of wood and board stacked up that I've accumulated. Did a bit of a throw out while reorganising the garage the other day (with the aim of getting room to actually start on a round the walls layout) but you can bet in a week or two, there will have been something I'll wish I had kept.
I am now committed (or should be) as finally have lashed out on an NCE PH-PRO-R 5amp system (figured that if I was going to go DCC, do it as big as I could) (BIG gulp) so here goes with the framing.
All that said I just got back from the lumber store for a few items.
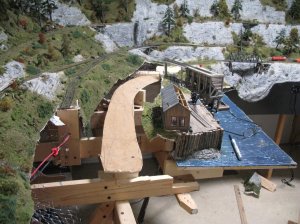
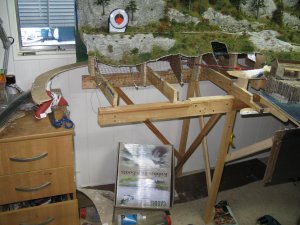
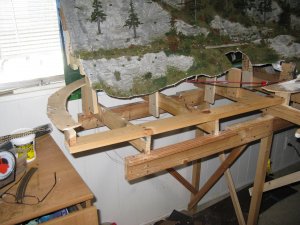
In this photo you can see how the subroadbed passes behind the pier now and below the middle track. From the middle track to this subroadbed will be the loop. Jim
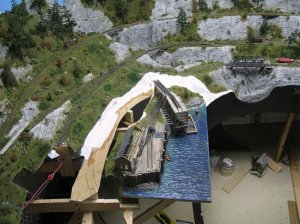
I got some cloth layed this morning. Just a start. I have to get the backside of the pier stablized so I can work on the trestle. There will now be a trestle bridge all the way to the middle track and a new bridge built beneath the middle bridge.In the bottom of the photo you can see I added a brace to the bottom of the pier and water. For those of you keeping score the water looks slanted; optical illusion. It is all level. Jim
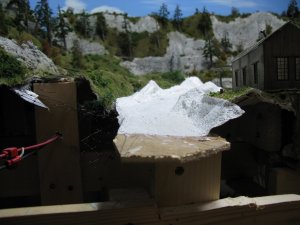
Plaster in place last night. Today this is all dried. I will put some WS Earth color on the plaster last night after the plaster cloth had dried a couple of hour.
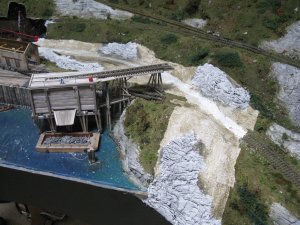
In this photo you see some stucco patch rocks. Jim
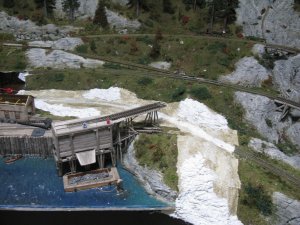
Here's the first wash of watered down WS Black. I will do about three washes. Because it is summer I will only have to wait an hour between washes. I use a spray bottle, not a brush, because these 'rocks' are not set yet. Jim
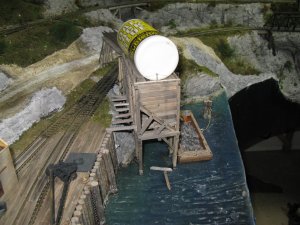
Crikey those rocks look real. But I gotta feel sorry for the little guy standing on the tipple. His arms are still frozen where he threw them up in horror when he saw you about to fall on him.
Thought I read something about the need to fit a desk in next to the layout....led to this remodeling project.....but I could be wrong. I'm sure it will turn out beautiful as ever.
Mike, These photos may not be clear. Remember I moved the tipple scene closer in from the end of the layout. That old area is not showing up in these photos. I took the advice of my wife and a poster to just build the track over the desk. I'm not that type of guy, but I will give it a try. The desk may get shorten in the long run however. For now this photo may help. Jim
More clues to the final outcome are revealed. Are you able to move the end of the loop closer to the layout so it's not overhanging your work bench as much?
the "water" level has created it's own problems to a certain extent (although an advantage over the bench) as it determines the lowest point horizontally that "land" scenery can descend to. Below that you can only have fascia (and an upstand from the benchtop to close the gap)
To me the loop looks like a golden opportunity to create a headland with the track dissapearing around and behind where it could be continuing on into another bay. This could be accentuated by having the "sea" also right around the lower edge of the "land" from end to end. Also a nice easy level top to the fascia.
Yep, More clues. Tomorrow I will post a photo of the subroadbed in its actual position over the desk. Right now I'm reconstructing the tipple. I'm not sure this isn't a harder job than building it. Jim
Here is the promised photo of the subroadbed over the desk shot. While this track won't be too much of a bother there will be scenery on the left that will make this encroachment more of an issue. Jim
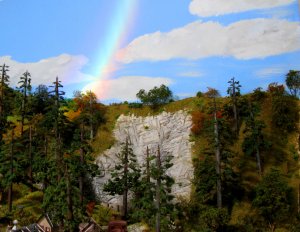
Here's a photo of something that might be of interest. I was working on the other side of the layout and turned an saw this rainbow. Probably coming through the prisms of my skylight. Jim
Thanks guys. Here is some news. I'm going to ballast the loop I'm working on. In theory it is a 'mainline' even if it is part of a Class 3 or worse railroad. More later and of course it will be ballasting Jim's way and maybe not your way. So stay tuned for that.
In the mean time, and still talking about track laying and ballast, I looked through the thread studied my method for ballasting mining and lumber track. It is all there, but I think we can go a bit deeper into the subject. Remember that I've mentioned that these old time settings couldn't afford much in the way of ballast so they let there locos sink the track and that was the ballast job.
I thought I would show you mining and logging layout folks how to "sink" your track thus not using traditional ballast and raised track methods. In the photo below you see the joining track to the ore tipple from the rest of the layout. You see one of my new left hand #4's and a trimmed piece of standard 15" radius Code 83.
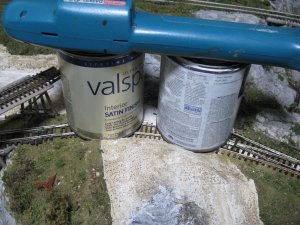
First thing I do is pour some Woodland Scenic Foam Tack Glue. I lay the track on top of it and add weight, over night at a minimum, and go on to another project while this is drying. Jim
Back to work. I had to do an additional 24 hours of drying time on the turnout curved track area showing to the left of the paint can. Anyway, now we have to make this mine track 'believable and functional.'
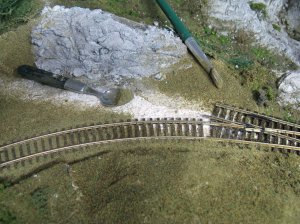
You need your ground cover to fill in the ties. I like a spoon for better control. I use a brush to get most, not all, of the ground cover off the rail sides. I don't want the ties covered so I use my thumb to do a final wipe and settle the ground cover just below the ties. Here you can see the finished on the left of the curve and what is to be done on the right side. I don't bother to worry about the plaster cloth being all covered, as it will be covered by the groundcover. Jim
Next you simply need to fill in the blanks between the ties. Don't forget the turnout. Nothing more unrealistic in my book than not paying close attention to the turnouts.
Not gluing them down is one thing, but doing it my way anchors them, for later removal, but more importantly makes them look more realistic. Notice the ties are not quite as filled as the regular track however.
Turnouts or risky behavior! I'm known for pushing the envelope and developing updated techniques to the average 80 year old modeling techniques I see every day. I give full respect to our forebearers in the scenery concept area, but picking up any 'scenery' magazine from you LHS is still a rehash of techniques from the 1920's-1930's. Only real difference is color photographs. The reason of course is so you can take the turnout out if you have to. What? What? If you put a turnout in carefully in the first place why would ever want to remove it? So mine, obviously, buck the old trend and are perminent fixtures just like track. Trust me with a long blade Exacto knife you can get your turnout up and out if you need to. In 4 layouts I've never had an issue! The reason I didn't glue the turnouts down in my first layout was because I knew nothing and followed the books. A nonrailroad neighbor came over said why don't you add ballast to the switches? They kind of stand out. That was it for me.
Let's take a look at turnouts. Tough to find many/any 'how to' books that say, "Sure go ahead and glue your turnout/switch down to the layout, no problem." Naturally, I've come to the realization that this theory is bunkum! Why not? Trust me I've read more about this subject than I want to admit and it is all a rehash of articles from the 1930's issues of Model Railroader Magazine. Time to move on I say.
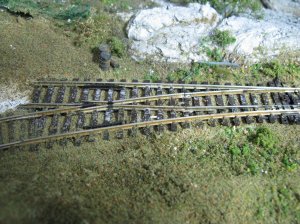
On all of my layouts, except the first one, I put a dab of WS Foam Tack glue down to simply hold the turnout in place. I don't use the same technique I use for track, ie. a bead of glue down the roadbed and weights on the track over night. Once the two or three dots of glue have 'fixed' my turnout in place then I add my ground covers. Which leads us to this photo: Althought there is glue on the tracks I simply wipe it off with my thumb or finger I took this photo before wiping.
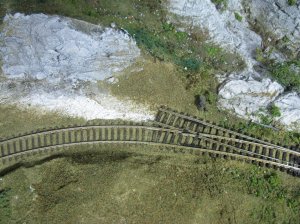
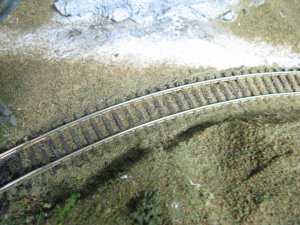
Here you see the same technique as regular track except I don't quite add as much ground cover/ballast as I do to regular track. I add Joy to the glue and carefully eyedropper it in between the ties. Let try with weights over night. Finally the pic below shows the curve fully 'ballasted' and sunk into the ground. I've even added a first layer of shaken WS Static Grass. To sum up. If you want to 'sink' your track realisticly simply add a lot more ground covers to the top of the ties. Jim