Building the Pinnacle Creek Mining & Timber Co. RR

ModelRailroadForums.com is a free Model Railroad Discussion Forum and photo gallery. We cover all scales and sizes of model railroads. Online since 2002, it's one of the oldest and largest model railroad forums on the web. Whether you're a master model railroader or just getting started, you'll find something of interest here.


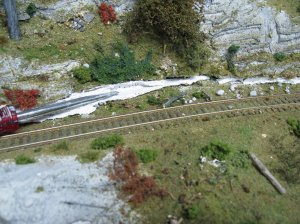
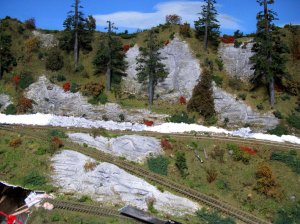
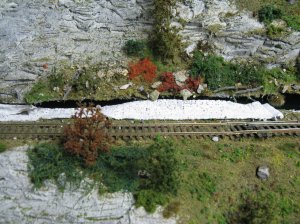
Time to fill in the gap. I tried to apply plaster cloth over the back of the long gap. Either I'm too old or too fat, but I seemed to lack the dexterity to do it they way I wanted to. So I used the plaster cloth and filled the gap from the front.

The purpose using the cloth is to keep the backdrop from flexing back and forth thus opening up this gap. I will let this plaster cloth dry and I will use some stucco patch from the back and seal it up. This should do the trick. I haven't quite figured out how I will blend the raised cliff gap into the scene yet. More thinking.
IMG_3906.jpg

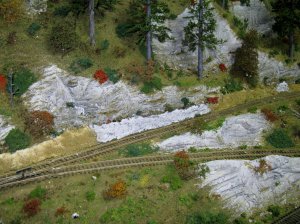
In this photo you see the cloth actually built up to close the gap.

IMG_3907.JPG

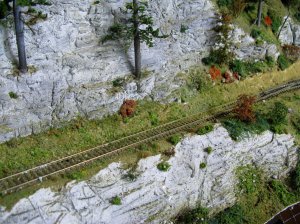
In this last photo you can see I had to stuff the cloth into the thinning gap. I use a flat head screwdriver for this. In fact instead of using my fingers I use the screwdriver to push the plaster cloth up against the rock above the gap and generally press down to attach the cloth to the scenery. Jim:)

IMG_3908.jpg
 
Last edited by a moderator:
Hey Jim, Lee Barry ,
Did you ever think you should 've let it be as it was ? Just asking. Kinda reminds me of trying to get that damned radiator out of my 2003 Ford Taurus and then the new back in. Wish I'd never started the project. The easier it started the harder its become. Don't know if I can 'member where all of the bolts, ect. go back to.
 
Time to fill in the gap. I tried to apply plaster cloth over the back of the long gap. Either I'm too old or too fat, but I seemed to lack the dexterity to do it they way I wanted to. So I used the plaster cloth and filled the gap from the front.

The purpose using the cloth is to keep the backdrop from flexing back and forth thus opening up this gap. I will let this plaster cloth dry and I will use some stucco patch from the back and seal it up. This should do the trick. I haven't quite figured out how I will blend the raised cliff gap into the scene yet. More thinking.


In this photo you see the cloth actually built up to close the gap.
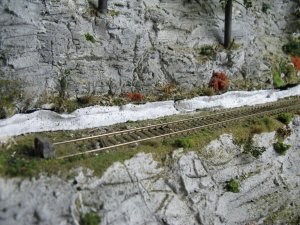


In this last photo you can see I had to stuff the cloth into the thinning gap. I use a flat head screwdriver for this. In fact instead of using my fingers I use the screwdriver to push the plaster cloth up against the rock above the gap and generally press down to attach the cloth to the scenery. Jim:)

That should work OK Jim.


Mike


Thanks Mike for looking in. I going to use a mixture of WS Foam Putty and Stucco Patch on the 'seam.' It should come out ok. Jim
 
Lee, You are correct the layout was as good as I could make it. The model railroaders at my open house said much the same as you, why change? I guess the problem if there is one is because a few things. First, I'm a runner not an operations guy. Thus I suppose it was only a matter of time before I tried to figure out how to put a loop on the layout. I will still have some operations. Actually with another train on the track operations will be even more challenging and rewarding. Second, I simply like to build layouts. Can't help it. I saw a possibility here and I'm taking the chance. Jim:)
 
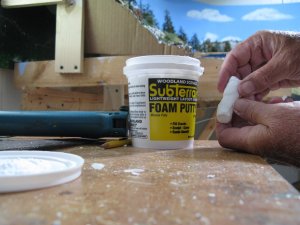
Next up is filling the gap. I've already put some plaster cloth in it thus joining the cliff back to the wooden track sub roadbed. Now it is time to add some Woodland Scenics Foam Putty. I've used many tubs of this stuff and I use it because it works. Many of you have put a dab on you finger or knife and rubbed on your layout. Or you made some big dabs on a cliff and made rocks. This is great stuff for carvers.

Let me show you another technique for better use of Foam Putty:
IMG_3909.JPG

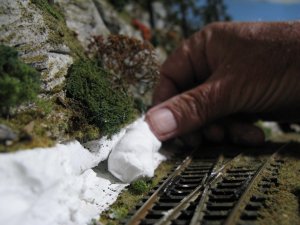
Notice that I rolled the putty into a roll. Simply form a roll in your fingers and thumb. For larger areas, larger rolls. For the skinny spots use a skinny roll.

IMG_3910.JPG

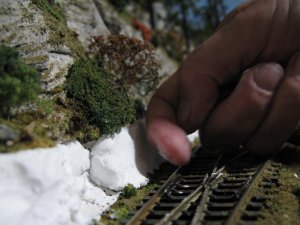
Stick the roll into the gap or on a cliff side or even a flat table top. Spread with your dry finger. HINT: After rolling fresh Foam Putty it starts sticking to your fingers as they absorb mosture from the putty. Dry your finger when you finish rolling with a paper towel.

After a while your fingers have real difficulty drying even with the paper towel. Don't despair! HINT: Use the back of your fingers to press in the putty and make forms. Harry fingers? Even better, the hair insulates your skin.

IMG_3911.JPG

When you are finished let dry over night. Jim:)
 
Last edited by a moderator:
Excellent schooling for a dummy like me. Who knows I may try to make a small diorama to use my 5& dime store on when I get it. Keep up the fine work. Lee
 
I'm rounding third (maybe it's second, I dunno) on my first diorama. There's a lot to developing your own techniques. The directions are usually pretty generic and tell you, but don't really teach you how to do things. Anyhow, thanks for the tips Jim!
 
As you know I'm a "runner" too. Too much work to do the other. Model railroading is suppose to be fun, when you start "working" on the running part then it gets too much like work, but to each his own. I have belonged to clubs, here and around Athens/Atlanta,Ga. that believed in nothing but the theory that "toy training" is suppose to be just a minuature of the real thing. Not for me Bro.


Thanks guys, always happy to help.

In the next photo you can see I've put the first spray of watered down Woodland Scenics Black. I use a spray bottle instead of a brush. Spraying seems to get into the cracks better. Jim:)

IMG_3912.jpg
 
Last edited by a moderator:
Here I've added some WS Earth color to the dried WS Foam Putty. While it was wet I shook some WS Earth Blend ground foam and let dry. The initial shake of ground foam will not necessarily cover the putty with one shake. I do it this way to have some bumps of foam on the putty so that when I spray with glue next I will have something on the putty that will allow very good coverage. Jim

IMG_3913.jpg
 
Last edited by a moderator:

Hi Jim, Glad you like it.

This photo shows a couple of things. I finished the bank below the rock cliff. The finished part is drying and you may notice some splattering of materials on the cliff. I will vaccum that off tomorrow.

Also because I lowered the track bed about an inch here I will add many more rocks to the bank to show natural accumulation of falling rock thru the years. I will also add bushes tomorrow after I vacuum. Jim:)

IMG_3914.jpg
 
Last edited by a moderator:
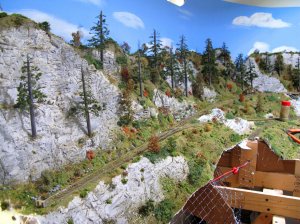
1st phase of the redo is finished. Here's a photo of the lowering of the top track and subsequent new scenery. Now comes the hard part figuring out how to put a tunnel in this low relief area below the turnout. The new grade on the upper track beyond the turnout is 2 degrees. Jim :)

IMG_3915.jpg
 
Last edited by a moderator:
Thanks Lee. I'm trying to figure out how to make the middle track go into a tunnel. I'm thinking of having it going down a bit and raising the area near the turnout. This is going to be a tough one. Jim:confused:
 
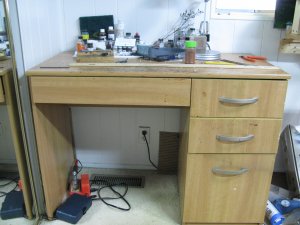
Hi all, I need some input please. I have this great desk/workbench.

IMG_3916.JPG

It is sturdy and perfect for my usage. I have a problem. With the new redo of the layout everything will work out better if I have an extra 7 or 8 inches on the layout end. That would put it over my desk and inch or two.

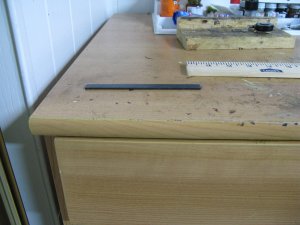
My question is: Have any of you ever made a desk less wide? I'm thinking of sawing out a 6 inch section. Of course I would have to do the drawer as well. The desk is 42 inches and I'm sure I could live with 36 inches. Will the desk become too weak or sag? I will put adequate bracing on it. I was just wondering if anyone has had this experience.

IMG_3917.JPG

I would cut out the area of the black plastic thing at that spot. Jim:)
 
Last edited by a moderator:
It looks like more of a pain than it's worth. Can it be turned or relocated?

BTW- You're very brave putting your work bench over a vent. I'd loose everything down it.


Affiliate Disclosure: We may receive a commision from some of the links and ads shown on this website (Learn More Here)

Back
Top