Weathering Rolling Stock, a Continous thread


Tom O - Thanks for your blessing to continue this discussion. RCH has been quite informative as he has been explaining some unknown stuff about the area that I railfaned in for over 40 years.

I worked alongside the Frisco main line less than a mile SW of Tower 77 and the triangle; although the tower was gone by the time I started working there. In the days before UP scooped up the MKT, and SSW, and BN absorbed SLSF, railfanning at the triangle was most interesting. Early on, congestion spilled over to the vehicle traffic on Belt Line Road and the I-35E frontage roads. That whole triangle actually occupied less than a whole acre, but it still exists. The Cotton Belt line east is now leased by DG&NE, and leads to the KCS yard in Wylie (among other places). The line west of I-35E is used by FWWR to reach Ft Worth. The MKT line was purchased by DART and mostly supplanted by their light rail, with the section north from Carrollton to Denton leased to DCTA commuter rail. Some of the old MKT line still exists to serve local rail customers. The Frisco line that ran alongside the business that I worked at is still a very busy line for BN and now BNSF headed to Whitesboro. I spent many hours staring out the windows watching traffic on that line. It was there that I first saw Frisco crews do a "flying switch" (many times) to service industries on the other side of the tracks. That ended in 1980 when BN took over.
Today, my primary area for watching is the Alliance to OKC stretch on the BNSF. I have probably seen you there unknowingly.
Willie, really no issue. While I generally don’t enjoy threads being derailed but RCH didn’t derail. If someone really derails one of my threads I will let them know by messaging on the forum mail. But, not needed on this one. I enjoy listening and reading from knowledgeable people.

As far as I am concerned he has enhanced the thread with his knowledge. I feel honored he tossed it in. As I mentioned previously I am intrigued by the area and even passing by on I35 takes me back to traveling the Chicago expressways back as a kid. Traveling to Michigan through Gary, Indiana always had my nose pressed up against the windows to look at all the steel industries back then. Those blazing furnaces I still can vividly picture. I sort of get that feeling going through StLouis with so many closed up plants along the Riverfront, traveling past the grain facilities in KC and just trying to figure out what tracks are below I35 in FW. Of course I love Google Earth and use it often in our travels and after.

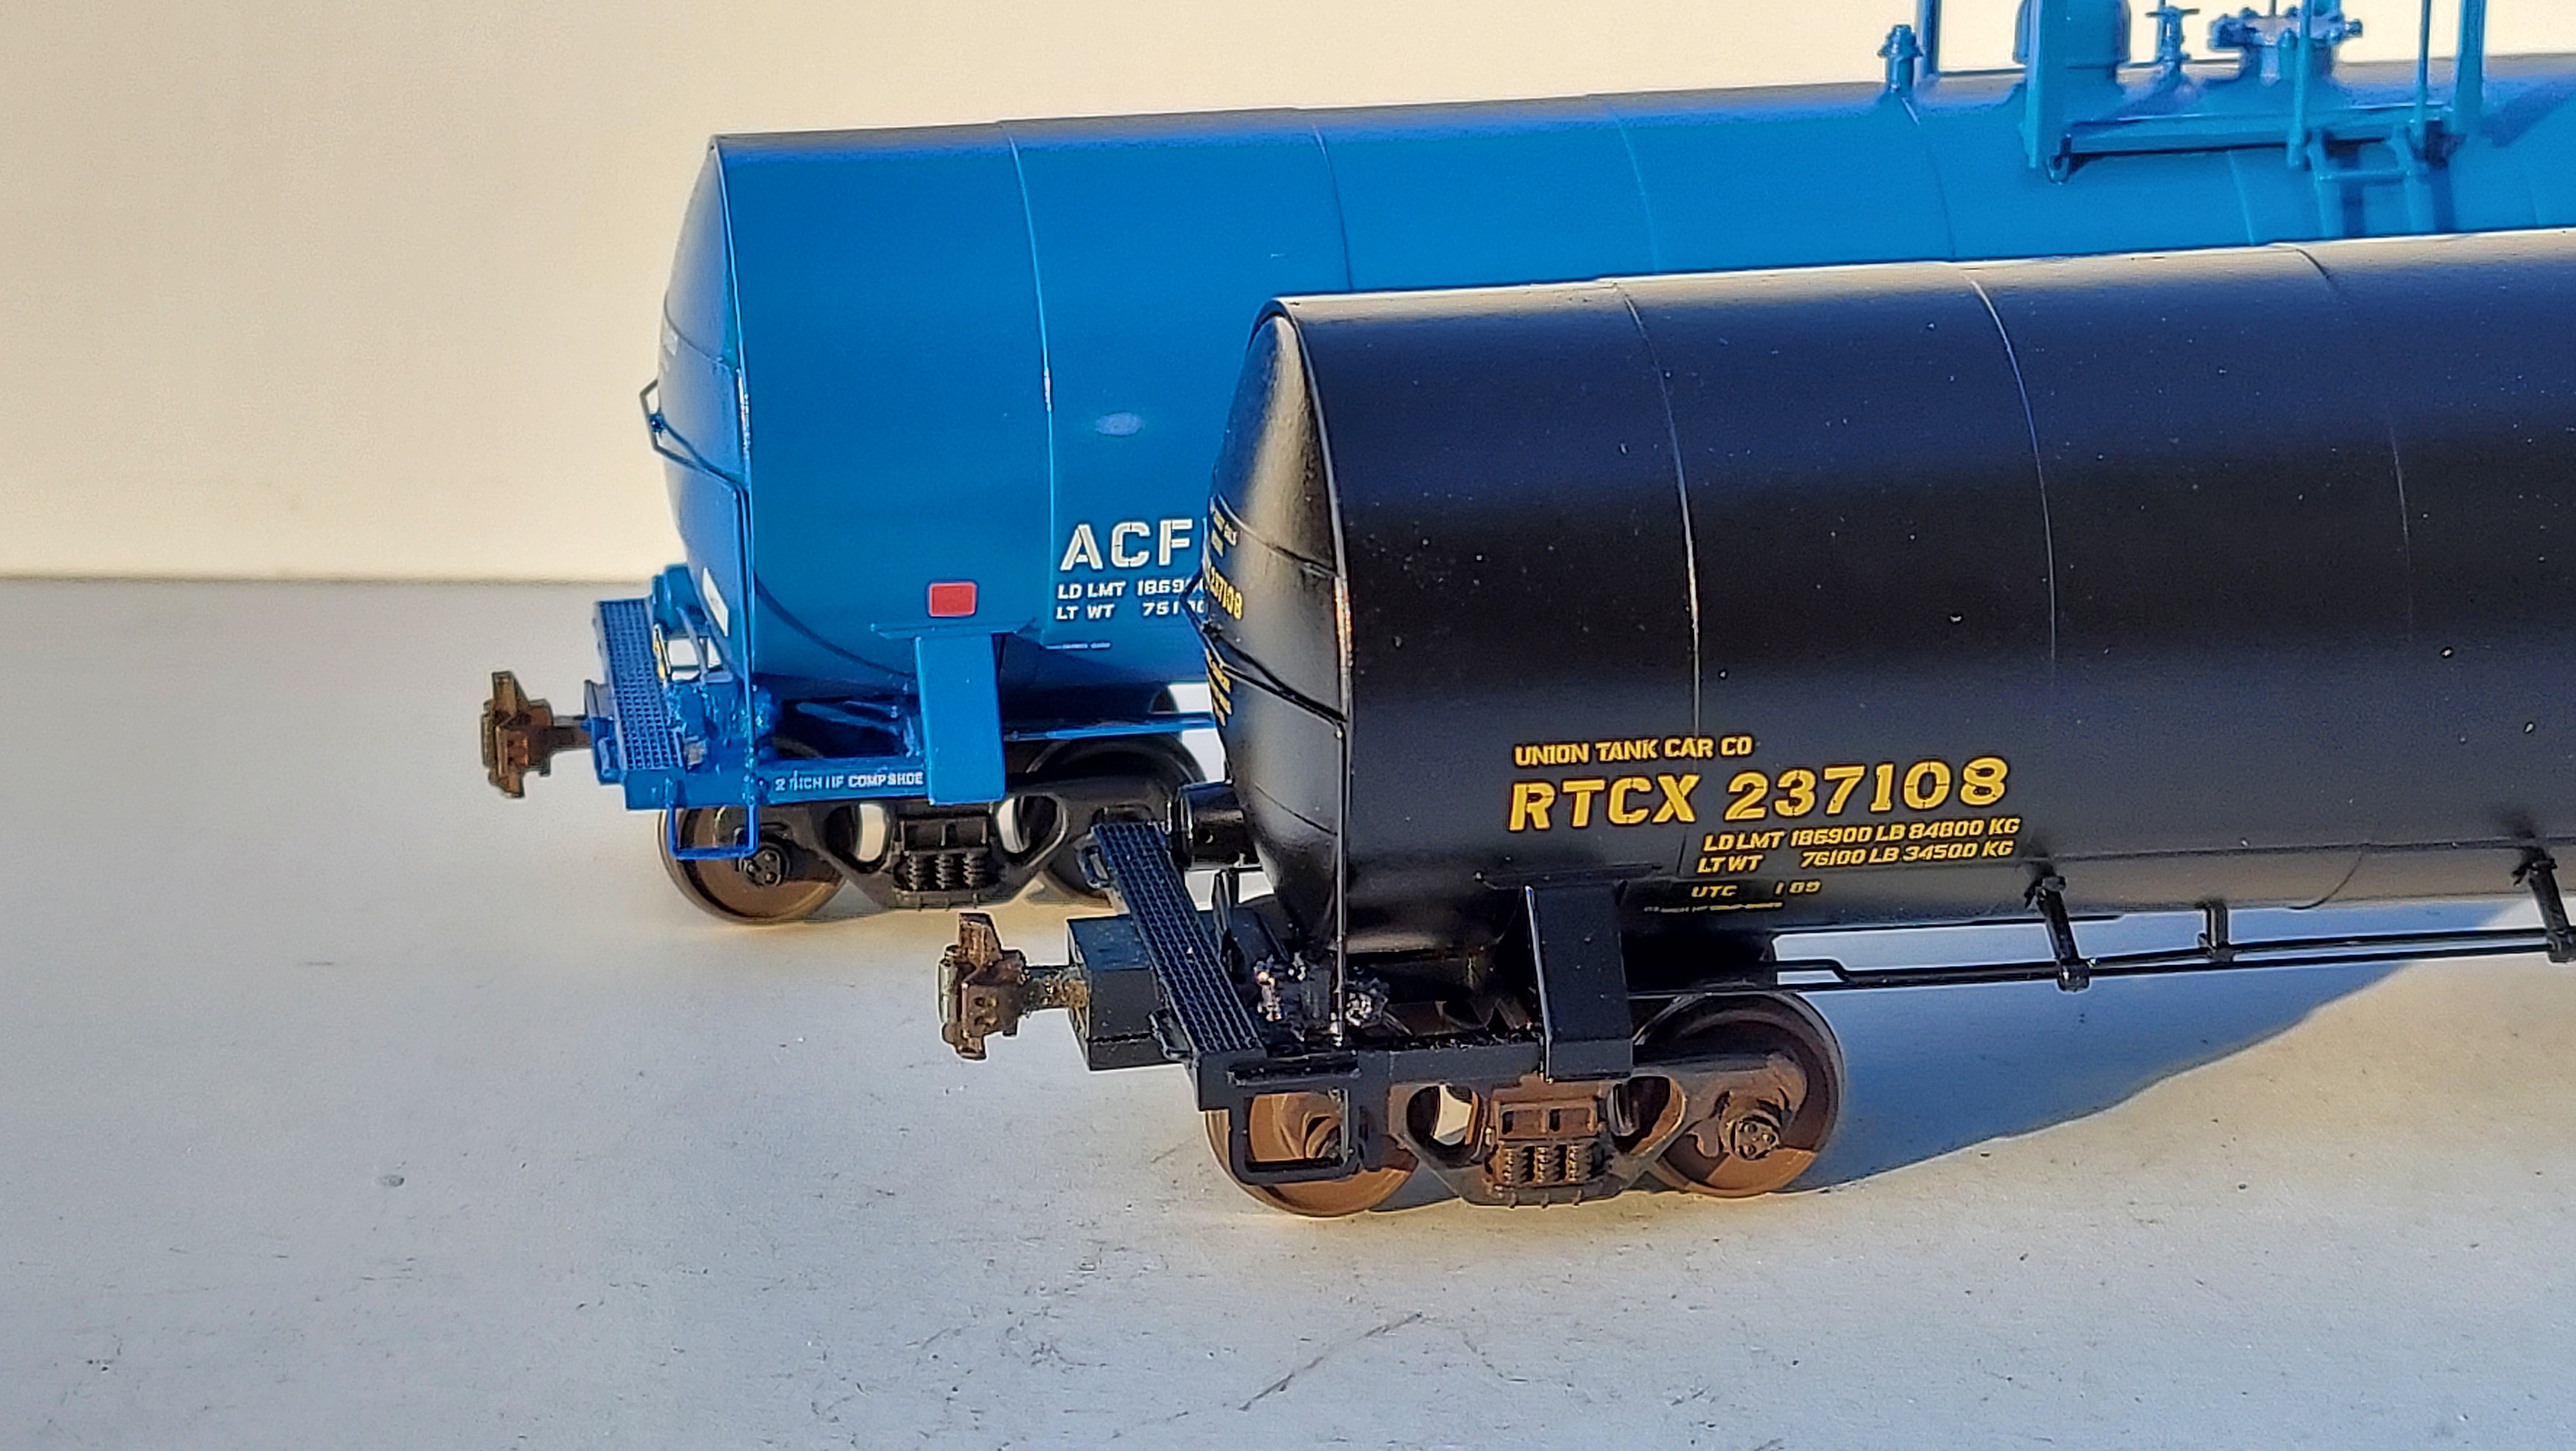
RCH, thanks again. Get your information ready for when I start doing the 2 bay covered hoppers for sand that I have to do. I have a client who threatened me last year with 20 cars, that I had to say no to at the time. He wrote last week asking when he can send them.

I missed it until I noticed the pictures of those UP Water Cars were taken from the inside of a locomotive. Are you able to say who you work for?
 
Tank car #1 done. Earth tone airbrushed then some grimy black to tone it down some, it also gives the coupler a rusty/grim look.
The electrical cabinets are painted with Vallejo flat aluminum. First time using it and like it.
IMG_5790.jpg
IMG_5791.jpg
IMG_5792.jpg
IMG_5789.jpg
 
Tom O - Thanks for your blessing to continue this discussion. RCH has been quite informative as he has been explaining some unknown stuff about the area that I railfaned in for over 40 years.

I worked alongside the Frisco main line less than a mile SW of Tower 77 and the triangle; although the tower was gone by the time I started working there. In the days before UP scooped up the MKT, and SSW, and BN absorbed SLSF, railfanning at the triangle was most interesting. Early on, congestion spilled over to the vehicle traffic on Belt Line Road and the I-35E frontage roads. That whole triangle actually occupied less than a whole acre, but it still exists. The Cotton Belt line east is now leased by DG&NE, and leads to the KCS yard in Wylie (among other places). The line west of I-35E is used by FWWR to reach Ft Worth. The MKT line was purchased by DART and mostly supplanted by their light rail, with the section north from Carrollton to Denton leased to DCTA commuter rail. Some of the old MKT line still exists to serve local rail customers. The Frisco line that ran alongside the business that I worked at is still a very busy line for BN and now BNSF headed to Whitesboro. I spent many hours staring out the windows watching traffic on that line. It was there that I first saw Frisco crews do a "flying switch" (many times) to service industries on the other side of the tracks. That ended in 1980 when BN took over.
Today, my primary area for watching is the Alliance to OKC stretch on the BNSF. I have probably seen you there unknowingly.

The construction of the DART Silver Line is well under way on the former Cotton Belt from DFW airport through Plano. I'm not sure what this means for the Fort Worth & Western or Dallas Garland and Northeastern. I live near the former Cotton Belt northeast of Fort Worth and I can't recall the last time I saw a freight train on the line since it's been rebuilt for the TexRail commuter cars.

I took a trip out to Carrollton a few months ago and got these photos of the former Tower 77 area from the DART station platform. It gives a nice perch to view the area but it also obscures the view of the triangle. Looking east:

original.jpg


The triangle, with the former MKT from lower left to top center, BNSF/former Frisco from upper right to left middle and former Cotton Belt now DART Silver Line lower left to lower right:

original.jpg


Looking west:

original.jpg


That tank closest to the camera shows the condensation rust I was talking about. That track is where you could find Southern Pacific and Cotton Belt locomotives idling away in the days before the UP merger. The multitude of flyover highways in this photo is fairly new. In the years Willie is talking about there was one bridge looking west -- I35E -- and the rest was surface streets. A fun place to take a heavy train!
 
Tank car #1 done. Earth tone airbrushed then some grimy black to tone it down some, it also gives the coupler a rusty/grim look.
The electrical cabinets are painted with Vallejo flat aluminum. First time using it and like it.View attachment 159886View attachment 159887View attachment 159888View attachment 159889

I love that flat aluminum!

Those Kadee shelf couplers are not a bad approximation of the SF couplers the prototype car has. SF couplers are huge compared to SE couplers, which are the standard double shelf couplers you see on tank cars today. SF couplers were used on tank cars built in the 70s. I can't give an exact date range but '72 to '78 inclusive and likely earlier up to 1970. I'm not sure when the change was made in 1979 but by 1980 SE couplers were standard. The draft gear for E and F couplers is completely different, so it's not a simple matter to swap out couplers on the real thing; however, E, SE, and SBE couplers are interchangeable with each other as are F and SF couplers, so you occasionally might see a car with mismatched couplers as long as they are both E or both F.

These cars have Sergent SE couplers:

original.jpg


And this one has Sergent SF couplers:

original.jpg
 
The construction of the DART Silver Line is well under way on the former Cotton Belt from DFW airport through Plano. I'm not sure what this means for the Fort Worth & Western or Dallas Garland and Northeastern. I live near the former Cotton Belt northeast of Fort Worth and I can't recall the last time I saw a freight train on the line since it's been rebuilt for the TexRail commuter cars.

I took a trip out to Carrollton a few months ago and got these photos of the former Tower 77 area from the DART station platform. It gives a nice perch to view the area but it also obscures the view of the triangle. Looking east:

original.jpg


The triangle, with the former MKT from lower left to top center, BNSF/former Frisco from upper right to left middle and former Cotton Belt now DART Silver Line lower left to lower right:

original.jpg


Looking west:

original.jpg


That tank closest to the camera shows the condensation rust I was talking about. That track is where you could find Southern Pacific and Cotton Belt locomotives idling away in the days before the UP merger. The multitude of flyover highways in this photo is fairly new. In the years Willie is talking about there was one bridge looking west -- I35E -- and the rest was surface streets. A fun place to take a heavy train!
We started driving i35 down to Austin as those miserable flyovers were being built. Sometimes it was easy travel but others we just sat. Now it’s a breeze traveling through. So this is a more normal view from what I see from the highway.

I do to get there and visit
 
Tank car #1 done. Earth tone airbrushed then some grimy black to tone it down some, it also gives the coupler a rusty/grim look.
The electrical cabinets are painted with Vallejo flat aluminum. First time using it and like it.View attachment 159886View attachment 159887View attachment 159888View attachment 159889
Nicely done Tom from NY State. He he!

Nice and subtle plus very convincing without all the hub bub of my car. Many ways to weather models that are convincing. Thanks for sharing.

The electrical cabinets are superb.
 
I love that flat aluminum!

Those Kadee shelf couplers are not a bad approximation of the SF couplers the prototype car has. SF couplers are huge compared to SE couplers, which are the standard double shelf couplers you see on tank cars today. SF couplers were used on tank cars built in the 70s. I can't give an exact date range but '72 to '78 inclusive and likely earlier up to 1970. I'm not sure when the change was made in 1979 but by 1980 SE couplers were standard. The draft gear for E and F couplers is completely different, so it's not a simple matter to swap out couplers on the real thing; however, E, SE, and SBE couplers are interchangeable with each other as are F and SF couplers, so you occasionally might see a car with mismatched couplers as long as they are both E or both F.

These cars have Sergent SE couplers:

original.jpg


And this one has Sergent SF couplers:

original.jpg
RCH. I guess you have reminded me to change the couplers on the tank cars I will keep for myself to the shelf type. I had looked into Sergant couplers but heard they were finicky to put together and install. The new open source type though I read are very easy retro fits. The ones you show look great.

Is that your weathering? Looks great

These are my next set of tankers to weather and they are for me, yes they are green
EFC7510E-D9AC-4C01-8972-528B6424A90D.jpeg
 
Sergent couplers are definitely not for the faint of heart! I don't know how the new couplers are from Innovative Models, but I might find out next week when I visit a friend who just got some.

I converted my fleet over in 2013 or so with a few bulk packs of couplers and lots of dummy couplers. Now the dummy couplers just stay on unit trains and the working Sergent couplers go on everything else.

This is how that tank car started out:

original.jpg


It is an Atlas clay slurry tank car which is a decent match for some phosphoric acid tank cars built around the same time. It has the signature ACF features of the time, which include a control valve and reservoir at the A end and the handbrake at the B end. Speaking of the control valve, I was not happy with it at all so I 3D printed a few ABDX valves through Shapeways and installed them on the three tank cars in my post above. This is a before photo of the control valve, which is really just a lump shaped like a control valve.

Here the car is stripped and repainted with a new control valve and reservoir:

original.jpg


Now I'm adding decals and cobbling together "PHOSPHORIC ACID" from a couple other labels:

original.jpg


Decals are complete, I've replaced the stirrups and flowed some panel line accent into the crossover and manway platforms:

original.jpg


These phosphoric acid cars can get filthy, especially if they've been around for awhile, so I picked out some prototype photos and did some damage:

original.jpg


original.jpg


original.jpg


original.jpg


The area where we spot these cars has some caliche gravel driveways alongside and over the tracks so mud is always splashing up underneath as we switch the cars. I tried to get a little of that on the trucks.

From what I understand the molds for these cars have been damaged so Atlas is not likely to run them again. The last run was in 2003.
Thank you for showing these. I just got 1 of 3 Genesis slurry cars in from the LHS. The last of the rolling stock I need for the paper mill. I will wait for all 3 to get here before weathering.

Interesting that slurry Atlas cars are a good match for the acid car you want.
 
Interesting that slurry Atlas cars are a good match for the acid car you want.
Well they aren't exact. Modeling tank cars of a certain era you have to take what you can get. They are outwardly similar in length, barrel diameter, fittings, saddles and brake arrangement. That checks a lot of boxes for me!

You can see differences between the clay slurry car and the phosphoric acid car looking at these two photos:


We also spot a customer who gets kaolin slurry so I might need to grab another one of these or if the Athearn car works for me one of those.
 
A lot of times those trapezoidal footings are used where three ground freezes and thaws regularly. The base wider at the bottom locks it into the soil and prevents frost heave, which could throw the shanty off kilter and damage the signal cabling.
Here in Wisconsin foundations need to go below the frost line. A flat slab can float and that maybe what CN uses with flexible connections. I suppose feet can be done the same
 
SMUDGE617 I saw in the diner you are frustrated with your practicing.

We are here to help. Thank you for the compliment in the diner but one thing you may have read somewhere in the 35 pages of this thread. When we all started out it wasn’t easy. When I came back to my airbrush in 2014 I couldn’t get paint to spray out of the airbrush. Why do I now have 7 airbrushes? Because I thought it was the equipment, not the operator. I now only use 2 for weathering and 1 for clear coating.

Play with the PSI. Play with the adjustments on your air brush. Thin your paint more, or maybe less. It’s an experiment but jot down the things that are working for you. Light coats, layer, layer! Let us know…
 
Last edited:
SMUDGE617 I saw in the diner you are frustrated with your practicing.

We are here to help. Thank you for the compliment in the diner but one thing you may have read somewhere in the 35 pages of this thread. When we all started out it wasn’t easy. When I came back to my airbrush in 2014 I couldn’t get paint to spray out of the airbrush. Why do I now have 7 airbrushes? Because I thought it was the equipment, not the operator. I now only use 2 for weathering and 1 for clear coating.

Play with the PSI. Play with the adjustments on your air brush. Thin your paint more, or maybe less. It’s an experiment but jot down the things that are working for you. Light coats, layer, layer! Let us know…
All that and you have to get a feel for distance. How far you have the airbrush away from what you are spraying and how much is coming out. If you notice in my pics the news paper has lots of test spray spots. I adjust the flow for what I'm doing before it hits the model. I've never been much on thinning the paint but that could be the type of airbrush I have. I've never used powders up until 2 years ago when certain paints were becoming hard to find. Now it's a mixture of both which I end up using less paint, plus the powers are nice in those hard to reach places.
Thank's TomO, I appreciate that, I have (had) the bad habit of thinning the paint to much and ended up with very watery looking paint when applied, I stopped thinning the paint at all now, as I mostly use Vellejo air paint I don't need to thin it (according to Vellejo's bumpf anyway), that seems to be working. Although I'll thin it for something like a fading effect, but I'm a long way away from trying that.

My frustration was that I couldn't get an even initial coat, I wasn't trying to weather it, just change it from a dark colour to white which would make it easier for me to see the weathering effect, and practise different techniques as CambriaArea51 has mentioned, how far away I need to be to create a different effect without overpainting it, as well as how fast or slow I need to move the airbrush at different pressure settings to get that effect I'm looking for.
I occasionally thin Vallejo Paints but it depends on what I am trying. My main go to base coating paint now is Tamiya Arcylics but that was after years of trying other things. You will get there and the frustration is understandable. Lots of good “how to airbrush“ tutorials out there on You Tube

I see Alan responded in the Diner
 
Last edited:


Back
Top