
twforeman
Certified Great Northern Nut
I think these cars look neat, and I decided I needed one on my railroad. The Great Northern actually had a handful of these, but they bought them in the 60's so they are not quite the right vintage for my layout.
But my layout, my rules, so I'm going to back-date one to 1958 and pretend.
Of course you can't get one painted for GN, and certainly not one with a 1958 build date, so I bought one painted for ATSF and decided to paint and decal it.
One issue with the Walthers kit is that the insides of the doors and ends have prominent ejector pin marks (the circles) and retainer pin holes.
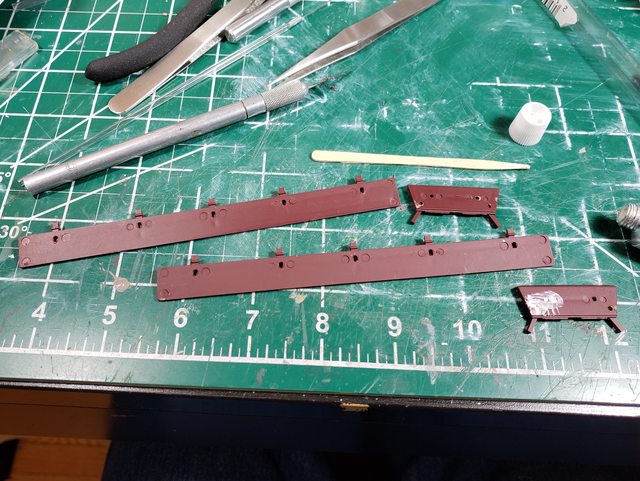
So I needed to fill and sand.

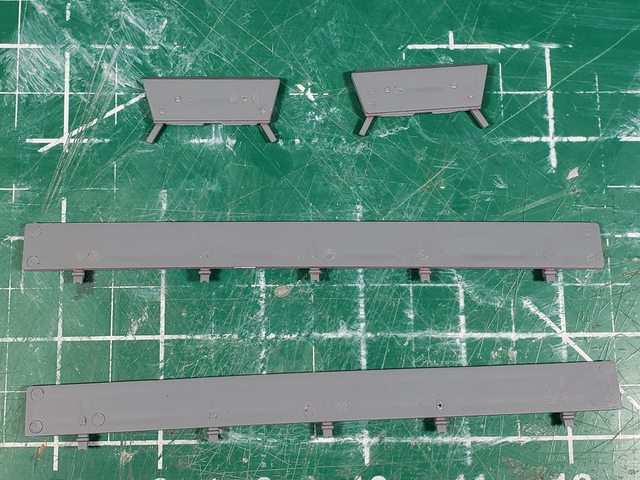
Then I decided I should probably strip the paint so the existing markings don't show through. This is where I realized I'd made a mistake.
Pro-Tip: you should strip the paint before filling the holes.
I soaked the parts in alcohol and scrubbed them with a toothbrush, which worked great. Unfortunately it also messed up my careful hole filling so I had to fill and sand again. Oh well, lesson learned (maybe.)
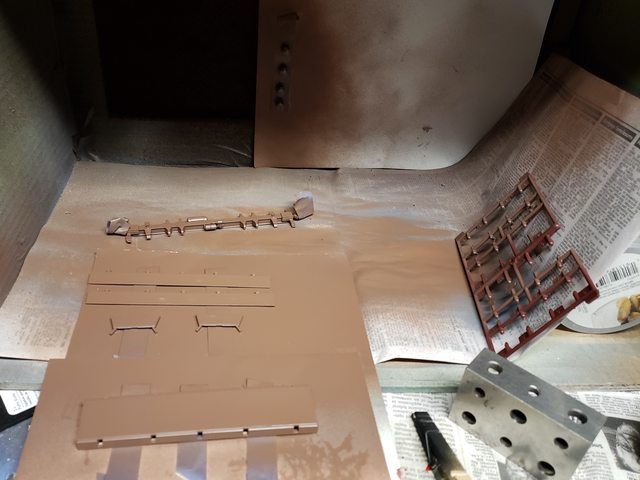
After refilling the holes, I hit the parts with some primer.
This showed me that I still had some work to do, so I filled and sanded yet again. Then I primed them again and now they look pretty good.

After the primer dried I hit all the parts with some Chestnut Brown Rust-Oleum. It's pretty close to box car brown. It looks lighter in the photo, but it's pretty dark actually.
I let it dry a full day before flipping the parts over to paint the other side.
Next up will be decalling. I hope the GN decals I have will fit between the ribs on the sides. We'll find out in our next installment.
But my layout, my rules, so I'm going to back-date one to 1958 and pretend.
Of course you can't get one painted for GN, and certainly not one with a 1958 build date, so I bought one painted for ATSF and decided to paint and decal it.
One issue with the Walthers kit is that the insides of the doors and ends have prominent ejector pin marks (the circles) and retainer pin holes.
So I needed to fill and sand.
Then I decided I should probably strip the paint so the existing markings don't show through. This is where I realized I'd made a mistake.
Pro-Tip: you should strip the paint before filling the holes.
I soaked the parts in alcohol and scrubbed them with a toothbrush, which worked great. Unfortunately it also messed up my careful hole filling so I had to fill and sand again. Oh well, lesson learned (maybe.)
After refilling the holes, I hit the parts with some primer.
This showed me that I still had some work to do, so I filled and sanded yet again. Then I primed them again and now they look pretty good.
After the primer dried I hit all the parts with some Chestnut Brown Rust-Oleum. It's pretty close to box car brown. It looks lighter in the photo, but it's pretty dark actually.
I let it dry a full day before flipping the parts over to paint the other side.
Next up will be decalling. I hope the GN decals I have will fit between the ribs on the sides. We'll find out in our next installment.
")
