SD60F project


dougcnup

Member
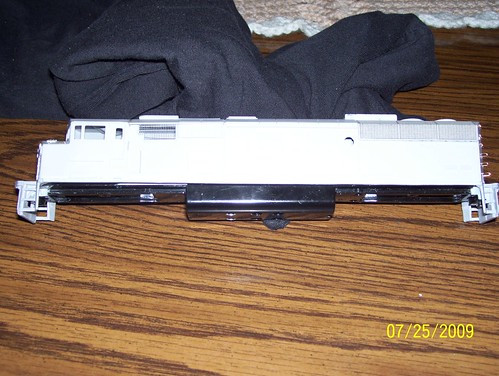
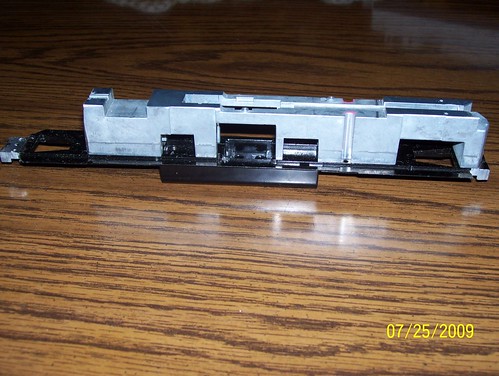
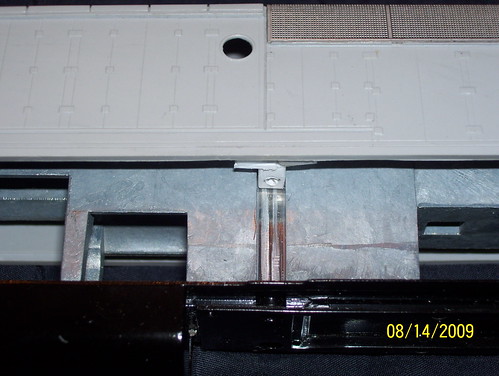
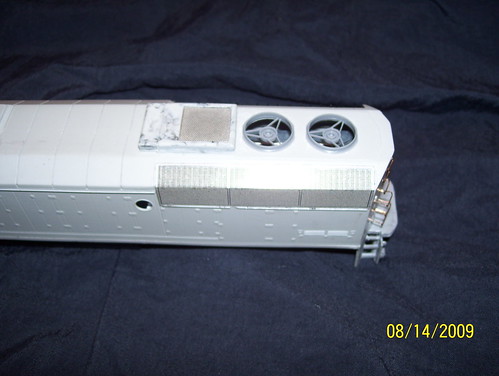
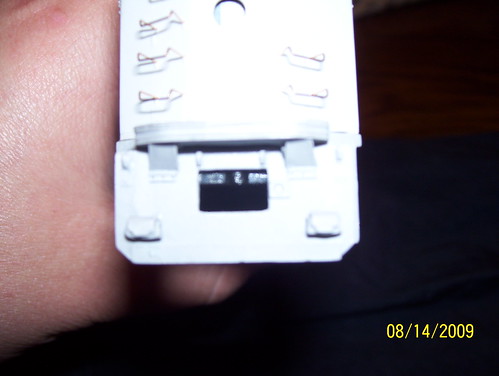
Last night I finally was able to get the proto 2000 chassis along with the weight to fit into Kaslo's SD60F shell. Had to make a few mods to both, but nothing to hard, some minor milling is all. Hopefully more to come soon. Just saw that front isn't all the way down when I took picture.

3756268627_c5da13e979.jpg
3756230617_beeddc28c9.jpg
 
Ok now

seems like I need to get my butt in gear on this project

As you can see from older pics I had a 3/16 groove milled on side of the weight where there used to be a half round groove before. After filing down thickness of 3/16 styrene strip so it would slide easier in groove. I drilled a hole in end of styrene to accept screw from the proto shell. Inside the shell I super glued a total of .140 of sheet styrene to inside of each side.

Leaving the 3/16 styrene in the groove, held against frame with the screw I added a little bit of super glue to each side and then slide the shell over the chassis and weight and held with a little bit of pressure till super glue set up. Removed the screws and pull the shell off of chassis.

all I need now is to make the hole to accept coupler boxes smaller in the front and rear pilots. Have to add .080 x .080 styrene to top edge and probably fill down some to make flush.

I also drilled out the fans on rear as the molded in ones looked like crap. Will be using Cannon & Company Fans. Drilled out a series of small holes just inside of the original fan. Using a nipper I cut out rest. Using a step Drill I bought at Harbour FreightI enlarged hole untill new fans fit. all done by hand (cuts easy)

Thanks for kick in butt. Going slow but is getting done, hopefully painted and running by end of year. My goal at least.

3820012320_bd73604b91.jpg
3820012642_0c9bc60702.jpg
3820011942_c7344f4ca8.jpg
3820012944_21be1170b9.jpg
 
Last edited by a moderator:
Thanks!

Yes, Keep us posted please. I am looking forward to the finish model and your opinion about building it..

And you are welcome.. Anytime you need a swift kick in the..:D:D:D;)
 
please tell me your thoughs on it?

Next I wanna fix the holes iin pilot for coupler boxes and plan on installing lighted number boards. Then I can start adding the fine detail.

Orderd to micro LED's from my LHS to use in ditch lights also.
 
I think you are doing great.

I like the progress pics.

I am thinking of taking the plunge too but not sure yet. Never used resin kits before.
Never started something on that scale, from scratch, painting etc..

Your pics gives a real good look at making one. A great way to get "the feel" so to speak.

I wonder if the shell would fit on a BLI SD40 frame....I know it would not be
accurate but it's for my short-line...


Please keep posting away.

Thanks again
 
I bought the shell back in Jan 07... I have spent alot of time just thinking of what and how to do this...All I know is that when this one is done, my next SD60F will be a breeze.

You know with that BLI SD40, you might consider a SD40-2F instead
 
Tomorrow I am planning on taking the pludge to drill out and file for my lighted number boards. then I can start adding all the small detail.
 
Will be looking forward to your progress.

Please keep us advised

Thanks for sharing
 
Doug, great work so far. Don't worry, drilling out the number boards isn't hard. Just make four holes and use your file to square it up after the plastic is gone. I've done a number of these and they came out fine using some clear styrene to back up the hole. Whatever you do, don't even think about doing this with a Dremel. Seemed like a good idea at the time. :D
 
sorry guys, going slow now as bow hunting season started, Kinda put on back burner for now but i have done a few things will post a few pics in a couple days
 
I have one of those Kaslo kits to put together and it's been so long since I bought it that I can't remember if it is a SD50F or SD60F. I'm looking forward to seeing the progress of your project.
 
I bought the shell back in Jan 07... I have spent alot of time just thinking of what and how to do this...All I know is that when this one is done, my next SD60F will be a breeze. You know with that BLI SD40, you might consider a SD40-2F instead

I cheated and used the kit 'advised' RPP SD50 chassis/drive and installed it backwards (with the cab notches on the frame to the rear) It worked well. You've gone the extra mile and I'm sure you'll be awarded with a better model than I...

Kaslo_SD50_1.jpg
 
well I actually have put on back burner for awhile till after bow hunting season... sorry guys. Plus I also had thw swine flu few weeks ago, and then to top it off last week I had a kidney stone.OUCH!!
 
I cheated and used the kit 'advised' RPP SD50 chassis/drive and installed it backwards (with the cab notches on the frame to the rear) It worked well. You've gone the extra mile and I'm sure you'll be awarded with a better model than I...

Kaslo_SD50_1.jpg

you did an awesome job an that engine, the paint job is awesome. Did you use decals or paint the white stripes on side? I had planned on painting mine.
 
well I actually have put on back burner for awhile till after bow hunting season... sorry guys. Plus I also had thw swine flu few weeks ago, and then to top it off last week I had a kidney stone.OUCH!!

Ouch, no kidding! :eek:

you did an awesome job an that engine, the paint job is awesome. Did you use decals or paint the white stripes on side? I had planned on painting mine.

Thanx. I did use decals, but in retrospect I should have painted them because there were so many. If you notice the space between them gets greater as it nears the cab, thats cuz the early Kaslo models had cabs that were incorrectly too small, and I didn't noticed til I started decalling....back to front...:mad: grrrrrr

Kaslo has fixed the problem, but you should check your model to make sure you have the 'repaired' shell. :)


Back
Top