Proto 2000 Covered Hopper


Hey tootnkumin, Santa Fe ordered theirs without the jacking pads, so that is correct for their models.
Willie

Thought that was likely. If you changed the walkways for etched metal, they'd be right up with the latest releases, the step overs are already perforated.
 
Hey tootnkumin, Santa Fe ordered theirs without the jacking pads, so that is correct for their models.
Willie


They included jacking pads and we were supposed to research our roads to determine whether or not to use them. You guys are VERY observant, I must say.
 
I finished the assembly process last eve and at the very end almost broke off some of the stuff. The weights went in tight and I had enough sense to file the edges a bit.

Also, the cap (cover) snapping on required some delicate pressure. There is a line that runs the length of the car that can easily get in the way, also the cages on the ends have some delicate details.

Here are the finished photos:

View attachment 53444

I was able to assemble it without loosing any parts. Three or four times pieces flew up in the air and fell on the ground, but my room has a tile floor and I was able to find them.

View attachment 53445

Nothing broke, either, although as said above I reemed out some of the holes with the sharp point of the exacto knife and I cut a couple of the tabs off altogether.


View attachment 53446

A couple pieces on the brake end did not get glued on perfect, also could have used a couple more drops of glue on the ladders. I did a pretty good job with the glue application, would have been easy to get too much and end up with a permanent blemish.

View attachment 53447

I used my favorite Gorilla Glue for the process, applied with a broken sharp tothpick. The glue really adhered well.

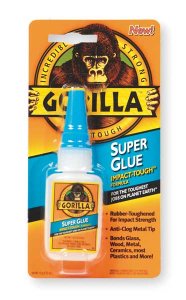
Which glue is that? If you don't mind me asking.
 
It is Gorilla glue, they sell it at hardware stores and lots of places. They make a couple different formulas and they do not all work the same. This one dries clear. I think it says "dries clear" on the bottle.

If you look carefully at the first photo in the first post the bottle is in the upper left hand corner. You have 10 or 15 seconds at most to adjust the items and then the bond becomes pretty strong, hopefully you don't have to do any adjustment. Total strength still takes 24 hours, I think.

I put a large drop on some paper or something and then dab the sharp point of a toothpick, or sharpened toothpick, to get a very small drop on the toothpick and apply that way.
 
They included jacking pads and we were supposed to research our roads to determine whether or not to use them. You guys are VERY observant, I must say.
I use railcarphotos.com for a lot of my research. Here's the link for the the search function: http://www.railcarphotos.com/Search.php
In the case of the ATSF cars, there were 1249 cars numbered from 307500-308749...ATSF didn't buy just a few of anything.
Willie
 
I finished the assembly process last eve ...

View attachment 53447

Nice looking hopper. I built a similar one - Rio Grande - same color, some years back and it came out very nice. IMO, they go together a bit easier than the similar Intermountain CF4750 hoppers. I have one more Rio Grande kit I need to assemble, same car different number.

But due to the back log of kits I developed, I have opted to buy most of the other Proto 2000 CF covere hoppers RTR. Presently have 5 yellow Cargill and a Milwaukee. I look for the RTR version at shows.

Cheers, Jim
 
Even the RTR ones I've got needed going over for unstuck bits, especially at the top corners of the ladders where they attach to the hopper. I also have several Intermountain 4750 hopper RTR's and even though they have etched walkways and detail, they're not in the same street as far as the fit of the bits as the Proto. The misalignment around the corner stirrups is the worst. They were offered in kit form as well.
 
I've got quite a few Intermountain RTR covered hoppers. I haven't examined them all closely but so far they seem very nice - most of mine are the CF4750 rib side, although I do have around a few of the 4650 - Cotton Belt and Rock Island. Most of my 4650 covered hoppers are Atlas as it turns out, they are very nice - slightly different in terms of stirrups.
 
It appeared from the IM's I've got that they were assembled from the kits, the stirrups are sort of twisted/pulled towards the middle of the side of the car. The brackets that are supposed to connect/brace the stirrups are too short on some and don't connect. Gives the appearance that the car's side frame is bent. May all depend on who and how carefully (and how much time they were given) did the putting together.

The Atlas 4650's are good well detailed, solid cars. Run beautifully, only thing I don't like is that strange coupler of theirs. Insists on decoupling on downgrades if there is a weight of other cars behind them.
 
I also have 6 of the IM RTR cars. I had to rework each of them to some degree, mostly re-attaching the roofwalks, but a little stirrup rework as well. On one, there were parts floating around in the box, fortunately all of them were there. Even given the degree of difficulty I would still rather have the P2K car. I have not purchased any recently because my layout is already overfilled! The RTR's weren't available when I bought the 18 I have.
Willie
 
Quote: [I used my favorite Gorilla Glue for the process, applied with a broken sharp toothpick. The glue really adhered well. /B]
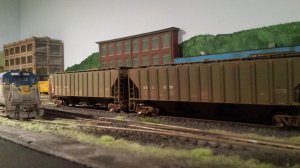
2nd request .. What kind of Gorilla Glue did you use?
 
This is the exact one I buy


super glue.JPG
 
I also use that Gorilla Glue instead of other CA types. I highly recommend it. I have used it for over 10 years now and never had any set up in the bottle (several bottles); unlike most others that I usually threw away while still partially filled.
Willie
 
Willie, glad to hear you have the same experience I do with the glue!!

Bridgeliner, really nice looking cars!!


Back
Top