Light-sealing models


paper-tiger

Member
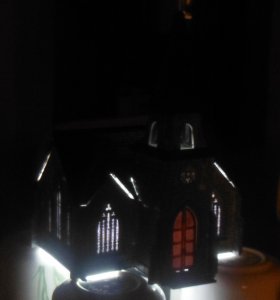
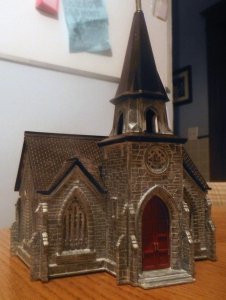
Hi guys! I'm working on remodeling a church I got from eBay that someone had built up (not particularly well) and never bothered to paint. I spent quite a lot of time on it so far and really love the stained glass windows, so I think it would look amazing if it was lit, but my test showed that it is very, very not 'light-tight'. What do you guys use to 'caulk' the joints where light leaks through?
churchuc.jpglightedtest.jpg
My test is just a flashlight underneath it and it's set up on some tea cups, that's why the bottom leaks so badly. The nifty diffusing in the steeple is because of a little square of translucent plastic right under the bell. The model doesn't fit together very tightly even with some fiddling. I'm not sure if that's because I ripped it apart and put it back together, or because that's just how it is. In any case, I need to find a literal stopgap if I'm going to light it nicely.

By the way, does anyone know what this model is called and who makes it?

Thanks!
 
Dark brown latex caulk makes an excellent gap filler. A coat of paint on the inside and/or some cardboard can usually block any unwanted light leaks. I don't recognize that particular model.
 
The tea cup support is a nifty idea, I think.
Painting the interior walls helps to stop some bleed through. I would also consider black card stock around light sources to keep it in specific areas of the building, simulating interior rooms.
 
Normally what I do when assembling any kit that will have lights is to paint the insides of the walls black before assembly. This usually does the trick, especially if the corners are kept tight when putting it together.

Zenith_Amtrak_Depot_2.jpg


That's a very nice church. It sounds like you've taken it apart once -- you could take it apart again, separate the windows, spray the interior walls black with a rattle can, and reassemble, taking care to use clamps, rubber bands, etc to keep things tight.
 
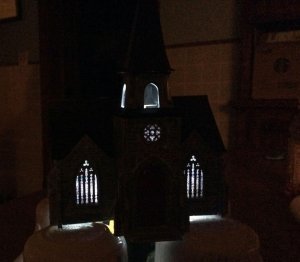
Thank you guys for the great advice! I used a little bit of all of it, and watched the Woodland Scenics Light Block Kit video to see how to kludge my own 'kit'. I used the dark brown caulk around the edges and a thick layer of black acrylic paint on the entire inside (except the windows, of course). I would have just taken it apart and re-sprayed, but I had the windows secured already and wouldn't have been able to take them out without destroying them.
fixchurchlightest.jpg
Here's the masking job, test-lit. Now that the rest isn't so bright, I might have to rethink how to mask the bell so it still has some 'accent light', but doesn't look like it is a rocket about to launch. Maybe a square of black right underneath the bell, but keep the translucent spaces around the edges.
 
Last edited by a moderator:
Looks like you got it nailed! It will definitely look more real with a tiny, current-limited incandescent bulb inside rather than a LED flashlight.
 
Looks like you got it nailed! It will definitely look more real with a tiny, current-limited incandescent bulb inside rather than a LED flashlight.
Thank you! I am hoping so; I'm using the flashlight to accentuate problems so I won't have them after I've spent all the detailing hours on the outside of the model. And maybe to give me ideas and experience for when the models get bigger and more complex. My LEDs and on/off switches for this project are literally on a slow boat from China. I have time to experiment!
I found an itty-bitty 'barrel' keychain LED at Goodwill today that would probably work better to stick under these models in future! Except, I completely forgot about it because my 3-year-old decided to eat a bag of cookies before we bought them, and the 5 year old got out ALL the dump trucks and made a huge mess, and the 6 year old 'accidentally' dropped 37 plastic eggs on the floor. I counted while I picked them up. Good grief. Maybe next time for the flashlight, with fewer kids.


Back
Top