In-ko-pah RR: My latest work


I just finished making a 1/24th scale replica of my wife's 104-year-old grandmother, to ride in the back of my scratch-built rail bus:

IMG_8907.jpg


IMG_8910.jpg


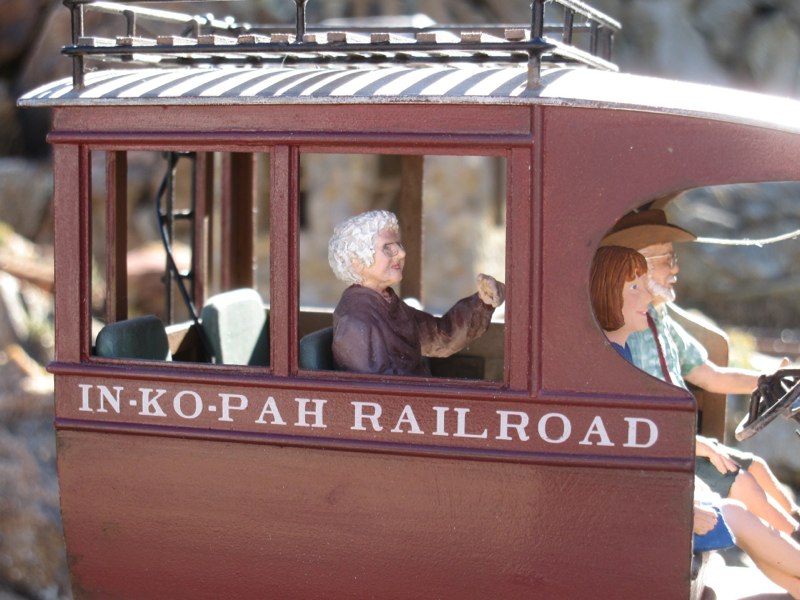
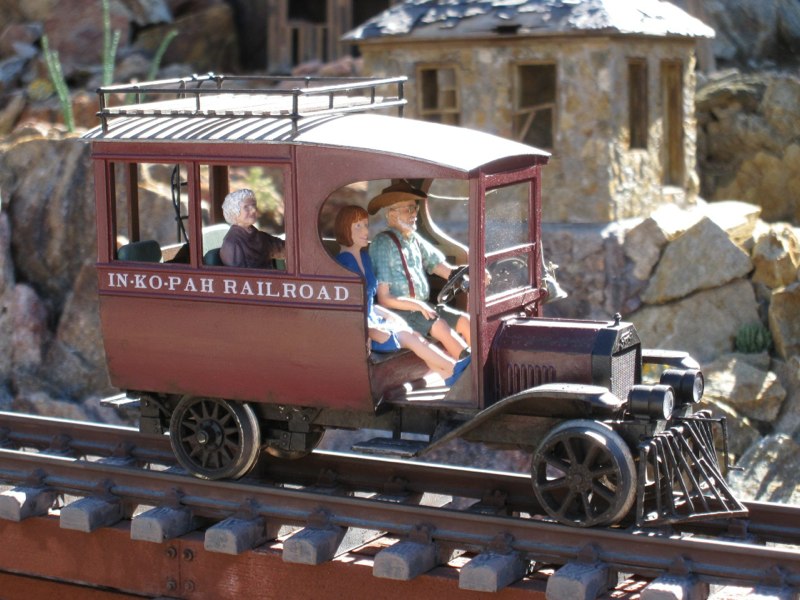
After sculpting the figure, I decided to make a mold and cast it in resin so I could make duplicates to use elsewhere, or to replace this one if ever got damaged. I have the step-by-step on making the two-part mold and casting the figure on my website:

http://www.raydunakin.com/Site/IRR_Figures.html

(This process can be used to mold anything, not just figures.)
 
Looks great! Is that you and the Mrs. in the front seat? Either way, it's some fantastic work and detail. I'm used to N scale, so detail like that is almost like a photo of the prototype!
 
Here's a little peek at what I've been working on lately… These are some interior details I made for a scratch-built radio repair shop on my In-ko-pah Railroad:

IMG_9216.jpg


You can see the whole build in progress here: *

http://www.raydunakin.com/Site/IRR_Mineral_Ridge_3.html

Good god! That's a model? When I read the first line that says this is what you've been working on lately I legitimately thought you had taken up HAM radio as a hobby and this was your work station!

That is photo realistic!
 
Are those reduced photos folded into little objects? How big a space is all that in the model? It really looks great. It might need a Hickok Tube Tester someday.

Thanks! The photos are printed onto self-adhesive vinyl and then stuck to the face of the object. In most cases I don't wrap it around the whole thing, but just paint the rest of the object to blend with the image.

One exception would be the "cardboard" boxes I made to pile under the workbench.
 
How about a few tiny Sam's Photofacts repair booklets and maybe a Burstein-Applebee Co parts catalog on the table?
 
Last edited by a moderator:
I wanted the radio shop to have fluorescent lights, but of course there are no working fluorescent lights in 1/24th scale. However I had an idea for a way to possibly simulate the appearance of working fluorescents...

I started by using 1/16" acrylic rods to represent the tubes. Small rounded bits of styrene strip were glued to the ends:

IMG_9332c.jpg


The base of the fixture was made from a strip of .100" x .250" styrene. Three 1/8" holes were drilled through it:

IMG_9336c.jpg


I used thin sheet brass to make the reflectors:

IMG_9338c.jpg


After painting the fixture white, I glued on the tubes. To help disperse the light and to give the tubes a somewhat frosted look, I brushed on a very thin coat of fluorescent white paint that I had leftover from a Halloween project years ago:

IMG_9340c.jpg


I marked the positions of the three holes and drilled three larger holes in the ceiling. Then the fixture was glued in place. Three 3mm LEDs were inserted into the fixture, through the holes in the ceiling. You can just barely see the rounded ends of the LEDs showing through in this photo:

IMG_9353c.jpg


When I first connected a battery to the leads I was disappointed… the beam from the LEDs simply made three bright spots on the acrylic rods. However, when I tried photographing it, I found that it looks perfect in photos! Here are some test shots, looking through the windows of the building:

IMG_9359.jpg


IMG_9366.jpg


IMG_9370.jpg


IMG_9354.jpg


IMG_9356.jpg


At this point I think I'm done with the radio shop. Next will be the barbershop details.


Back
Top