LOL, it definitly takes practice, each one I do I think is a little better than the last.... but still striving to get like some. There is another message board I am on where some of the work will blow your socks off!!!
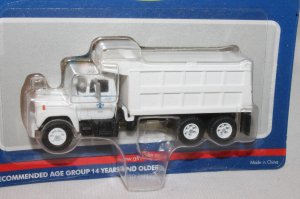
First I start with either a model I already like the paint scheme on or if not I try to get on in white or the lightest color possible. This gives a good base coat. Its hard to paint yellows and reds over dark blues and blacks, so sometimes I will have to shoot it with white just to lighten the undertones. As I have said before I got a cheap passhe (sp) dual action (highly recomended for paint flow control) airbrush, and use the cheap less than a doller acrylic paints from any craft store. Brand does not matter. I usually thin the paint down 20%paint to about 80% 90% isopropal alcohol from any drug store. Again, brand dosent matter.
I do all my detail work, kitbashing, scratch building and finally painting before I weather.
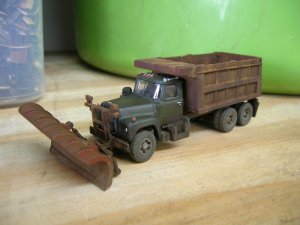
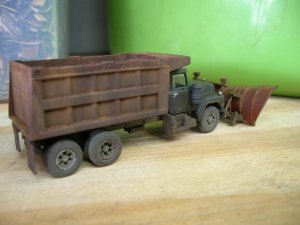
For weathering I use weathering powders, I started off years ago by grinding down pastell chalk sticks onto white paper with a wirebrush, but now have a tray of assorted colors by a company called stoney mountain classic castings..... they may be the best, they may be the worst, I dont know as these are all I have had a chance to use. I dull coat my paint and decals with testors (I have tried others and this is the best IMO, some still seem shiny) The dull coat will give you a nice tooth for the powders to "catch" on. Just apply them dry with small brsuhes, and cover with dull coat. after spraying with the dull coat they will fade out meaning they wont look as strong as they were when you put them on dry, so you will have to re-apply and do many layers. if you mess up just wipe it off......as long as you havent gone over them with the dull coat. Sometimes, after i am almost complete i will give it a light dusting with more powders without spraying... makes it look even more realistic, but it could come off depending how much you handle your trains.
another tip is to dab paint on an area similar to the color you want and then apply the powders to it wet. The brush will be no good after that, but it makes the rust really look like you could go at it with a putyy knife!!!
Heres another tip.... mix a little powder (rust colors)in a small cup or tray with a little iso alchohol..... just enough to make it "muddy... but a little thinner. Next take some scissors and cut a few straw bristles off one of your wifes brooms....seriously, its worth the bum chew... hot glue gun the strands on one end and wrap with tape if you want to make sort of a "mini broom" and make the other end look a little scragaly. dip the scragally end into your muddy alcohol/powder mixture and dab at a 90 degree angle onto your model. let these random spots dry completly. you can do this again with a darker or lighter color until you have different rusty colored spots. again, once they are dry, take a nice flat small (1/4 inch) wide paint brush, dip it in some fresh iso alco, dab a bit on a towel to remove excess and then make a completly vertical top to botom pass over each spot. It will give the illusion of running rust. if you want a bigger or darker "run" go over it again. its important to keep the strokes verticle top to bottom as rust dosent usually run at angles.
last tip...... paint a car completly brown.... a dark brown perferably. once the paint is dry, mist the car with water. while still wet sprinkle the entire car, top, sides, and ends with sea salt(the big grandular stuff). let the model sit until the salt spekles are dry and stuck on. choose the color that you want the car to be...... lets say yellow. Paint the car yellow (over the salt) until it is the desires shade/thickness. let it dry. once the top coat is dry take a hobby knife and stick the point at the edge/bottom of each grandular and "flick it off......... what will that do???? well............. it makes it look like you have a yellow car with rust spots on it, and where the salt was will now be recessed in as the yellow paint is thicker.... it gives it a 3D look. Trust me, its cool... try it on a junk car first. after that use your powders to make the lighter shades around it and running rust.
Hope these help and spark some "ohhh I'm gonna tray that"!!!!! Have fun, thats what its all about!!!
Steve


