Ho, Brass Knapp (pre Bowser) 4-8-2 Mountain Restore Project


pnova56

Member
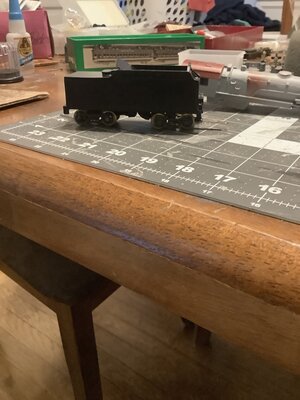
I am restoring/ updating a Ho scale 4-8-2 Mountain.

My intentions are to repaint, replace the Pittman style motor with a can motor and replace the drive wheels.

This is going to be a long project. I work full time and have small children so getting time to work on the project is limited. For example I bough this locomotive in December 2022.

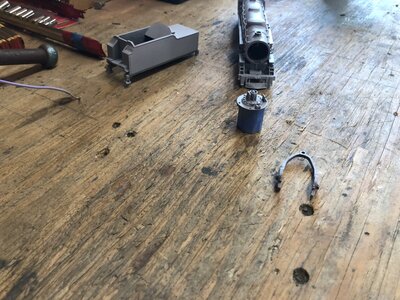
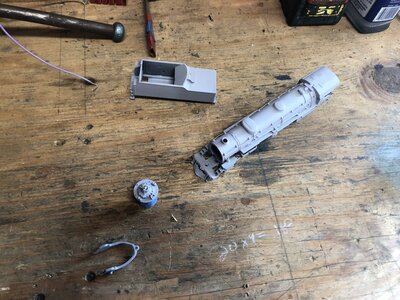
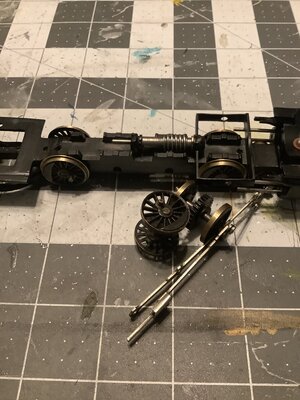
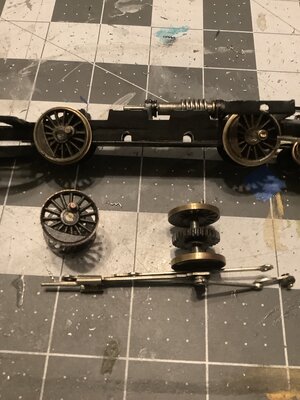
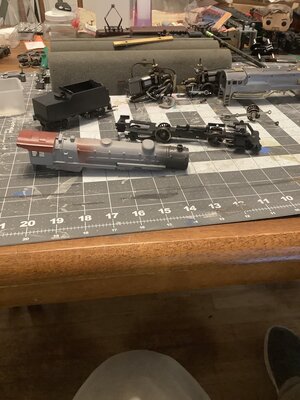
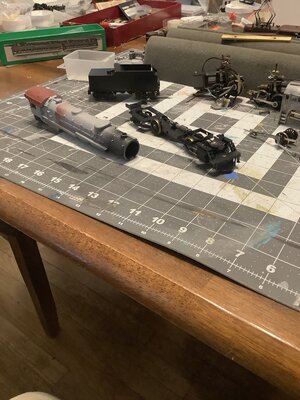
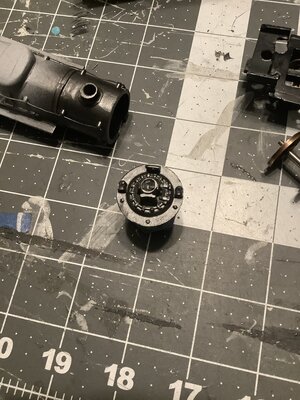
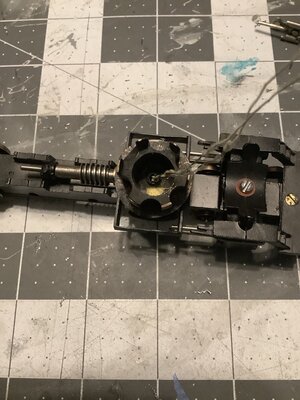
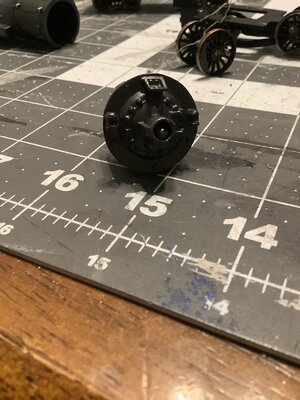
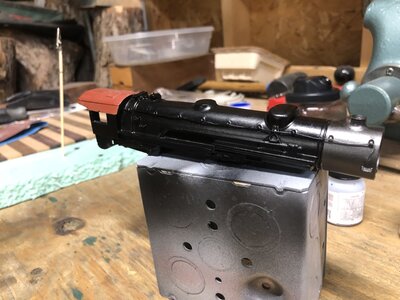
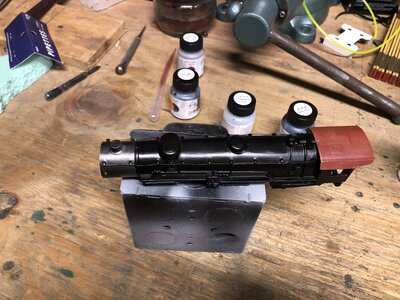
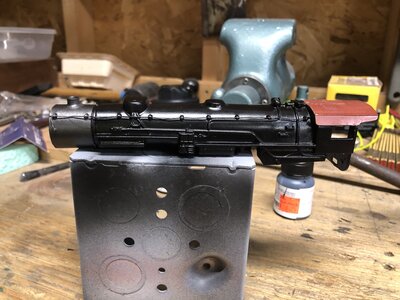
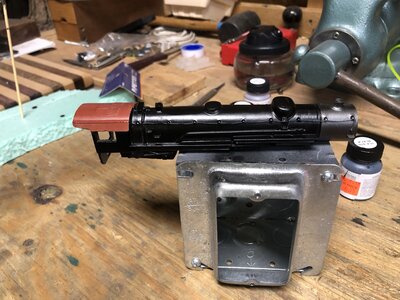
So far I have the locomotive disassemble, paint removed, primed, and some parts are painted.

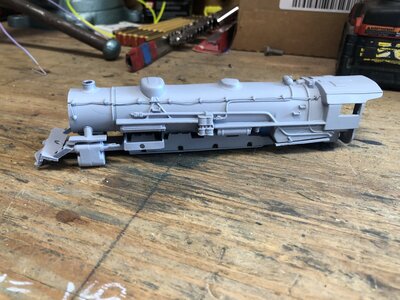
below area the before
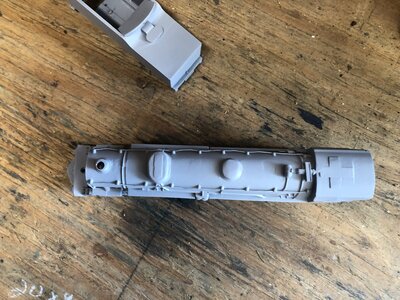
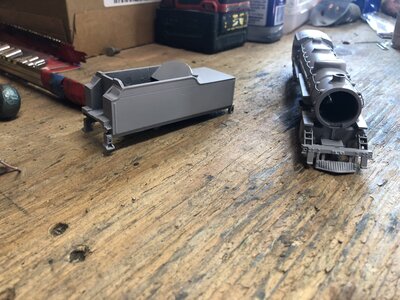
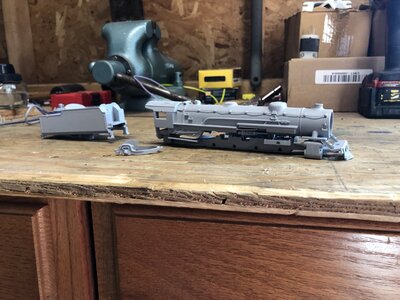
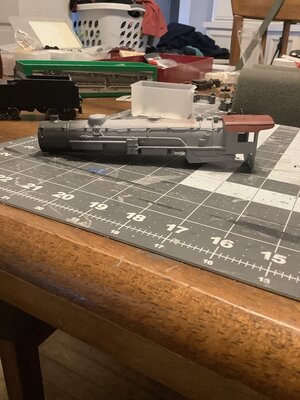
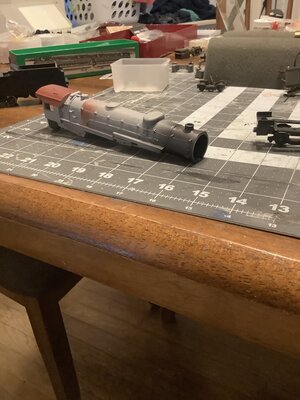
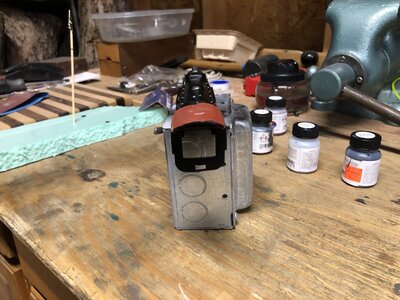
IMG_1640.jpegIMG_1644.jpeg


IMG_1641.jpeg


paint removed


IMG_2045.jpegIMG_2041.jpegIMG_2040.jpegIMG_2039.jpegIMG_2038.jpeg
 
Once the paint was removed I was surprised on how much the metal looks like copper. I know it’s no pure copper but I don't think it brass.

below are some pictures of the primed locomotive.
 

Attachments

  • IMG_2053.jpeg
    IMG_2053.jpeg
    585.9 KB · Views: 54
  • IMG_2052.jpeg
    IMG_2052.jpeg
    611.7 KB · Views: 49
  • IMG_2051.jpeg
    IMG_2051.jpeg
    589.6 KB · Views: 55
  • IMG_2050.jpeg
    IMG_2050.jpeg
    500.1 KB · Views: 57
  • IMG_2049.jpeg
    IMG_2049.jpeg
    475.6 KB · Views: 53
  • IMG_2048.jpeg
    IMG_2048.jpeg
    456.3 KB · Views: 52
Well look at that, I just found very similar engine in one of local antique shops:
20230916_082931-1.jpg

Mine looks like the later version cast in zamac. Did yours have disc type wheels?
 
Well look at that, I just found very similar engine in one of local antique shops:View attachment 174270
Mine looks like the later version cast in zamac. Did yours have disc type wheels?
That’s a good looking train.

I think the wheels are disc type, but I’m bot sure. I attach some pictures.
 

Attachments

  • IMG_0430.jpeg
    IMG_0430.jpeg
    655.4 KB · Views: 45
  • IMG_0429.jpeg
    IMG_0429.jpeg
    566.5 KB · Views: 47
Attached pictures are the most up to date. The tender is all but complete. The engine is almost done. I am planning on masking off and painting it today. But we will see.
 

Attachments

  • IMG_0436.jpeg
    IMG_0436.jpeg
    662.3 KB · Views: 50
  • IMG_0435.jpeg
    IMG_0435.jpeg
    678 KB · Views: 50
  • IMG_0434.jpeg
    IMG_0434.jpeg
    574.5 KB · Views: 45
  • IMG_0433.jpeg
    IMG_0433.jpeg
    605.6 KB · Views: 43
  • IMG_0432.jpeg
    IMG_0432.jpeg
    566.7 KB · Views: 49
  • IMG_0431.jpeg
    IMG_0431.jpeg
    569.1 KB · Views: 45
One problem I am having is with the light bulb on the smoke front head light. the light works but the insulation on the conductors are corroded. I plan on installing a led but I can’t get the old one out. At least without destroying the old bulb. Any suggestions would be appreciate.
 

Attachments

  • IMG_0437.jpeg
    IMG_0437.jpeg
    746.6 KB · Views: 44
  • IMG_0439.jpeg
    IMG_0439.jpeg
    585.4 KB · Views: 54
  • IMG_0438.jpeg
    IMG_0438.jpeg
    564.6 KB · Views: 49
One problem I am having is with the light bulb on the smoke front head light. the light works but the insulation on the conductors are corroded. I plan on installing a led but I can’t get the old one out. At least without destroying the old bulb. Any suggestions would be appreciate.
You could try something like WD40, but you'll probably have to destroy the old bulb.
 
I painted the boiler last night. I just removed the masking tape. I am very pleased with the results, especially since this is the first project that I am using an airbrush. It’s not perfect but I am very pleased with the results so far.
 

Attachments

  • IMG_2093.jpeg
    IMG_2093.jpeg
    394.8 KB · Views: 53
  • IMG_2094.jpeg
    IMG_2094.jpeg
    412.6 KB · Views: 50
  • IMG_2095.jpeg
    IMG_2095.jpeg
    535.6 KB · Views: 51
  • IMG_2096.jpeg
    IMG_2096.jpeg
    434.8 KB · Views: 57
  • IMG_2097.jpeg
    IMG_2097.jpeg
    445.3 KB · Views: 57
  • IMG_2098.jpeg
    IMG_2098.jpeg
    449.2 KB · Views: 49
I painted the boiler last night. I just removed the masking tape. I am very pleased with the results, especially since this is the first project that I am using an airbrush. It’s not perfect but I am very pleased with the results so far.
That's looking really good, great work.
 
I had a pair of them which I painted and lettered for NYO&W #325 and 326. They got traded away and about a year ago I found another at a train show. here is the old photo of my fiirst two Bronze mountains Both are Bowser
Bowser 4-8-2.JPG
 
Last edited:
I have a photo of one of my early ones when I had it taken apart just before painting and lettering.
BOW 4-8-2 Bronze-4.JPG
 
Last edited:
From what it says on Bowser website the cast early ones were brass. But brass being an alloy itself might have had different mixture of bronze than what it's used now. Cool, the one with disc wheels would make good candidate for kit bashing into New York Central Mohawk.
 
I painted the boiler last night. I just removed the masking tape. I am very pleased with the results, especially since this is the first project that I am using an airbrush. It’s not perfect but I am very pleased with the results so far.
What color did you use for that smoke box? Looks like "gun metal" to me.
 
From what it says on Bowser website the cast early ones were brass. But brass being an alloy itself might have had different mixture of bronze than what it's used now. Cool, the one with disc wheels would make good candidate for kit bashing into New York Central Mohawk.
The differance between the Bowser mountain and the Knapp mountain is easy to see. The original Knapp version has spoked drivers, The Bowser version has Boxpoke drivers. The ones with the circular holes and not spokes. These drivers can be seen in all my recient photos of my Bronze Mountains. And yes Bowser got it wrong, they are a bronze alloy. It is kinda of like calling Steel, Iron. They are cast Bornze. Bronze is not a naturaly metal but a alloy mixture using the softer copper with metals like mainly nickel to harden it and make bronze.
frank
 
Last edited:
For a first time airbrush project that looks really good! 👍 👍
One thing I have found helpful when airbrushing is to first paint the nooks and crannies of an object. For example, the corner where a walkway meets the cab. Give those areas a couple of light coats, then paint the main areas. Otherwise, trying to get paint into the recesses while painting the main areas will likely result in paint runs from too much paint.


Back
Top