
IronBeltKen
Lazy Daydreamer
While I was visiting an RHS (Regional Hobby Shop) in Southern PA for the first time, I stumbled upon a 1:87 model of a GMC TDH-4510 transit bus, like this one:

I couldn't tell just by looking at the box, who the manufacturer was. I remembered seeing them on the shelves of various hobby shops in the mid-1990's, but at that time I was too focused on trains. Then I never saw any of them again...until now. I got it for $25.
Since I'm trying to model suburban Cleveland of the early 1970's, I wanted to have it painted for the Cleveland Transit System. At first I planned to just slap on some white paint on the top and blue on the bottom. I googled in vain for an online prototype photo of a GMC "Old Look" bus from the sixties, painted in white-and-blue CTS livery. However, I did come across a few photos of this O scale model: http://www.sptc-spb.ru/model/1950-5...series-in-cts-post-59-livery-sptc238-11-1.php
I decided this would have to be my reference, since I wasn't thrilled at the idea of spending money on a book just to paint a $25 model. So I figured out how to dissassemble it, then stripped of the dark green paint with 91% Iso. First I covered the whole body shell in white, then masked off the top and sprayed the bottom Spa Blue. Next, I grabbed some Testors Clear decal paper and printed up some dark blue stripes and numbers, and what seemed like a passable representation of a CTS logo.
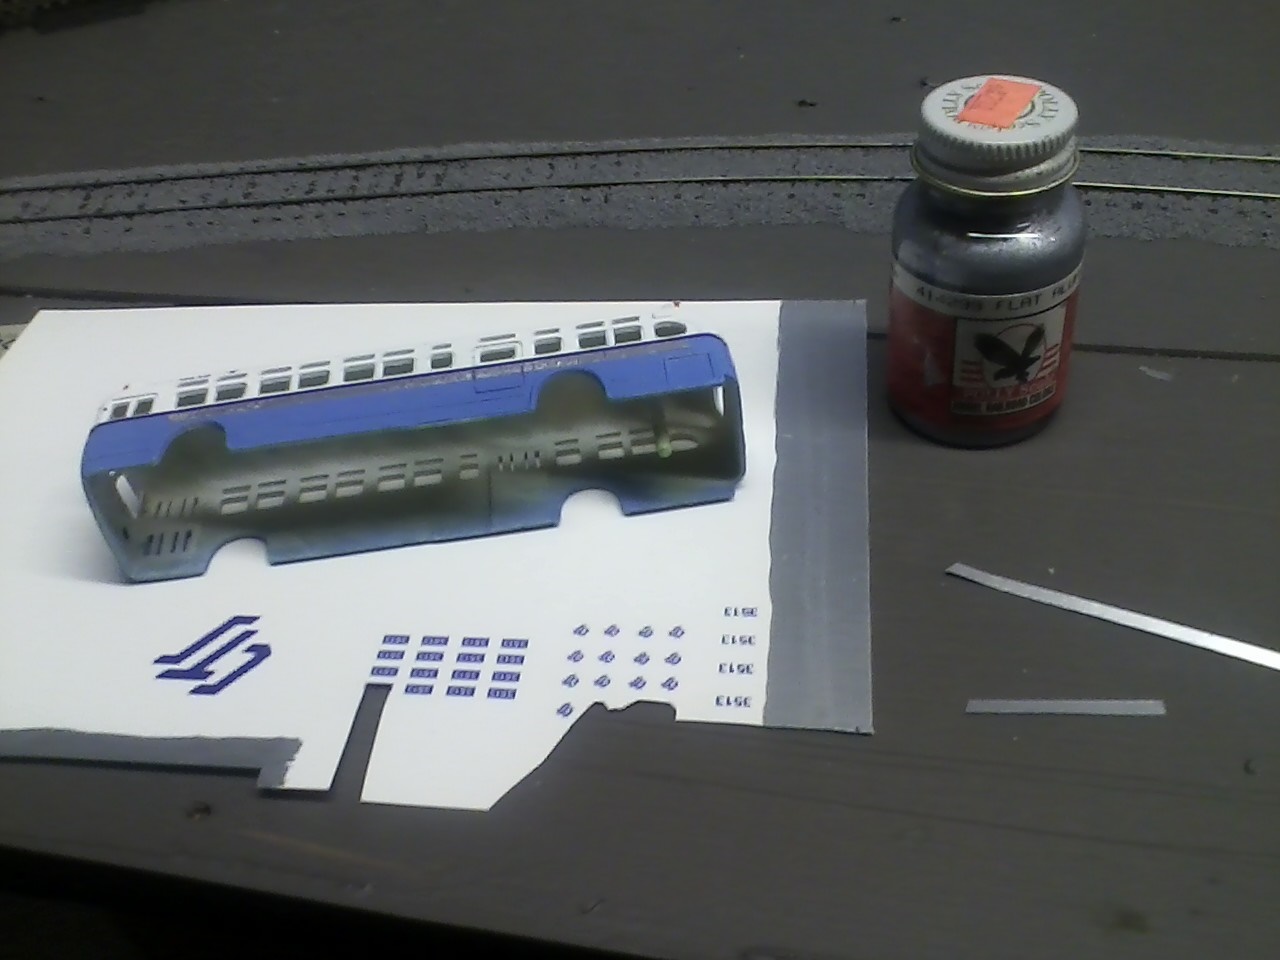
After I had cut-out and applied the stripes and numbers on the top half, I spread some PollyScale acrylic Flat Aluminum paint on what was left of the Testors decal sheet to use for the Loewy art-deco style aluminum paneling:
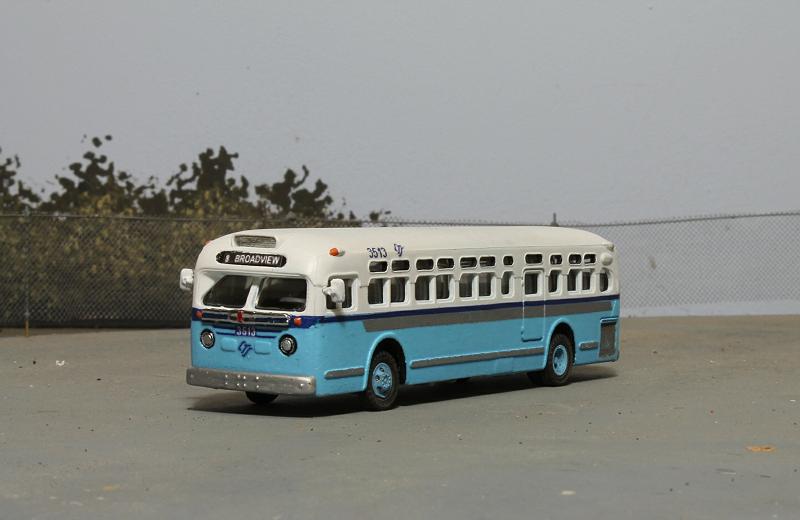
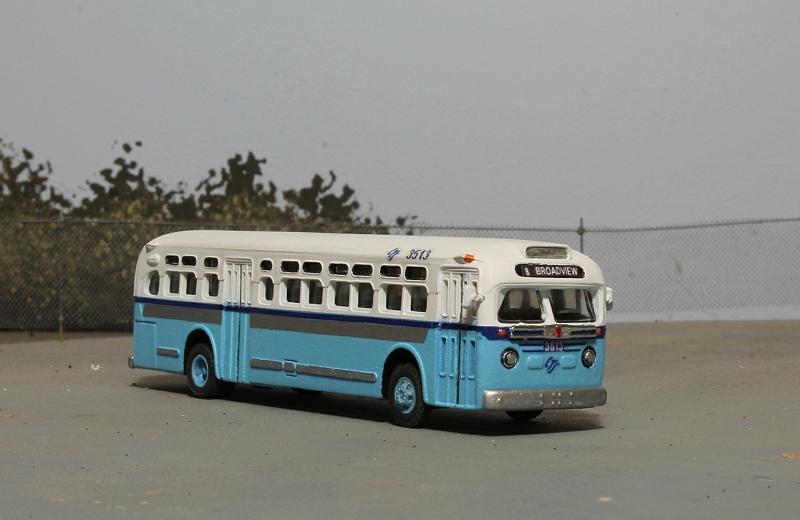
At this point I realized the blue was way too dark. At first I figured I would just let it slide, but I just kept obsessing about it. That's because I realized that this is something that conveys the locale of my layout [Cleveland], so I wanted to make it as accurate as possible. I wound up having to repaint and re-do the entire bottom half of the shell in Robins Egg Blue, this cost me a few extra nights' worth of work. But at least now I knew it would be more accurate. [Sure wish I had taken more photos of the project along the way, but I don't think about stuff like that when I struggling with a challenging paint job...]
Every time I looked at the photo of the O scale model, I would see yet another detail that I needed to add. All in all, I spent ~2 weeks worth of evenings and Saturdays getting this thing done. But I think it was time well spent. Later I discovered this item on eBay that I could have bought for $90 already painted:
http://www.ebay.com/itm/like/151218514571?item=151218514571&vectorid=229466&rmvSB=true
...No thanks! For $25, plus another ~$10 for paint and supplies and a bit of "sweat equity", I wound up with THIS:
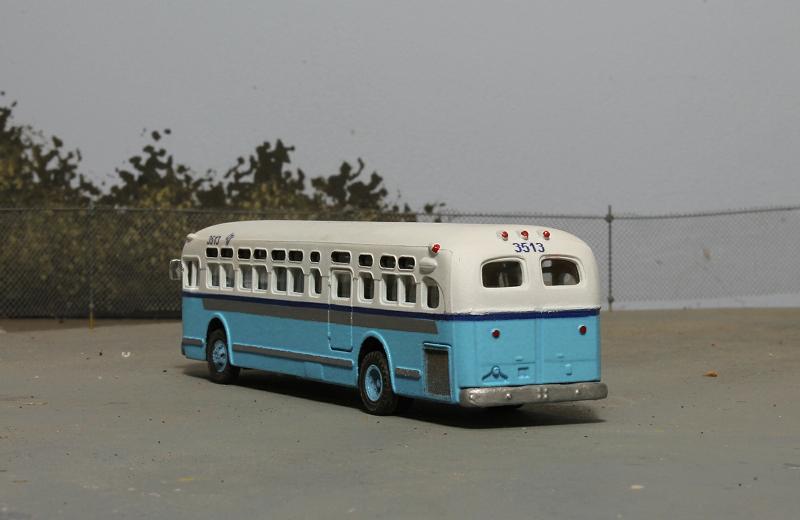
Looks like I'll need to re-do that route/destination placard since it wrinkled when I cemented it on, but I'll deal with that later. I have to get back to de-cluttering my layout...
I couldn't tell just by looking at the box, who the manufacturer was. I remembered seeing them on the shelves of various hobby shops in the mid-1990's, but at that time I was too focused on trains. Then I never saw any of them again...until now. I got it for $25.
Since I'm trying to model suburban Cleveland of the early 1970's, I wanted to have it painted for the Cleveland Transit System. At first I planned to just slap on some white paint on the top and blue on the bottom. I googled in vain for an online prototype photo of a GMC "Old Look" bus from the sixties, painted in white-and-blue CTS livery. However, I did come across a few photos of this O scale model: http://www.sptc-spb.ru/model/1950-5...series-in-cts-post-59-livery-sptc238-11-1.php
I decided this would have to be my reference, since I wasn't thrilled at the idea of spending money on a book just to paint a $25 model. So I figured out how to dissassemble it, then stripped of the dark green paint with 91% Iso. First I covered the whole body shell in white, then masked off the top and sprayed the bottom Spa Blue. Next, I grabbed some Testors Clear decal paper and printed up some dark blue stripes and numbers, and what seemed like a passable representation of a CTS logo.
After I had cut-out and applied the stripes and numbers on the top half, I spread some PollyScale acrylic Flat Aluminum paint on what was left of the Testors decal sheet to use for the Loewy art-deco style aluminum paneling:
At this point I realized the blue was way too dark. At first I figured I would just let it slide, but I just kept obsessing about it. That's because I realized that this is something that conveys the locale of my layout [Cleveland], so I wanted to make it as accurate as possible. I wound up having to repaint and re-do the entire bottom half of the shell in Robins Egg Blue, this cost me a few extra nights' worth of work. But at least now I knew it would be more accurate. [Sure wish I had taken more photos of the project along the way, but I don't think about stuff like that when I struggling with a challenging paint job...]
Every time I looked at the photo of the O scale model, I would see yet another detail that I needed to add. All in all, I spent ~2 weeks worth of evenings and Saturdays getting this thing done. But I think it was time well spent. Later I discovered this item on eBay that I could have bought for $90 already painted:
http://www.ebay.com/itm/like/151218514571?item=151218514571&vectorid=229466&rmvSB=true
...No thanks! For $25, plus another ~$10 for paint and supplies and a bit of "sweat equity", I wound up with THIS:
Looks like I'll need to re-do that route/destination placard since it wrinkled when I cemented it on, but I'll deal with that later. I have to get back to de-cluttering my layout...
Last edited by a moderator:
