
Steamfan1977
New Member
Hello everyone,
A few years ago I blew the dust of my old Marklin trainset and introduced my son to the fascinating world of model trains. Fortunately I have been able to get him as enthusiastic about model trains as I am and over the past few years we have built up quite a collection.
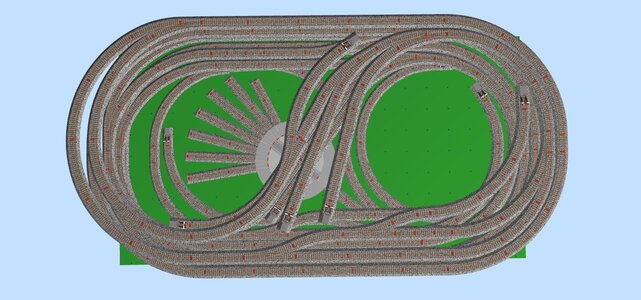
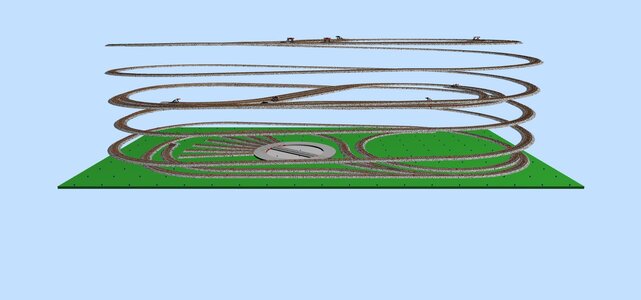
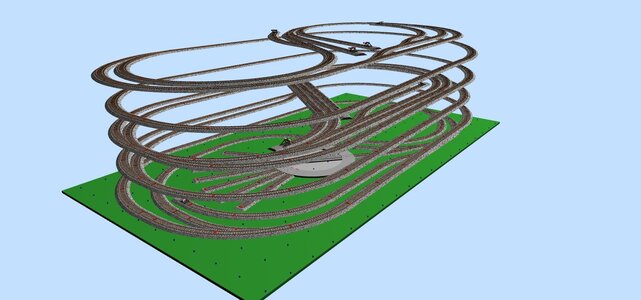
It is now time to move the tracks from the the floor of his bedroom onto a table. Since we both love to see the trains riding along a long mainline and since we have limited space we have no option to do a multi level layout.
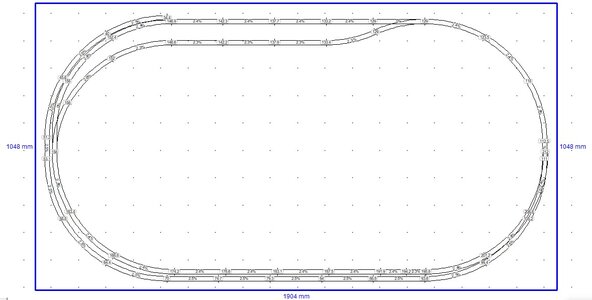
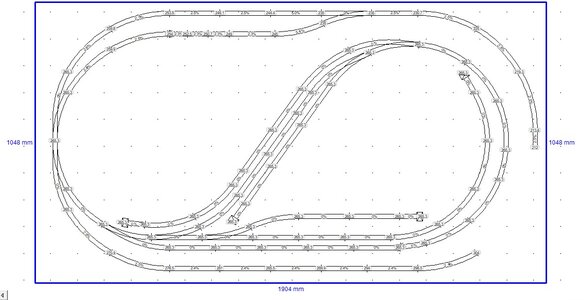
Again, due to the limited space available, we have decided the layout to be a single track and we have also stepped away from the helix concept. I have kept the gradient to a max of 2.5% and tried to use R2 curves as much as possible.
The idea is to have only one base plate and to have open space in between the loops to ensure there is a "relatively" easy access to the trains in case of derailment etc.
There are still some thing we are finetuning on this layout but I would love to hear your feedback to see if it has potential.
Thank you so much for your advice and have a wonderful day,
Serge
A few years ago I blew the dust of my old Marklin trainset and introduced my son to the fascinating world of model trains. Fortunately I have been able to get him as enthusiastic about model trains as I am and over the past few years we have built up quite a collection.
It is now time to move the tracks from the the floor of his bedroom onto a table. Since we both love to see the trains riding along a long mainline and since we have limited space we have no option to do a multi level layout.
Again, due to the limited space available, we have decided the layout to be a single track and we have also stepped away from the helix concept. I have kept the gradient to a max of 2.5% and tried to use R2 curves as much as possible.
The idea is to have only one base plate and to have open space in between the loops to ensure there is a "relatively" easy access to the trains in case of derailment etc.
There are still some thing we are finetuning on this layout but I would love to hear your feedback to see if it has potential.
Thank you so much for your advice and have a wonderful day,
Serge
Attachments
-
 1 - Level 1 - 20230102.jpg128.9 KB · Views: 247
 -
 2 - Ramp to Level 2 - 20230102.jpg86 KB · Views: 206
 -
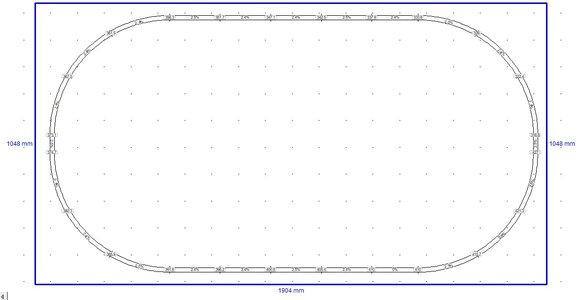
 3 - Level 2 - 20230102.jpg132.6 KB · Views: 201
 -
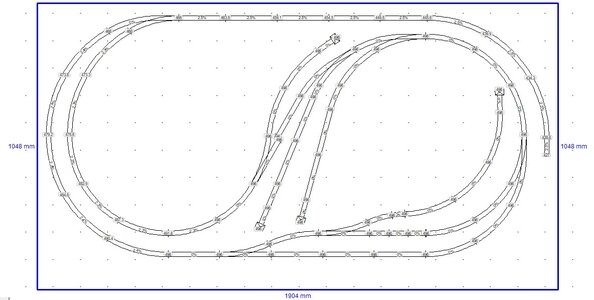
 4 - Ramp to Level 3 - 20230102.jpg67.4 KB · Views: 191
 -
 5 - Level 3 - 20230102.jpg116.9 KB · Views: 198
 -
 3d img 01.jpg276.9 KB · Views: 183
 -
 3d img 02.jpg124.8 KB · Views: 225
 -
 3d img 03.jpg168.3 KB · Views: 240


 .
.
