I like what you have done. This is basically what I have done in years past on many layouts. With this picture, I would like to see the underside picture of this hookup. A more instructive photo of the wire hook ups on the underside.I'm using the tried and true Atlas (for the most part) on mine and several turnout switches I got from Willie.
All 13 of the turnout switches are wired and working at this time.
Mine was made of 1/2 leftover plywood from the grandson's train layout and about 1 full can of green paint (because I needed to get rid of the paint anyway). It is attached like a shelf to the train table.
And no I haven't connected the 2nd controller yet!
View attachment 114023
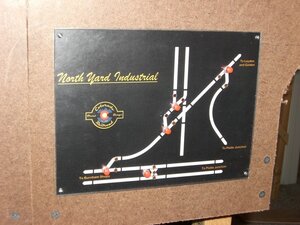
View attachment 114025

How to find more pictures like this.