Control panel questions


ianc

Member
I'm at the point in my layout where I have to design a decent control panel. You can see what I'm doing here: http://www.modelrailroadforums.com/forum/showthread.php?34159-The-Saanich-Peninsula

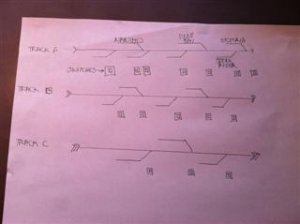
As I have three separate railroads on my layout, and I'm doing this on the cheap, I'm using three little transformers (two Bachman, one Lifelike), all of which came as part of job lots. I put together a little box that holds the transformers and the four turntable switches, but I've decided that as four of my turnouts (points, switches, what do you folks prefer?) can't be reached from the front of the layout I might as well electrify all 13 turnouts. I've been looking at control panels on various websites, and I've found lots of instructions on how to transfer patterns, and cut plexi, and how to wire little lights to tell me which turnout is in what position, but I haven't found any pictures of a panel with three transformers and 20 switches, or even anything approximating that. I can design my own, and I will if need be, but if someone else has an elegant solution I see no need to reinvent the wheel. Any suggestions appreciated.
 
I assume you are talking HO. What kind of switch machines are you planning on, twin coil, Tortoise? Do you really need the lights to show turnout direction? I used Atlas twin coil machines and have each one wired through a SPDT switch that is activated with a momentary on push button. The SPDT switch handle tells me the direction of the turnouts unless someone changes it with out me knowing. A quick press of the button will make sure. For the panel face, I went cheap. Drew out the part of the layout I was controlling on a piece of paper and then copied it onto some thick pretty paper and had Staples laminate it. Then contact cement to the back and the piece of 1/8" Masonite and let it dry for 48 hrs with a lot of weight. Filled it with holes for all the switches and wired it up. Worked well for me and I have done 3 this way.
 
It is indeed HO. I have Atlas switch machines. I don't need lights to tell me anything, as there are three separate lines and one has three turnouts, one has five, and one has seven. I don't have any questions as to construction: I'd like ideas for layout of the panel. I'll be using the Atlas switches - push to determine open or closed, then push to actuate the coil.
 
ianc:

On my Milwaukee Northern, I made control panels using black, wooden picture frames from a custom picture framer. I had them made when I had coupons or there was a sale. I used Lexan for the panel face, since it will not break or crack when cutting. Plexi-glass is a chore to work with in my experience. I spray paint the back of the Lexan with a color of my choice.

I mount the frame to the fascia of the layout using small piano hinges.

Track layout is applied to the front of the panel using colored modelers stripping tape. Holes are drilled using a sharp, high speed drill bit for the electrical switches.

Your transformers can be mounted on a shelve below the panel.

I'll post a picture of my panels in the near future.

Thanks.

Greg
 
Well, the descriptions provided sound great! Frankly, I wish I had done my control panels (plural, one for the "westside" of the layout and a large one for the "eastside/Galesburg" plus two smaller auxilliary panels for East Galesburg's engine facilities. I framed the panels from 1x4 pine and made the panel faces from 1/8" masonite. I painted the faces with green paint, and laid out the track plan with pencil. After that, I scraped off the paint at where the pencil lines formed the track plan. Drilled holes for mini-toggle switches and pushbuttons as appropriate for turnouts and block toggles. As my layout has elevations 32" and 36" AFL (above floor level) so I can see most of it from a seated position, and little kids as well as adults who come over can see the trains run, I can see many of the turnouts from the control station. Those that are farther away have their positions indicated either by the rotary switches on the panel...with the momentary pushbuttons adjacent to the rotary switch...or by signal lights trackside near the turnout. Where I have used Peco or Shinohara turnouts, the signal lights indicate which track route is chosen by the turnout position. (All my signals are interlocking indicators, rather than block occupancy or CTC. Not exactly prototypical except that some railroads operated by train orders exclusively, including the Colorado & Southern subsidiary of the Burlington Route in the 1940's and '50's.) I have one toggle switch on the main panel, which selects either DC or DCC, even though the MRC Tech 6 6.0 can switch between either system. (I just leave the Tech 6 in DCC and the DC is controlled from an MRC Tech IV 260. I have a separate AC power pack for the turnouts. With the DPDT toggle, I don't have to read the type of power on the Tech 6; I just note the toggle is to the left for DC and right for DCC, which keeps me from burning out DC motors. Having collected over 50 locomotives over 60 years of model railroading, most of my motive power is DC, with a few DCC for sound. I seldom try to run more than one train at time, and the layout is only in a 14' x 13'7" room, which limits train length. So all DCC locos are set to address #3. Not a very sophisticated setup, but it works for me.

Merry Christmas or Happy Chanukkah!
 
Guys, I think we are off the mark. He says in post #3 that he doesn't need construction ideas but a track and switch configuration. I think I know what he is asking but still not quite sure. I have a quick drawing for IANC to see if this is what he wants. I'll post it in a second if I can remember how.
 
IANC: Is this close to what you are looking for? I call it a stick drawing but John Armstrong had another name but I don't recall it. Basically unwrapping your track plan.
 

Attachments

  • photo (Mobile).JPG
    photo (Mobile).JPG
    14 KB · Views: 200
QUOTE=bwells;369706]IANC: Is this close to what you are looking for? I call it a stick drawing but John Armstrong had another name but I don't recall it. Basically unwrapping your track plan.[/QUOTE]

You're closer than anyone else. What I want are some pictures of control panels showing the transformers (controllers) and switches. I've found lots of pix showing a layout diagram with a control switch at each turnout, but none of them show me the controllers. Where do people typically hide them? I'm not using DCC - my three controllers have handles on top to control speed, so I have to be able to get at them easily. I can't hide them away somewhere. Most of the pix I've seen are very elaborate - take a look at this:

http://1.bp.blogspot.com/-Dj4FbPXhg...AQg/4gitOx7IQRM/s1600/MODEL+EXPO+2011+008.jpg

I'm looking for simplicity.
 
Since you are looking for simplicity, how about a shelf the width of the largest controller that will hold all three and place it below your control panel? Your panel will be large due to the switches you planning on using. I think they are the square flat ones with a red slide switch in the middle that show direction and then you push the slide down to activate the coils and you can daisy chain them together. If so, they are rather large and really ugly!
 
IANC: this is turning into an Easter Egg hunt. We do not have a track plan to go by and we are not sure exactly what you are looking for. I assume you want one panel in one location to control the whole layout. You want your 3 controllers near the panel. You want it to be easy to build. What is wrong with a shelf for the transformers below a panel for your switches? I think we need a tad bit more info than cold, warmer, warmer, hot!
 
IANC: I think I have got it. Do you want the three controllers in the same panel as the switches for your turnouts? One big panel is my guess, if so, do the transformer sizes differ by alot? If so, it can be done but it won't be simple, you would need a "cradle" for each transformer and keep in mind you need access to all the switches, on/off, momentum, brake, forward/reverse, etc. Keep us posted. Thanks.
 
IANC: I think I have got it. Do you want the three controllers in the same panel as the switches for your turnouts? One big panel is my guess, if so, do the transformer sizes differ by alot? If so, it can be done but it won't be simple, you would need a "cradle" for each transformer and keep in mind you need access to all the switches, on/off, momentum, brake, forward/reverse, etc. Keep us posted. Thanks.

You have indeed 'got it'. I've attached a pic of the temporary control panel I slapped together to make sure everything works. The switches control the turntables (I have to add one: one TT still needs a motor). When the loco is on the TT and the switch is thrown it cuts power to the TT tracks and puts power to the TT motor, so when the rheostat is turned the TT turns. You are correct about the switches - they are Atlas, and your previous description fits. " I think they are the square flat ones with a red slide switch in the middle that show direction and then you push the slide down to activate the coils and you can daisy chain them together. If so, they are rather large and really ugly!"

2014-12-21 11.47.11.jpg
 
Are you looking for something like this.I built a drawer that slides back under the bench work.

Excellent! That's exactly what I need. And it is indeed elegant. I've been trying to figure out how to replicate the three lines and position the switches in relation to the diagram, but there's no need - number the turnouts and the switches. I guess I can colour code them somehow, one colour for each of the three railroads, and three sets of numbers from 1 to 6 or whatever. so I have Red 1, Red 2, Blue 1, Blue 2 and so on. How did you handle the wiring for the sliding panel? Just lots of slack? My thanks to all of you, and if anyone else has pix that might help me, obviously I need all the help I can get.
 
the wires are fastened to the drawer with nylon clamps use the smallest clamos that will fit around the wires snugly put a tie wrap in front of the clamp and one behind the clamp nice and tight so the so the sliding of the drawer dont pull on the connections. Leave enough slack behind the clamp so the drawer can slide.Tie wrap the wires into a harness and your done.

IMG_1024_zps91713fda.jpg


Back
Top