Building the Pinnacle Creek Mining & Timber Co. RR


Thanks to Chris, who visits here quite often, I have this photo to share. I call it Panning for Gold. Jim:eek:

found the photo Chris, but cannot upload it. Sorry.
 
Last edited by a moderator:
Thanks to Chris, who visits here quite often, I have this photo to share. I call it Panning for Gold. Jim:eek:

panningforgold_zps17ef6873.jpg

Now that's a neat little detail!
 
Hey Jim, my little miner never looked better. What I like best is your incredible detail to the actual stream. That's exactly the way the boulders look in the stream with the water flowing around them. Nice nice job. - Chris
 
Chris, I could not have done this scene without your help. Thanks.

As for the stream I take no credit for realism. I simply poured the Realistic Water from the top and let it run down the steam bed naturally. Gravity, like always, is the best solution to well done streams. Many modelers forget to 'slope' their stream beds and end up with shallow pond trying to look like a stream. The key to better streams is to pour enough Realistic Water in so that it actually flows off the layout and into a receptacle on the floor. A bit more expensive, but you see the results. Jim:)
 
Jim

I have always been a proponent of Liquitex Medium for water. After seeing your stream I think I may have to re think my "loyalties" and give this Realistic Water a try. Excellent work and, as Chris said, very realistic!
 
Tony, Thanks. Here is the deal again. My modeling endeavors are, and have for the most part, done on the cheap. I use fairly basic easy to procure scenery items from my LHS or epay. I do NOT spend an inordinate amount of time or money at Scenic Express. I wish I could but money is dear. So I put my efforts into doing my best with what is in most of our budgets. Woodland Scenics products fit the bill for the most part. Their Realistic Water, in particular, fits my requirements. It is not too expensive, it can simply be poured straight from the bottle, and I don't have to heat it, mix it, just pour it. Even in a static environment like lakes and ponds it dries with an ever so slight texture that is quite 'realistic.' I don't like crystal clear smooth water like some of the two-part mixes. It just doesn't look correct to me. I've use Liquitex Medium and ModgePodge for water also and find Realistic Water still my favorite. Jim :)
 
Nuts and Bolts!

Some of us are into scratch and kit building. Some of us like to build our bridges or water towers. Some of us forget that maybe we should have gone to the LHS or epay and bought these:

IMG_6576.jpg

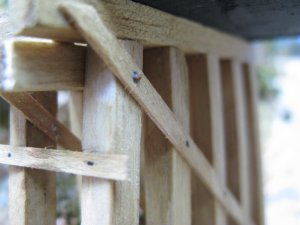
A wooden trestle is one thing, but a wooden trestle that has these used is something else! Trust me a photo can tell, as well as most guests to your layout, that you have gone that little extra step that separates adequate from just okay.

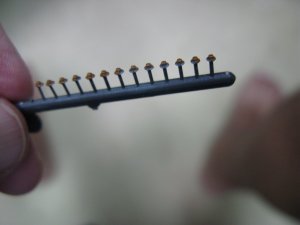
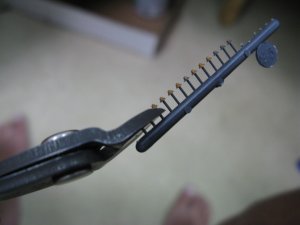
This product comes in HO scale sizes from my LHS. I like the largest size because they 'standout' more. Smaller is okay and may actually be more in scale. The fact that these nuts and bolts are there is the important thing. I like to use bolts with washers because again they're larger than a simple bolt head in the wood. These bolts DO NOT go through the whole wooden trestle part and come out the other side. They are like 'stick ons' they only go on one side of the structure. I cut the bolts off the sprue like this:

IMG_6577.jpg

I put them in a saucer so I can pick them up easily. Notice I have painted the tops with rust colored paint to show some aging. This is up to you whether your structure and bolts are old or new. Notice I cut these bolts off and left some 'tail' attached. This is because in the next step you will see how we make insertion holes for the bolts. There are a few ways to make the insertion holes. First is this way:

IMG_6578.jpg
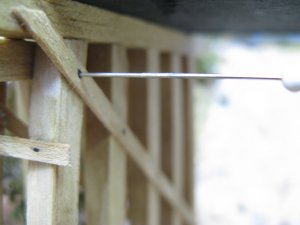
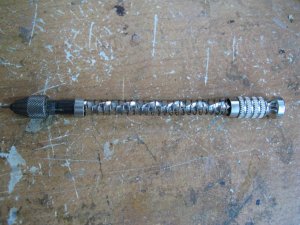
Here you see the pin method. This is okay until you start pushing your structure over! Put a finger on the other side to hold the structure steady. Another way, and my favorite is using this pin vise drill.

IMG_6579.jpgIMG_6582.jpg

The bit barely shows but this device will do your hole in an easy safe manner. Notice also that I've marked the hole positions with ink. I did this not for this job, but for simulating 'bolts' when viewed from across the room. Reasonable facsimile! Some leave their structure with no markings or bolts. I'm hoping to get you folks to take the next step. The last way to attach your bolts is to cut them off the sprue and glue them on. I seldom use this method because it is messy and glue just seems to get everywhere.

Next up you need a tweeser. I like this curved one:

IMG_6579.jpg

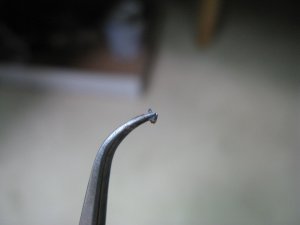
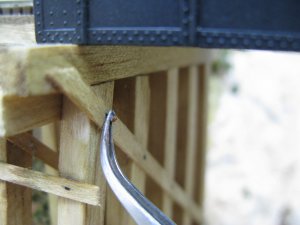
I like this rounded one because it picks up bolts, even if the stem is cut to short! The curve also allows you to eliminate contortions with your hands and wrist. Here is how the bolt goes in your pre-drilled hole:

IMG_6580.jpg

When I get to this point I put my finger of my other hand up and press the bolt into the hole. If you've drilled the hole deep enough and left the stem long enough then I don't use glue. If you left the stem really short like the previous photo then you should dip the stem in some white glue and then insert. This is what we are trying to do:

IMG_6581.jpg

So there you have it. Go the extra step. These bolts are like $4 per package and you get a lot so give it a try. Jim :eek:


Last edited by a moderator:
Nuts and Bolts addendum:

Here is a before and after shot of the bolts or no bolts.

IMG_6287.JPG
me!
IMG_6596.jpg

Hopefully you can tell the differences and see the point of making just a bit more effort. Jim :)
 
Last edited by a moderator:
Thanks for this mini-tutorial. I've used bolts in the past on one project and have a few sets from others. I can't remember if I did it this way or not. I want to say that's what I did. I think that's why I bought the pin vise.

For whatever reason cutting them short and gluing them into place comes to mind. Obviously, that's not the right way and will take significantly more time and effort!
 
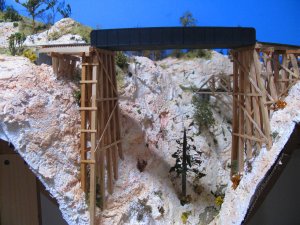
This brought back fond memories of building the Dinky Creek Bridge almost 40 years ago. By Christmas it should be on my layout
 
I just counted them in my bridge and stopped at 804. Each drilled and glued. I need to retract the word fond from my earlier post. Blayne
 
Thanks guys.

Balyne, That is a lot of bolts! Congratulations. Good that you did them decades ago.:) As for the thru girder bridge. Yes, it is curved and I did it. I scribed each section with a saw and delicately bent the girders to the curve; and proud of it. With an HO layout this size in a room only 10'x11' I have little or no straight track on the layout. Everything is a 22r or 24r piece of track. Jim ;)
 
Jim,
Yes the bolts were pre bifocals and pre cataracts. Your thru girder looks like a CV of which I own 2 and only need one somewhere else and my HOn3 has 24" R curves. I'm good to go. I owe you one. As I was typing I started to think of all the wonderful ideas that are in this 243 page thread. Just goes to show how much light a candle gives.Thanks, Blayne
 
Jim,

Great little tutorial. Until now, I have used track nails to simulate my bolts, rivets etc. Yours is obviously far more realistic and just as easy. Great work sir.


Back
Top