Building the Pinnacle Creek Mining & Timber Co. RR


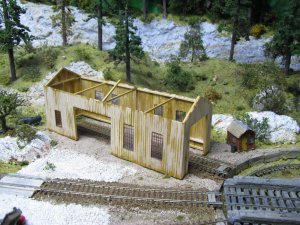
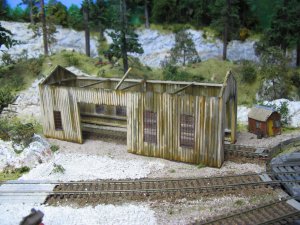
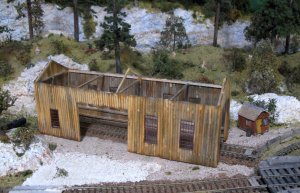
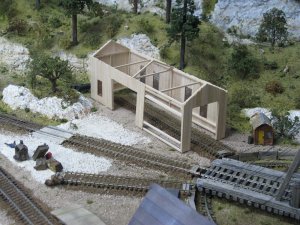
Here's a photo of the engine house as of a few minutes ago. I got enough wood to fill in the back of the building and put in a couple more windows. The LHS is still out of wood so I special ordered a good supply to finish this building and have extra for other building.

IMG_6150.JPG

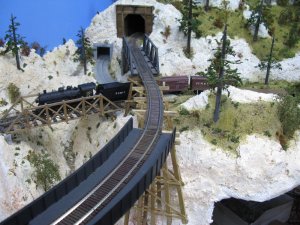
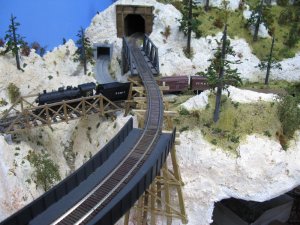
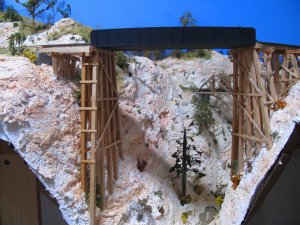
Also here is an update showing the bridge track I made and the reason for it. More on these bridges later. Jim :)

IMG_6151.JPG
 
Last edited by a moderator:
Scott and Toot, Thanks for the compliments. Much appreciated.

Blayne, Good on you for noticing the girder bridge was a bit 'different.' Different because it is a curved metal girder bridge. I didn't want a full wooden trestle bridge across this narrow gap and curving the plastic straight girders seemed the way to go. It is my railroad after all. In the photo you can see the product. So, no, I didn't not scratch build the metal bridges. I just worked with them until they fit. This girder bridge is not finished at this point. Still needs wood planking on the deck and some metal bits around the track, like real life, to keep the track stable. Remember also that this layout is dual gauge so these bridges tend to look bigger than normal HO scale.
Sticking with this photo you may realize is simply cut off the bridge uppers and insert a new wooden base the glue the uppers to the curve of the base. Jim;)

IMG_6151.JPG
 
Last edited by a moderator:
Earlier I mention the lack of cars in the 30s decade. Here a photo of some shiny cars from 1929, 1936, and 1941. Doing what cars do best, waiting for the local to pass. Jim:)

RailroadCrossing_zps30379c1e.jpg
 
Last edited by a moderator:
Jim, I know you have explained your photographic technique before, but your photos are so realistic. Excellent job in setting the scene. Even the white line or crack down the middle of the road shows an old 1940's road. You can show more progress in your layout than anyone I have ever scene. Good job. - Chris
 
I'll let him tell you his secrets, but one thing immediately stands out. Note the hard light and shadows. That looks like sun, and makes the scene look real.
 
Chris, Yes, I do put thought into my 1941 time frame. While I wasn't around then I do like to think I have a clue as to what, where, when and how things looked back in the day. One of the keys of modeling is to have a grasp of what our surroundings really look like. I see layouts that look like scenes from your city park. I may be wrong, but I don't think that is how a scene two blocks away from that park looks like. I try to make everything a bit 'rough' around the edges. As far as showing off the layout as I go, that is basically the way I have to build the layout. Because I'm in a small room, only 10x11, and have minimum 22r this time, I have to build back to front because of reach issues. I've built all six of the layouts this way so it is no big deal for me. It does mean that layouts are completed in different spots (corners) at different times. Track laying is not traditional either in that nothing gets run until the layout is nearly done. This time I've endeavored to build from one end of the layout to the other and as I post some photos of each new three feet of completion so followers here can maybe learn a new thing or two.

Bob, A careful reading of the thread will reveal all my 'secrets.' I think! You make a good point about shadow. I prefer 'hard light and shadows' as you put it. I, and you it seems, like the possibly more realistic 'look' of the layout photos. Of course I'm talking about those special photos that portray a special scene not the ones that simply show the layout in general. One of the things I think I did right when I started building these layouts 8 years ago was putting in one of those skylight tubes in the ceiling. They are great for photography and I've learned that mostly cloudy days are best for photos without any artificial lighting. Late afternoon when skylight light is waning is when I turn on my workbench light. The direction I turn the light decides how sharp or hard those shadows will be. Thanks for visiting. Jim:)
 
Jim,

Really great photo. I was just on the scene in 1941 and don't really remember much from those days, but photos from my childhood show what you are trying to portray - the rough around the edges look. I really like the pick up trucks.

David
 
Remembering the fifties.

Jim, I'm not old enough to remember a "forties" era. I am old enough to have lived next to the ATSF mainline for 14 years, still saw steam heading freights occasionally, or a big steamer coupled to the front of the covered wagons, helping or standing in for broken units. I'm old enough to have "jumped" (with other kids) the once a day S.P. local to the next town over running through alleys and behind business's. That little local needed flat cars to push loaded merchandise cars onto sidings with track that looked like thick wire on the ground. The first couple of summers hopping that local it was steam powered, a little 2-6-0 I think. Later it ran a 70 tonner I think (hard to tell motorized boxcars apart) maximum speed, 15 mph, I doubt it ever did that. Conductor made us sit in the middle of the flats, crosslegged, imagine that today. I remember those "backside scenes" at least I think I remember. It was called the Monrovia branch I think.

My Mom was pretty broke but I did get an Athearn HiFi ATSF passenger set for Christmas when I was 5. She knew. I have always loved trains and model trains.

Is it suprising that with everything else drifting away, I want a bit of that in my back room?
 
Last edited by a moderator:
JimT, I think it is only natural to think back to the 'good old days.' As long as we have hope and goals for the future a quick glance from time to time is a good thing.

On that looking forward subject I'm very close to closing the loop and making a 'first run.' Table top scenery is a out 40% finished so this run will just be to check track work. Normally I wait until the layout is mostly done before trains but something got into me about cleaning the left side of the layout and finishing the track. :rolleyes: Guess this just shows there is more than one way to build these layouts. Jim
 
Back to business. Some of you model modern railroads and some model in my favorite era the 1930s. Some earlier. Since I've been gluing down the last of my foam roadbed I wonder if you take into consideration the size of your foam or cork roadbed concerning your modeling era? In the photo below we see the modern era, let's say after 1945, on the left and roadbed before WWII on the right.
IMG_6168.JPG

Your roadbed material, cork or foam, does not take this essential modeling fact of width into consideration when you buy it. You have to make your roadbed a bit narrower for pre-WWII. Simply cut out a 1/4 inch and glue down.
IMG_6167.JPG

Remember it is the importance of the 'little' things we do that make the difference.

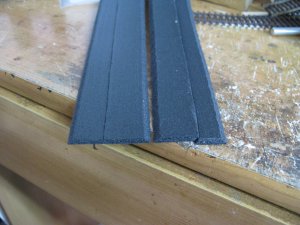
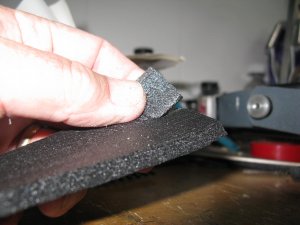
While we are on the subject of roadbed, and foam in particular, do not tear the foam down the middle with the top of the roadbed facing you. Not like this:

IMG_6169.JPG

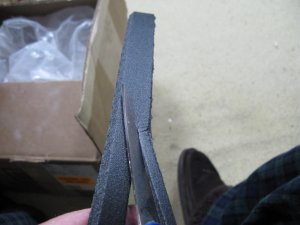
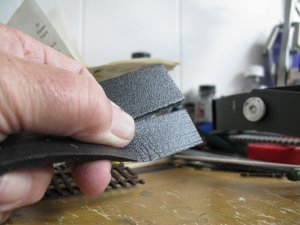
Turn the foam over and tear. The final result is a much cleaner tear without jagged edges.

IMG_6170.JPG

Remember this hint it will save you headaches when gluing down your roadbed. Also, follow directions. Many new modelers try to glue the whole piece down without tearing it. Wrong. To make it lie flat on curves you must tear it. Jim :)
 
Last edited by a moderator:
Busy morning here. I poured the first pour of WS Realistic Water in my small creek. It was mainly to fill in the seams. If you pour a bit too much you can see in this photo you have to scramble a bit to keep this stuff off the floor. I grabbed a hairspray top to catch the run off. You can actually see a drip dropping! Jim:D

Photo NOT found. Thanks photobucket.
 

Attachments

  • IMG_6287.JPG
    IMG_6287.JPG
    569.2 KB · Views: 149
Last edited by a moderator:
Remember the engine house? The LHS finally got some wood in and finished the basic structure. In this photo you can see the weathering/aging process. I've use Micro Mark Brown weathering solution here. I used a brush and painted the inside and the bottom edges. I used more solution to get it to soak through the seams and wood in varying decrees.

IMG_6171.JPG

After letting the 'brown' dry over night I added Micro Mark's Gray. I repainted the inside of the engine shed covering the original 'brown.' I let this dry overnight as well.

IMG_6172.JPG

When it is all dry I went over the outside with the Gray and here you are.

IMG_6191.JPG


Jim:)
 
Last edited by a moderator:


Back
Top