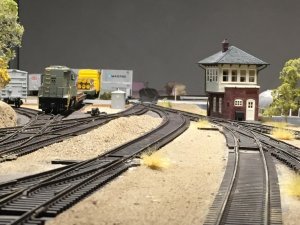
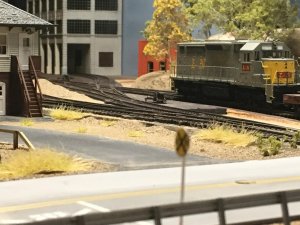
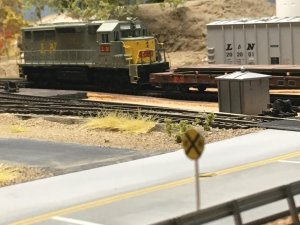
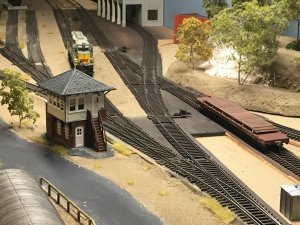
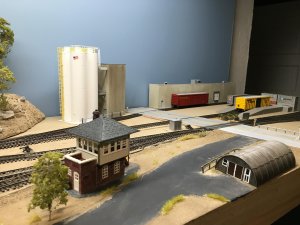
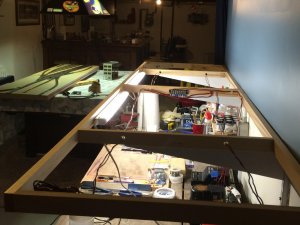
Even though I haven't posted in a bit, I have been slightly busy with the layout. Here is the final version I ended up with.
View attachment 51392
I pinned all the track down to make sure it would fit properly. Took it up and laid down Woodland scenics foam roadbed down on the mainline, runaround, and interchange tracks. Mainly to help with track noise. I found some 1/8" 2'x4' rolls of cork at Jo-Ann Fabrics to put down under the yard and spurs so that it wasn't such a transition from the road bed to the foam. They also had 1/4" cork that probably would have worked well for the main line, but I had already bought the foam roadbed. I have it all repinned down to mark where I want feeders to go and holes for possible switch machines in some spots. Then I can caulk the track down and wire it up and maybe finally do some scenery. I didn't take many pics of the progress; however, I did make a short test run video.
- Nice progress so far. I tried putting an engine house on my layout and a fueling pad that your putting in and I ended up just cutting out the middle section between the tracks to use next to a track to save space. You can use the sidewalks later on for truck scales if you needed them. The other thing you could do is put a scrap yard where the engine house is and park a diesel truck on your team track from time to time to refuel your engine. But it looks good
You are using an out of date browser. It may not display this or other websites correctly.
You should upgrade or use an alternative browser.
You should upgrade or use an alternative browser.
2'x8' Shelf Module
- Thread starter LW93Rcode
- Start date
Thanks Steve! I have been looking at your layout progress and I'm hoping I can get a similar feel to yours. I did cut one half of the side walk off. Here is how it the fueling pad sits as of now. I just may cut off the other side now that you mentioned it.
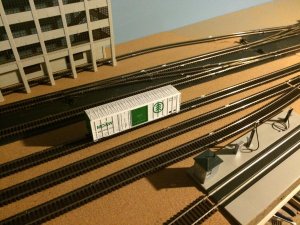
I was able to get it all wired up and the track is glued down. I have been running trains back and forth to find/fix and trouble spots before I had dirt and ballast. I'm heading to OBX in few hours for vacation so I won't be having any updates for the week.
-Laurence

I was able to get it all wired up and the track is glued down. I have been running trains back and forth to find/fix and trouble spots before I had dirt and ballast. I'm heading to OBX in few hours for vacation so I won't be having any updates for the week.

-Laurence
Last edited by a moderator:
Hi guys! I don't have too much to update other than painting the rails. I have been running all my locos back and forth the last few weeks making sure the track work is good. I seem to have one problem spot thru an Atlas 19* crossing (mostly with 6 axle locos).
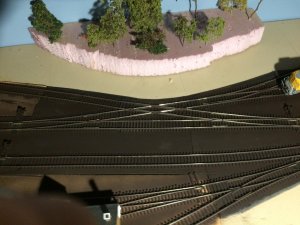
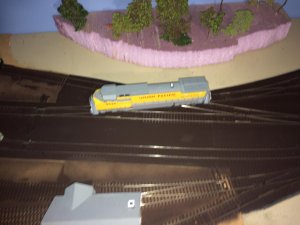
I tried paint/nail polish on the frogs on the two switches and crossing but this particular loco still stalls where its at. The switches are Peco #6s. Are the switches just simply too close to the crossing? I know it would be terribly hard to diagnose something like this from just a picture, but I was just wondering if someone had a situation similar and what their solution was/might be? On a side note, I did check to make sure all the wheel sets were in gauge on all the locos that had problems.
-Laurence
Last edited by a moderator:
Genetk44
Active Member
The locos in question are stalling? not derailing?Hi guys! I don't have too much to update other than painting the rails. I have been running all my locos back and forth the last few weeks making sure the track work is good. I seem to have one problem spot thru an Atlas 19* crossing (mostly with 6 axle locos).
View attachment 52443View attachment 52444
I tried paint/nail polish on the frogs on the two switches and crossing but this particular loco still stalls where its at. The switches are Peco #6s. Are the switches just simply too close to the crossing? I know it would be terribly hard to diagnose something like this from just a picture, but I was just wondering if someone had a situation similar and what their solution was/might be? On a side note, I did check to make sure all the wheel sets were in gauge on all the locos that had problems.
-Laurence
Genetk44
Active Member
[h=2]I built one of these ....its very easy to do, all the parts are available at any Radio Shack etc......it beeps when there is a wiring or other short-circuit....I suspect those long-wheelbase locos are shorting across the polarity by the crossing/switches and the beeper will let you know where.
Cheap Electrical Short Circuit Detector[/h]IMPORTANT - Build a Short Detecting Beeper BEFORE You Start ANY DCC Track Wiring!
When doing any wiring on a track segment, you should connect a buzzing short circuit detector to the track block you're working on. This will help you detect shorts before soldering a connection, unless you really like having to cut newly connected wires until the short is found! You can build one of these using some cheap Radio Shack parts.
Items needed:
If you have several boosters (or power districts), you will need to move the beeper to each district as you wire. If there are several teams wiring different districts at once, just make them each a buzzer - they're cheap insurance!
Cheap Electrical Short Circuit Detector[/h]IMPORTANT - Build a Short Detecting Beeper BEFORE You Start ANY DCC Track Wiring!
When doing any wiring on a track segment, you should connect a buzzing short circuit detector to the track block you're working on. This will help you detect shorts before soldering a connection, unless you really like having to cut newly connected wires until the short is found! You can build one of these using some cheap Radio Shack parts.
Items needed:
- 18-22 gauge wire (just a few feet)
- 2 Alligator Clips
- buzzer
- 9 volt battery
If you have several boosters (or power districts), you will need to move the beeper to each district as you wire. If there are several teams wiring different districts at once, just make them each a buzzer - they're cheap insurance!
Laurence
Have you used a NMRA track gauge thru the Xing & beyond it? Also run your 6 axle loco thru it very slowly (<2 MPH) & watch it closely, i.e. "up close & personal") to see exactly where it's derailing. Then check that spot visually & by touch to see if there's anything that might cause the loco to derail. Touch the insides & tops of all the rails to feel for anything that could cause derailments. Also check it w/ a metal straight edge to be sure every thing is straight thru the Xing & to the switch on right.
But usually 4 axle engines would be doing local switching, not larger 6 axle road engines. Also on the real RRs union rules allow road crews to only do setouts/pickups for local crews to work. Yard crews do local industry & yard switching. But as they say it's your MR, so run it any way you want!
Last edited by a moderator:
Gene, it is definitely stalling/shorting. Sometimes it trips the short circuit on my DCC system, sometimes it stalls without tripping it. So far the only derails are when the switchman (me) forgets to throw the turnout in the right direction!! At first I thought it was a short when the loco was in the crossing and just into the switch. I went back and ran it slow again and it seems to stall when entering the crossing from the spurs. I can give it a push and then it'll go until the rear axle hits the crossing frog rails. Push again and it'll continue right thru the peco switch just fine. I thought that maybe that particular loco's wheels were off but they seem to be good with the nmra gauge I bought. My other thought was that if it actually was the crossing like that, wouldn't the 4 axle locos have shorted too? I just seem to have trouble seeing where any of the wheels are touching two rails. I'm going away for a wedding this weekend. When I get back I'll try and get a little video up of what it does and build one of those short detectors.
Andy, I definitely do intend to use 4 axle locos for switching here. I was just in the mindset however, that I wanted everything to work as best it could for all my locos. I know I'll probably never have a 6 axle loco go thru that crossing when actually switching or maybe making a video. Sometimes it just has to work right even if I never use it that way. It will bug the hell out of me for some reason, lol! I did run the gauge thru the crossing but not the switches yet. I will definitely be asking you the do's and don'ts of switching once I start operating a bit
-Laurence
Genetk44
Active Member
I'm going to make a long-distance guess its a combination of the crossing , switches and length of the loco acting in concert to short-out the system. If the four-axle locos are running through it no problem it really suggests to me that everything is so tight in distance that just that tiny bit of extra length is causing the problem
Laurence
Have known it to happen that a loco or car wheels will jump up going thru one track feature then actually derail going over the next one. That's why you need to watch the loco go thru all of it. See if the wheels jump or "wiggle" any where thru those tracks. Did you run a finger along the inside of the rails yet?
Have known it to happen that a loco or car wheels will jump up going thru one track feature then actually derail going over the next one. That's why you need to watch the loco go thru all of it. See if the wheels jump or "wiggle" any where thru those tracks. Did you run a finger along the inside of the rails yet?
What you've actually got there is a double crossover without 1 of the parallel straight through tracks. Maybe find a circuit for a double crossover and see if there's something about the way this configuration is wired up that's doing it. Are all the frogs insulfrog. I notice with the 6 axle loco it seems to have stopped where the wheelsets on the side facing us are sitting on the crossover X frog and the other wheelset on the frog of the left hand turnout. Maybe causing a loss of electrical contact on that side of the loco, which would cause a stall. 6 axle trucks can have the habit of pivoting about on the centre pair of wheels, doesn't take much of a high spot in the track (frogs being one of them), that could in this scenario cause a loss of contact by the fore and aft wheels in that truck or both and be a reason for derailing/shorting.
I think it's got a lot to do with the wheelbase of your 6 axle loco matching the distance between those frogs.
I think it's got a lot to do with the wheelbase of your 6 axle loco matching the distance between those frogs.
Genetk44
Active Member
I think it's got a lot to do with the wheelbase of your 6 axle loco matching the distance between those frogs.
Like i said earlier it would appear that the longer wheelbase of the 6 wheelers has an impact. Looks like they are insulfrog from the pictures.
roofintrash
Well-Known Member
Wow that's looking good. Nice work.
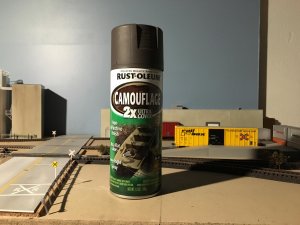
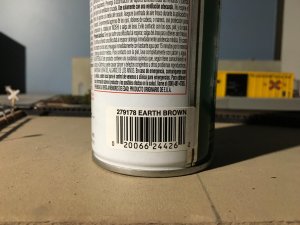
What color,type of paint did you use for your track? That matches what I see around here perfectly. Me likey!
What color,type of paint did you use for your track? That matches what I see around here perfectly. Me likey!
Last edited by a moderator:
iandrewmartin
New Member
Laurence;
The layout looks great. Have you run an operating session, or sessions yet? I'm looking forward to seeing what comes next. Keep the photos coming.
The layout looks great. Have you run an operating session, or sessions yet? I'm looking forward to seeing what comes next. Keep the photos coming.
Thanks Andrew! I haven't run any real op sessions as of yet as I'm still in the process of learning all of that. I also didn't pre plan out everything so well, (not so much the track plan, had excellent help with that) but what all the industries actually are. One of the reasons other than time for the slow progress! I have been loading my rolling stock info into the Switchlist app for Mac. Being that not all the industries have been established yet, I haven't generated a work list yet. Anyway, here's a video I made moving a few box cars around awhile back after installing a Loksound Select.
https://youtu.be/fJzSUpRk63Y
-Laurence
https://youtu.be/fJzSUpRk63Y
-Laurence
Last edited by a moderator:
Alan's layout is for sure one of the builds I have been looking at for ideas and inspiration! There are quite a few layouts from this forum that I've taken notes from and learned some techniques on including yours Chet. Definitely a great resource this forum is, even for people like me who don't always post a lot.
-Laurence
-Laurence


