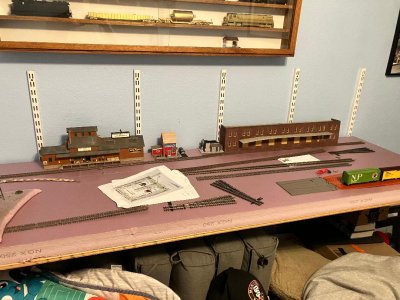
What's happening on your layout?

ModelRailroadForums.com is a free Model Railroad Discussion Forum and photo gallery. We cover all scales and sizes of model railroads. Online since 2002, it's one of the oldest and largest model railroad forums on the web. Whether you're a master model railroader or just getting started, you'll find something of interest here.


I got all my freight cars sorted out, got a couple hours of running trains time last week:

sorted.JPG


:):):):):):)
 
I'm working on the right side wall/area of my layout. After some fitting I am now painting mountains and tunnels and stone walls and bridging.
I am waiting for the water fall supplies to get here.......

I'm not sure if I'll keep the back drop scenery up....... although I don't want to spend money again for another back drop...... Unless someone knows where to find good back drops..... for cheap.


Nothing much on the layout itself. I am still working on finishing that Mantua 2-6-6-2 logger into something resembling a Burlington T-2. I hooked up a small tender and did a test run around the layout. The T-2's were oil fired, and I wanted to put one on. I happened to have a Roundhouse tender with the oil bunker, which I had connected to a Mantua Pacific, with a Burlington Route logo and large G.G.& W. letters (for my Grashhook, Galesburg and Western division of he Q. As the ersatz T-2 would be right as configured for that tender, I was going to transfer the tender. As it happened, I found a duplicate tender already logo'd with the Burlington Route logo already on it, on ebay. It turned out to be the same exact tender. So I simply swapped bodies, and am in the process of assembling the G.G. & W. body to the "new" chassis.
 
Did some more painting on the bridge and wall stone work today.
I adjusted the backdrop scenery I will probably leave it the way that it is.
Still some more painting to do on the top of the tunnel add some trees and scenery to that.
Also thinking of adding trees and scenery on the other side of the bridge at the top of the wall.

Still waiting for the waterfall material to show up....... Of course I will have to do some practicing with the waterfalls before I actually apply it to the scenery.
 
Last edited:


Another project currently working on the layout.......
Well, first, here's one I just got through with......
Three stall engine house and fuel pad...........
PXL_20250905_182010292.MP.jpg

PXL_20250830_184231759.jpg

PXL_20250925_174247040.jpg

PXL_20251008_202506405.jpg

PXL_20251204_201430835.jpg

The fill between the fuel pad and building/track, is crushed red cinder that was used for the original roadbeds in this area on the Great Northern and Southern Pacific railroads. I bought a series of mesh screens so I could make my own ballast/dirt. The Mainline will have the GN grey ballast, but all other tracks will be red cinder.......
 
So a month ago I posted the left picture of the start of my son's Bridgeport neighborhood in Chicago's near south side. A much condensed version of perhaps 16 city blocks resulted and is almost finished in the right photo. Not nearly accurate but has enough details to make it recognizable to someone who has been there. It was a fun winter project during our tule fog month. My son's house is the middle of the 3 single story bungalows in the center.
 

Attachments

  • IMG_1956.jpeg
    IMG_1956.jpeg
    107.7 KB · Views: 54
  • IMG_1972.jpeg
    IMG_1972.jpeg
    685 KB · Views: 54
Still working on my backdrop scenery and the bridging on the right side of my layout.
I know the one bridge brick column did not look wide enough proportionally with the bridge above it..... Since I do not have enough room to widen the bridge column...

I painted a piece of scenery and added to the bridge column to make it....look wider.

I'm not sure how good it looks but I may need to work on it some.
 
Last edited:
Last post I mentioned my current layout project.......
It is this creek scene. With layout 1 I completed the track work and had trains running, no landscaping experience.......
So here I am doing landscaping on #2, all new stuff, a lot of learning curves to get through......
I've been trying to persevere with this project, so I can run trains again.......

The roughed in creek scene......
IMG_0214.JPG


With the abutments & retaining walls in, it's construct the creek sides.......
First iteration........
PXL_20250830_184248304.jpg


The creek bed dug out. Standing water on the right of the column, creek flow to the left of the column.
PXL_20250914_192051341.jpg


Then I got it to this stage. The slots in the foam behind the column is where the "wrecked" plate girder bridge goes......
PXL_20251004_194435392.jpg


The last revision was to cast another batch of rocks and replace the back right side of the wall. To help seal the foam and all its seams and holes, I used WS plaster cloth. After the mess with the first layer, I found it was less so with layer two by laying the plaster cloth pieces down and soaking them with a squirt bottle. I thought I would attempt the mirror at the far end of the creek trick, but I'm having trouble finding one big enough in this town...cheeezz! Is it any wonder why I have to shop online? Anyway, today it's cut the masonite down to size that is going to be the backdrop and get it fitted in. Has anybody here used the mirror on the layout trick?
PXL_20251231_201740524.jpg


This is after I got the foam and all that cut for the masonite. The wall has since been painted blue......
PXL_20251231_201732833.jpg
 
Last post I mentioned my current layout project.......
It is this creek scene. With layout 1 I completed the track work and had trains running, no landscaping experience.......
So here I am doing landscaping on #2, all new stuff, a lot of learning curves to get through......
I've been trying to persevere with this project, so I can run trains again.......

The roughed in creek scene......
View attachment 254742

With the abutments & retaining walls in, it's construct the creek sides.......
First iteration........
View attachment 254743

The creek bed dug out. Standing water on the right of the column, creek flow to the left of the column.
View attachment 254744

Then I got it to this stage. The slots in the foam behind the column is where the "wrecked" plate girder bridge goes......
View attachment 254747

The last revision was to cast another batch of rocks and replace the back right side of the wall. To help seal the foam and all its seams and holes, I used WS plaster cloth. After the mess with the first layer, I found it was less so with layer two by laying the plaster cloth pieces down and soaking them with a squirt bottle. I thought I would attempt the mirror at the far end of the creek trick, but I'm having trouble finding one big enough in this town...cheeezz! Is it any wonder why I have to shop online? Anyway, today it's cut the masonite down to size that is going to be the backdrop and get it fitted in. Has anybody here used the mirror on the layout trick?
View attachment 254748

This is after I got the foam and all that cut for the masonite. The wall has since been painted blue......
View attachment 254750

Looking good, great work!


Affiliate Disclosure: We may receive a commision from some of the links and ads shown on this website (Learn More Here)

Back
Top