
You are using an out of date browser. It may not display this or other websites correctly.
You should upgrade or use an alternative browser.
You should upgrade or use an alternative browser.
What's happening on your layout?
- Thread starter Old 97
- Start date
ModelRailroadForums.com is a free Model Railroad Discussion Forum and photo gallery. We cover all scales and sizes of model railroads. Online since 2002, it's one of the oldest and largest model railroad forums on the web. Whether you're a master model railroader or just getting started, you'll find something of interest here.


 which inspired me to never do that again



Affiliate Disclosure: We may receive a commision from some of the links and ads shown on this website (Learn More Here)

Mopac Junkie
The Thread Killer
trailrider
Well-Known Member
That's why the prototype had switchmen.THanks! I did find that I have to make sure to put the switches back to straight through after the train has switched over.
Kusojiji
RANK AMATEURS OF THE MODEL RAILROAD FORM MEMBER
Haha, yeah I better wire them in!That's why the prototype had switchmen.

Rico
BNSF Modeller
Occasionally (okay quite often) I like to run a “ridiculously long train that has no business being on the layout”, that is a train that has no real destination and is too long for any sidings. Sure adds lots of interest to multiple train operations!
So when it heads back to staging it takes up just a little too much real estate and winds up fouling switches.
Well this morning I fired up a couple “Jimmies” and started heading out to the mainline when I heard that unmistakable sound of dragging wheels on the ties. Yup, hit that big ol' coal train midsection.
That inspired me to add another light to the overhead control panel. Just a simple on/off toggle switch that activates a flashing LED to indicate a no-go situation on the west staging yard lead. Here’s a short video…
So when it heads back to staging it takes up just a little too much real estate and winds up fouling switches.
Well this morning I fired up a couple “Jimmies” and started heading out to the mainline when I heard that unmistakable sound of dragging wheels on the ties. Yup, hit that big ol' coal train midsection.
That inspired me to add another light to the overhead control panel. Just a simple on/off toggle switch that activates a flashing LED to indicate a no-go situation on the west staging yard lead. Here’s a short video…
SD40 Jim
Well-Known Member
I did that once and it was pretty cool. Then heard the dragging wheels on ties, which still wasn't that bad. It was the crash when 3 cars hit the concrete floorOccasionally (okay quite often) I like to run a “ridiculously long train that has no business being on the layout”, that is a train that has no real destination and is too long for any sidings. Sure adds lots of interest to multiple train operations!
So when it heads back to staging it takes up just a little too much real estate and winds up fouling switches.
Well this morning I fired up a couple “Jimmies” and started heading out to the mainline when I heard that unmistakable sound of dragging wheels on the ties. Yup, hit that big ol' coal train midsection.
That inspired me to add another light to the overhead control panel. Just a simple on/off toggle switch that activates a flashing LED to indicate a no-go situation on the west staging yard lead. Here’s a short video…
which inspired me to never do that again 
freescopesdad
Active Member
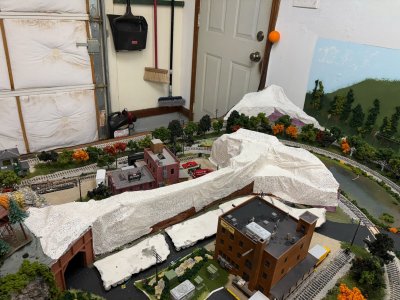
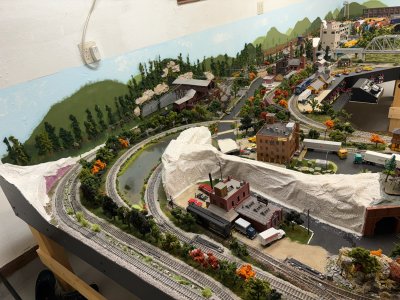
With the persistent tule fog in the central valley the last 2 weeks I've been indoors building and painting structures for a recreation of my son's Chicago Bridgeport neighborhood on my n scale layout out in my garage. I have about a dozen houses and a dozen brownstones, plus Bridgeport Catholic Academy, Nativity of Our Lord Church, of course Shinnick's Pub, the firehouse on 35th., the RJ Daley house, the playground at 36th. and Wallace, etc. It will occupy a grid of about 18x33 inches and be very selectively compressed (some streets and structures ignored - where is the Cell? Where is the Dan Ryan? - for the sake of space). It will stretch from Halsted to Wallace and 35th to 38th and include most structures of interest to my family and grandkids. I may try to pay homage to 3545 S. Wells which is where my dad's house stood but is now section 159 of the right field grandstand at Rate Field. Anyway, here is the rudimentary start...

Kusojiji
RANK AMATEURS OF THE MODEL RAILROAD FORM MEMBER
Well, it was watching a Rapido E1 pulling some passenger cars around until I heard a thunk and it stopped hard. Found that a connecting rod pin had fallen off.

Am now printing up a 2.23mm hex driver to get all that off so that I can try to put the pin back in. Have written to Rapido for a replacement. Am seriously hoping that the rest of the mechanism survived without getting skewed as it was such a wonderful runner.
Am now printing up a 2.23mm hex driver to get all that off so that I can try to put the pin back in. Have written to Rapido for a replacement. Am seriously hoping that the rest of the mechanism survived without getting skewed as it was such a wonderful runner.
RhB Michael
RhB Lokführer
My rail joiners showed up yesterday, so I might fix that yard lead track tomorrow. Or I might not. Depends.
Kusojiji
RANK AMATEURS OF THE MODEL RAILROAD FORM MEMBER
After 4 attempts, got the hex tool size correct. Got the crank pins out, con rod pin back in and pushed a dental tool in to try to spread the pin a bit to get an interference. Also put a drop of loctite 603 on the backside. Only managed to break the headlight and one step off in the process. Good thing is she runs like before.


Kusojiji
RANK AMATEURS OF THE MODEL RAILROAD FORM MEMBER
I found this n scale boxcab design on a 3d site and gave it a try. It was designed for a Kato 11-109 motor chassis. It was so awesome that I ended up printing 3 of them in different colors and even upsized it to HO scale. When I couldn't find the right size bogie for HO, I put a Hornby 0-6-0 steam chassis under it. Found out that the designer is a member of this forum.

Power unit for the HO size. Coreless motor installed.

Power unit for the HO size. Coreless motor installed.
Affiliate Disclosure: We may receive a commision from some of the links and ads shown on this website (Learn More Here)