

Aerojet
Active Member
My first post did not go so well, so I thought I would try this, as a "second" first. To start, I have been building Plywood Centrals for the past 35+ years, and in 2007 / 8 I decided to do something different. MY big layout went into the can when i had to move the biz home in 88, and I had been working with a N scale on an old door, and was not happy with the results. Looking thru a dozen layout books I was not happy with what I saw. I wanted a road which up and down and the track went above and below the scenery, not just over the board.
In 09, I started this project, and have been working at it ever since ... first up - the foundation. I have built free standing tables forever and one of the problems was somebody always kicks one of the legs. Earthquake time on the road! You never know what may get damaged by the sudden movement of the whole thing. Problem # 1 to solve ....
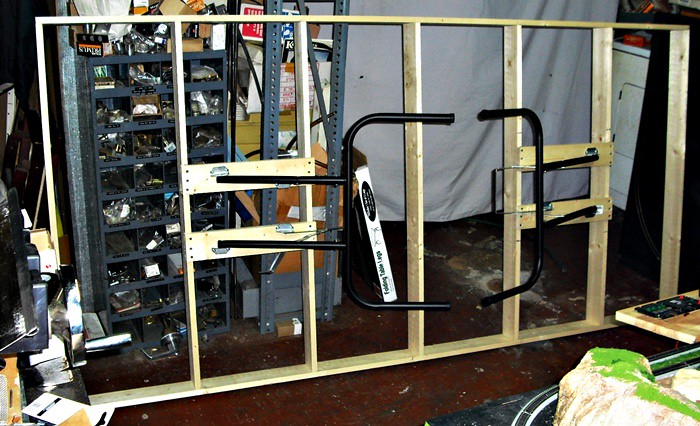
AN so I went over to home depot, and bought lumber, and table legs. Assembled as seen, it provides a solid base for the table, and doesn't have "legs" at the corners, or anywhere else which one can easily kick. Next to pull from the tombs one of the boards from the old 88 layout. They were up against the wall behind the office area....
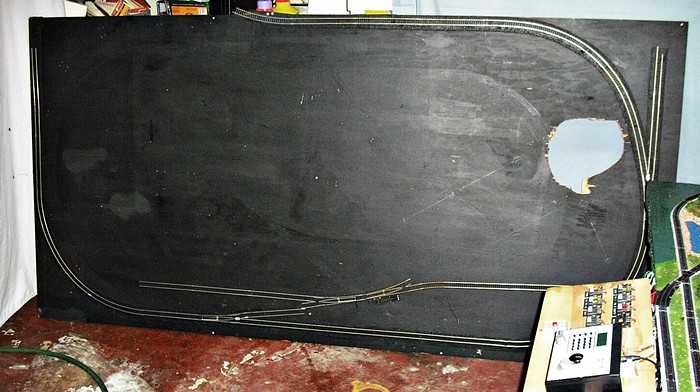
Still has track on it and the hole from the turn table. Time to clean it off, remove all the old track and start again. AS you can see it was built like a plywood central. Not what I wanted in the end. Now to find some way to build without a lot of carpentry work ... again a search was made, and I found Woodland Scenics kits. HO and N -- well I had enough of N, so back to HO. and I bought the River Pass kit. this is not shake the box and screw on wheels -- this is a box of foam, instructions, and basic hard shell materials. There are two other kits and i bought both - the scenery kit and the Atlas Track kit for this -- might as well go all the way! It is code 70 track, just for you to know ...
AND so construction begins. This is several weeks worth of weekend afternoons building ...

So most of the risers and the backdrop "box' has been erected and hot glued into place. Lots more to do, trial track placements and trial runs to make sure everything is solid and works. This took longer than I thought ... in the end, today this is the working like as I have it now ...
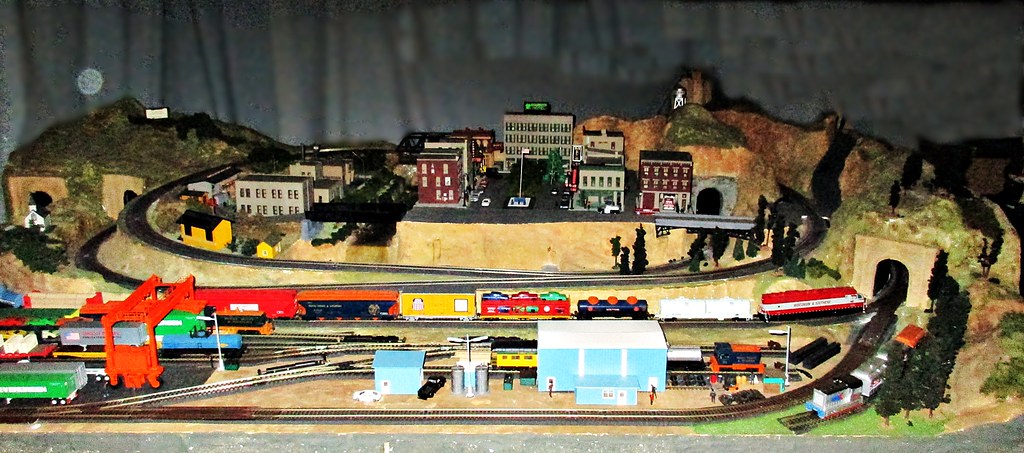
A lot of work went into this project, and I added the extra foot on the front a few years ago -- NOW?? I am working on putting up a second board and making this the base for a new longer road, much bigger ...
Last, I have been reading the boards and Model Railroader for ages -- so no newbie here. Just finally getting my pike in the way I want it to be ...
The Aerojet
In 09, I started this project, and have been working at it ever since ... first up - the foundation. I have built free standing tables forever and one of the problems was somebody always kicks one of the legs. Earthquake time on the road! You never know what may get damaged by the sudden movement of the whole thing. Problem # 1 to solve ....
AN so I went over to home depot, and bought lumber, and table legs. Assembled as seen, it provides a solid base for the table, and doesn't have "legs" at the corners, or anywhere else which one can easily kick. Next to pull from the tombs one of the boards from the old 88 layout. They were up against the wall behind the office area....
Still has track on it and the hole from the turn table. Time to clean it off, remove all the old track and start again. AS you can see it was built like a plywood central. Not what I wanted in the end. Now to find some way to build without a lot of carpentry work ... again a search was made, and I found Woodland Scenics kits. HO and N -- well I had enough of N, so back to HO. and I bought the River Pass kit. this is not shake the box and screw on wheels -- this is a box of foam, instructions, and basic hard shell materials. There are two other kits and i bought both - the scenery kit and the Atlas Track kit for this -- might as well go all the way! It is code 70 track, just for you to know ...
AND so construction begins. This is several weeks worth of weekend afternoons building ...
So most of the risers and the backdrop "box' has been erected and hot glued into place. Lots more to do, trial track placements and trial runs to make sure everything is solid and works. This took longer than I thought ... in the end, today this is the working like as I have it now ...
A lot of work went into this project, and I added the extra foot on the front a few years ago -- NOW?? I am working on putting up a second board and making this the base for a new longer road, much bigger ...
Last, I have been reading the boards and Model Railroader for ages -- so no newbie here. Just finally getting my pike in the way I want it to be ...
The Aerojet


 .
.


