Weathering Rolling Stock, a Continous thread

ModelRailroadForums.com is a free Model Railroad Discussion Forum and photo gallery. We cover all scales and sizes of model railroads. Online since 2002, it's one of the oldest and largest model railroad forums on the web. Whether you're a master model railroader or just getting started, you'll find something of interest here.


Status
Not open for further replies.


I chose these two to start. Last night I thoroughly washed with soap, and warm water. Then let dry overnight. I took them outside this morning and sprayed the first coat of Testors Dullcote. I will then let these dry overnight.

D67BD24B-F7F8-42A7-97A3-378F407BE3BB.jpeg
BD3579F6-A061-4292-AF24-3DE6A994F889.jpeg


I'm not sure where to go from here. Would I start with a wash?
 
I chose these two to start. Last night I thoroughly washed with soap, and warm water. Then let dry overnight. I took them outside this morning and sprayed the first coat of Testors Dullcote. I will then let these dry overnight.

View attachment 163920View attachment 163921

I'm not sure where to go from here. Would I start with a wash?
I don't think there is any set way to learn how to do any of this, I started on weathering the inside of a Hopper first, as that interested me at the time, now I'm just trying different colours with different pressure's from the compressor and seeing what effect each one has. Both Tom's have put various weathering formulas on here which I've used to good effect, nowhere near as good as either, I still haven't got the technique right, but I'll keep trying.
 
People have different skills, all desirable
a good eye for finished colour
a good eye for mixing paints
a good eye for layering paints
a good relationship with enamels (which I struggle with)
a good relationship with acrylics
a good relationship with a specific manufacturers paints (people often favour a particular type as they like working with it)
a good relationship with several manufacturers or types (‘highly desirable but you have to try and get the feel so time)
some people have a steady hand (nice for hand painting)
or the patience to go back and correct minor mistakes (patience is an art form in its own standing)
some people have good all round eye sight
me I’m short sighted but useful for squinting at detail, a magnifying glass on a stand works as well
I chose bi focal, close distance look over the top push out of the way lol
Some people have a good mind for math, excellent for scratch build,
…I think you get the idea :D
you’ll find your skills,you’ll find the equipment you like working with, and you’ll find what, skills can be acquired, equipment sourced, patience is something you’ll need, and sometimes when something frustrates the living sxxx out of me I walk away go do something else and when it is not like to get stomped on I return and try again, still a form of patience lol
it is a journey, I would suggest go cheap for the cheap end of the kit, but for high end kit air brushes etc wait until you know you can afford it, consider second hand if you might want to resell it, and build up your kit as each job required it, and most important of all, only move forward if you enjoy it.
Some people like scratchbuild, some kits, some have to compromise, I envy Willie the time he has had to invest in kits I just do not have that time and rely on plonk and play’, which I usually upgrade as time allows, but then the cost is higher, and not the satisfaction of a kit.I love scratchbuild have the drawing skills and the equipment but time is more difficult.
You have to my mind gone about it the right way, a couple of cheap wagons where nothing lost and you can take risks,best of luck and enjoy the journey.
 
FYI I have a love hate relationship with glue, and keep acetone about as I have three times had superglue on me instead of the model, once on a pair of glasses!
5649B812-0C83-4132-9847-0465304282C2.jpeg

I have reasonable drawing skills
and am game for a challenge

I bet both Toms have something either woodwork, engineering, mechanics,Lego, boyhood planes or boat kits or similar, let the child in you run free, and if you have any associated skills lean to wards those if they give you a comfort zone
and just so you can see how lame my first weathering job was
5361388E-DD3D-49BF-8D5D-B4883CCBB7F6.jpeg

to be fair to myself I had not joined a forum so did not have the resources, but I did not just jump into Toms standard overnite, you’ll trial ideas find ways that suit you and as you gain confidence you’ll try more and get better. The first steps are always the scariest.
 

Attachments

  • EEEB9E08-F6FD-4313-A0F2-884FDD9B399C.jpeg
    EEEB9E08-F6FD-4313-A0F2-884FDD9B399C.jpeg
    324.1 KB · Views: 170
  • F68AE6D8-B672-4650-B839-AE377D935334.jpeg
    F68AE6D8-B672-4650-B839-AE377D935334.jpeg
    283.5 KB · Views: 173
  • E9D41736-84B2-436B-B7F6-CA7DA0D162E3.jpeg
    E9D41736-84B2-436B-B7F6-CA7DA0D162E3.jpeg
    330.9 KB · Views: 186
  • AB2C6C99-16EC-4FA9-B3C1-BD0CFE0BE41B.jpeg
    AB2C6C99-16EC-4FA9-B3C1-BD0CFE0BE41B.jpeg
    423.9 KB · Views: 174
Jaz makes some good point's, but, she's been doing this a while and is very very good at it, I would disagree on some point's like getting cheap brushes etc. you get what you pay for, try and get middle range priced items, they will last longer and will give a decent result, the cheap stuff I found just disappointed me, I could not get a decent result, soon as I switched up a notch, I found it not only became easier I started getting much better results.

Case in point, I like to airbrush, a technique I am still very much a novice at, I bought a cheap airbrush set, you know the ones, cheap Chinese $40 airbrush and mini compressor, I could not get it to even work properly very often, and when I did, I seemed to paint everything except what I wanted, now I have a mid range compressor and a mid range airbrush, and the result is amazing.
Although I would advise against just going out and spending that kind of cash until you feel you need to, and it is something your actually going to use.

Look back on this thread and see what others are using, (or ask) that will give you a good barometer of the kind of equipment to look for, if you can get 2nd hand from a reputable dealer or even another forum member even better.
 
I chose these two to start. Last night I thoroughly washed with soap, and warm water. Then let dry overnight. I took them outside this morning and sprayed the first coat of Testors Dullcote. I will then let these dry overnight.

View attachment 163920View attachment 163921

I'm not sure where to go from here. Would I start with a wash?
Mike congrats on the 1st adventure. You got this far and with patience you even let it dry overnight. My suggestion is a panel line. Take a dark pan pastel with a micro brush and apply that. Get up tight to the ribs to create shadows of dark. If you dislike it, use a soft eraser and it should come off.

If you start with the pan pastel keep going with fading using the PP. it’s very forgiving.

Or if you prefer, you could start by trying a fade using the washes of Vallejo Air. I would go 60% water to 40% paint for my 1st attempts and I mean like count the drops you use. 12 water to 8 paint. If you decide that’s too dark, add more water. Make notes for awhile. After you find a formula you like it becomes a do by eye thing. That should do that 1st car with no waste. My way is brush clear water on the car, then with another brush use your mixed fade color. Straight lines down from the top. Do the whole side and do again. I use a flat wider brush for both applying the water and then the fade mix

If you have played with your airbrush and feel good, try fading with that. For airbrushing I use Tamiya Arcylic thinned with now 99% Isopropyl Alcohol, I was using 70% but 99 contains less water.

I will be in the air for most of the afternoon but I will check back in the morning.

This is a time for you to experiment, there are lots of ways

have fun
 
Before we came out to Arizona I was working on a few things.

A guy liked Chris’s tank cars so much he asked for some.
2C359F5F-D433-49CB-BC0B-2E851D1E5A30.jpeg
While I could not locate 3 for him I found 2 at decent prices. In the 2 months or so since Chris purchased his I couldn’t get within $5.00 of the previous purchase prices. These are Walters Mainline 25,000 gallon tank cars that mostly here in the Midwestern USA are hauling ethanol.
18079040-1970-4B9C-9D96-39819E632F30.jpeg

These are now dry after a quick brush down of 99% Isopropyl Alcohol.
62DDF053-CC3F-4EE2-BD80-AA0FFCA5995B.jpeg
42CC741F-B15C-4713-B4E5-A773112856C3.jpeg

This one has been airbrushed with Army Painters Matt Varnish that is water based. I took a chance as I usually test out new products but being water based if I don’t like it I figured I could fix it easily. It has a more pronounced whiteness to it compared to the VMS Matt clear varnish I have been using. It is definitely easier to use then Tamiya’a X-21 base that has a real chalky texture and look to it.
560F3887-BC6C-4FE2-AFC3-5187882D298E.jpeg

One car was done with Vallejo Air custom washes and hand brushed to bring out more fade. After that dried a mix of VA burnt umber was hand brushed as a wash on both sides of the ladders with a heavier concentration near the dome.

The other car was brushed with Pan Pastel #820.2 Nuetral Gray extra dark to create a fade but not as white as the other car. Then once blended onto the car #740.1 burnt Sienna extra dark was added to the panel sipon either side of the ladder and pulled down. Then #20010 Colorless Blender was brushed on to bring everything together. I sure am glad I put all this info on the photos.

For both cars when I get back I will to take a microbrush and apply some running rust down the car from where ever there might be an issue on the coverage of the car. Like a spec of dust that appeared after the clear coat dried.

I was able to fix the really white chalky fade on the shell of the MP15Ac. Not shown is I redid the panel lines after this picture but the limit of 10…
AA578809-4426-4371-B497-DC2D35E8478B.jpeg
F1AF54E9-F629-4C12-AC13-DB3856146025.jpeg
C29F72FF-A5C0-4509-AC60-BA01C2FC9BE9.jpeg
C6D0D39F-CEE7-4640-98DA-3FF674AA1EA9.jpeg

Finally the wheelsets for the 2 tank cars
E57400BF-9C5D-40CE-8199-CAC3168E7ADA.jpeg

There are others to list another time


Army Painters Matt Varnish that is water based. I took a chance as I usually test out new products but being water based if I don’t like it I figured I could fix it easily. It has a more pronounced whiteness to it compared to the VMS Matt clear varnish I have been using. It is definitely easier to use then Tamiya’a X-21 base
Did you find using the Army Painters Varnish was easier and gave a better finish than either Tamiya or VMS ?
 
I chose these two to start. Last night I thoroughly washed with soap, and warm water. Then let dry overnight. I took them outside this morning and sprayed the first coat of Testors Dullcote. I will then let these dry overnight.

View attachment 163920View attachment 163921

I'm not sure where to go from here. Would I start with a wash?
You could start with a wash to fade it down, or airbrush a light coat of earth will dirty and fade, followed by some grimy black. You could then try the powders to see how they add to the weathering process.
 
Did you find using the Army Painters Varnish was easier and gave a better finish than either Tamiya or VMS ?
I have mixed feelings.

The Army Painter was super easy to spray, easy to clean, no thinning needed and used right from the bottle (well shaken) and it was great level coverage.

It looked like a gritty surface going on but finger touching when it was dry is smooth. I touched it 2 hours after and it was smooth but 24 hours later is was definitely a good hard finish. No soft spots that I found.

VMS is great. Using it the last 6-8 months was so much better then Testors dull cote and no where near as aggressive as the Testors was with the Pan Pastels. The Army Painter bottle is bigger and less expensive then the VMS.

Time will tell.
 
I have mixed feelings.

The Army Painter was super easy to spray, easy to clean, no thinning needed and used right from the bottle (well shaken) and it was great level coverage.

It looked like a gritty surface going on but finger touching when it was dry is smooth. I touched it 2 hours after and it was smooth but 24 hours later is was definitely a good hard finish. No soft spots that I found.

VMS is great. Using it the last 6-8 months was so much better then Testors dull cote and no where near as aggressive as the Testors was with the Pan Pastels. The Army Painter bottle is bigger and less expensive then the VMS.

Time will tell.
I've a bottle of VMS which arrived last week, I'll use that on the StClair and CN cars rather than then Tamiya clear I have, I may get some Army Painters, I'll see how you get on with it first tho' :)
 
More pictures of cars ready for clear coat. They all were done using the new to me Army Painter Matt Varnish Air.

The diesel had its final clear matt finish done with VMS’s product because that is what I used on that whole project. My first diesel weathering is done. Check out that thread
D669DBD6-5A5C-42F9-93F7-D6FDD9658B52.jpeg
2E6C51AE-5B57-4390-832E-5482ED0D8A0D.jpeg
C80871E2-F2F9-446E-AE35-2FA39C86E313.jpeg


Finally, the 5 F plate boxcar High cubes were sold and weathering ordered. The 2-3 packs of duplicate pulp cars were sold and weathering for them was ordered. I will be busy when I get back. Oh yeah, the entire 26’ of paper modules is up
50B445AD-6879-4555-95A8-B3FD79C89AE1.jpeg
 
This morning I was looking at this contemplating my next move. I kept coming back to the orange inside of this hopper. My thought was, to paint it a brown color to get rid of all that orange. I dug through my paint stash. Found a suitable acrylic brown. It is just a base and most of it will be different rusts anyway. Now looking at it I should have hit the top as well. probably will do that as that would be rusted as ell from debris falling on it. I tried to stipple the brush to give it a little texture. It looks like most of it leveled as it dried.

Comments or suggestions?

P. S you can't offend me.... give it to me straight!

I
2B61CA10-6DB7-4B66-AFB5-A9E547FDB8CF.jpeg


F87915C9-8FB4-48DF-ADC8-821ECD91BA5B.jpeg
 
This morning I was looking at this contemplating my next move. I kept coming back to the orange inside of this hopper. My thought was, to paint it a brown color to get rid of all that orange. I dug through my paint stash. Found a suitable acrylic brown. It is just a base and most of it will be different rusts anyway. Now looking at it I should have hit the top as well. probably will do that as that would be rusted as ell from debris falling on it. I tried to stipple the brush to give it a little texture. It looks like most of it leveled as it dried.

Comments or suggestions?

P. S you can't offend me.... give it to me straight!

IView attachment 164015


View attachment 164016

If you go back to Page 22 and scroll down about 2/3rds of the page, you'll see what Tom uses and how to apply it.


This morning I was looking at this contemplating my next move. I kept coming back to the orange inside of this hopper. My thought was, to paint it a brown color to get rid of all that orange. I dug through my paint stash. Found a suitable acrylic brown. It is just a base and most of it will be different rusts anyway. Now looking at it I should have hit the top as well. probably will do that as that would be rusted as ell from debris falling on it. I tried to stipple the brush to give it a little texture. It looks like most of it leveled as it dried.

Comments or suggestions?

P. S you can't offend me.... give it to me straight!

IView attachment 164015


View attachment 164016
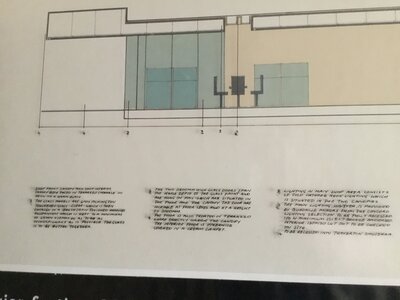
Whatever colour you paint the orange top I would go back and redo the inside brown and the way you have painted it makes it look exactly like the wagon has taken a bit of a bashing by its loads
 
Status
Not open for further replies.


Affiliate Disclosure: We may receive a commision from some of the links and ads shown on this website (Learn More Here)

Back
Top