
Tips for laying ballast...

ModelRailroadForums.com is a free Model Railroad Discussion Forum and photo gallery. We cover all scales and sizes of model railroads. Online since 2002, it's one of the oldest and largest model railroad forums on the web. Whether you're a master model railroader or just getting started, you'll find something of interest here.


wombat457

I'm the one
Morning all,

Looking for tips for laying ballast without turning it into a mess like I did on my first attempt.

What I was thinking of doing was running a single line of 50/50 pva/water along the centre line between the tracks first then putting the ballast in. I f that sounds reasonable, what is the best way of getting the wet glue between the tracks without getting it all over the tracks themselves short of taping all the rails?
 
Last edited by a moderator:
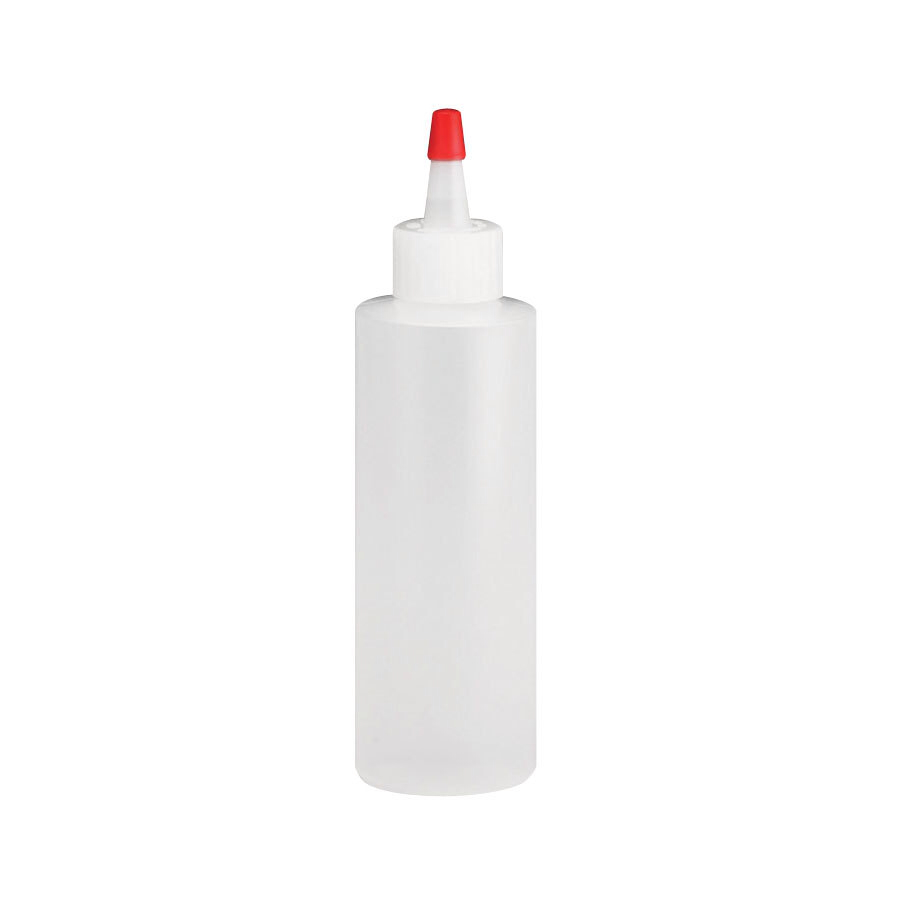
Book I have called "Detailing Track" by Mike Cougill recommends spraying it down with denatured alcohol. Then mixing 50/50 glue n water, with a couple of drops of dish soap. Then applying it with a bottle with a pointed tip. He used an old Matte medium bottle, which to me kind of looks like the catsup squeeze bottles you see in some restaurants.
ejabujub.jpg


Sent from Pete's Pad using Tapatalk
 
Well what worked best for me was this method.
Lay the ballast without water or glue. When you are happy with with your work :D , using a spray bottle (atomizer) soak the ballast with water. Next dribble a mixture of ballast cement (just a watery mix of glue and water) down the center of the track. Capillary action will spread the glue mixture throughout ballast. At this time you can tidy up the edges then Let dry overnight. To remove ballast, just use water.
Cheers
Willis


The way I have been doing it is placing all the ballast in a short area the way I want it, two to three feet long, the spray the whole line down with a mixture of 91% alcohol and water, about a 30% alcohol to water mixture. Then I mix 50/50 mixture of Elmers white glue-all, a few drops of dish soap and water. I do use a catsup squeeze bottle and run a single line down the middle of the wet ballasted area then do along both sides. You might want to set up a practice area with some spare track because you don't want to flood it to much and getting the touch and feel of using the catsup bottle takes a little bit. The line down the middle of the track is done pretty quickly and the sides are done in a way that is more like a quick drip rather than flooding it all at once. Most of all just take your time, practice and you'll get it.

Good luck
David
 
That is how I used to do it David.

One thing I did was take an acid brush and cut the bristles down to use to spread the ballast and brush it of the ties. I left the bristles around 3/8" long if I remember correctly. Do this first with the ballast dry, then again after you pre-wet it.

Sent from my SPH-D710BST using Tapatalk
 
Hi,

This is a set of instructions for install DCC Concepts Cobalt Switch Machines but they also include a section (near the end) on how they scenic track - worth a read.

http://www.dccconcepts.com/PDF_Downloads/cobalt_instructions.pdf

Also some glues dry "hard" and some stay "flexible" - something to consider. One product that used to be commonly used was "artist's matte medium" - thought I don't see it mentioned much any more.

And some folks use liquid soap/detergent, some use denature alcohol to make "wet water" - I see one post above that uses both - find what works best for you.

I always start with a length of flex track with roadbed installed on a strip of 2" rigid foam and experiment at the workbench to find my desired methods, colors, etc.
 
Great advise guys, cheers.

Will definitely be practicing with spare track before I do the layout track. Finally, how "deep" should the ballast be? My instinct is to keep it level with the top of the ties, that seems to be how it is with the "real" track and ballast outside our side door.
 
Here in southwest Virginia, USA the ballast on the nearby railroad tacks is very neatly applied. Generally you do not see any ballast on top of ties or up against the rails.

On model railroads that I have seen the ones the I like best have ballast that is neatly applied, up to or slightly below the top of the ties, none touching the rails.

Yards and sidings are another issue entirely.

It's your railroad and you can do whatever you like - just take your time so when you look at the results you are happy and content.

And don't try to do too much in one session.
 
Here in Ohio, if you could see through the snow, I have noticed it to be just below the tops of the ties. The outsides are a little heavier though. I'm guessing because though there are no mountains here but so rolling they may need it. It also seems like the outside is a larger size. It may be because this area was formed by glaciers and there is a wealth of aggregate here. Probably keeps the cost down so they may be a little more generous with it.


The hardest thing is making the ballast look good. Use your fingers/hand palm to smooth it out, etc. Then use the back of a kitchen knife, grab the metal side, and tap the rails with the handle. Lots of repeated taps until the ballast settles down in between the ties and off the inside of the rails. You gotta watch there are no ballast bits touching the rails when you glue it down. Or it will interfere with wheels. Some stubborn pieces will attach themselves when you add the glue mixture. Take a toothpick to pick off the bits from the rails.
 
Michael, I found that out the hard way, ballast V's Rail V's Wheels. I spent abut an hour going around the very short section I have ballasted picking bits of it out of the inside of the rails and I'm still not sure if I found them all. The turnouts are my biggest worry, as they are any ones probably. All fun and games though but now wish I had have done the "other layout" I was doing first. Practiced on that then done mine :) Yeah yeah yeah, I know, selfish attitude to take
 
Michael, I found that out the hard way, ballast V's Rail V's Wheels. I spent abut an hour going around the very short section I have ballasted picking bits of it out of the inside of the rails and I'm still not sure if I found them all. The turnouts are my biggest worry, as they are any ones probably. All fun and games though but now wish I had have done the "other layout" I was doing first. Practiced on that then done mine :) Yeah yeah yeah, I know, selfish attitude to take

Personally, on turnouts I use a little less ballast than I do on the rest of the track...and I never glue it on turnouts either. Also, when ballast turnouts, I find it helpful to get a bushy brush and use it to clear out the bits that fall into the crevices of the turnout. Make sure the points swing fully and the frogs are clear.
 
Hi Tony,

Regards turnouts:

While it's most important that ballast not interfere with the workings of the turnout or clog the guard rails or frogs I think it's safe to glue the ballast on the outside of the turnout.

To a certain extent ballast between the rails is confined but not so the ballast outside.

So a little glue to keep it in place is, IMO, a good idea.

And in and around the guard rails and frogs is likely a safe place for a little glue to help keep the ballast out of guard rails and frogs.

Keep us informed of your results - both good and bad.

Thanks.
 
fcwilt,

I will be sure to post pictures of the results (good and bad). I practiced a little on some spare track and think it turned out reasonably well. Once I get my camera lights tomorrow, I'll be able to take decent pictures.

When I did the practice I used grey and black Medium Ballast (Woodlands). What I found was the black went down a lot easier than they grey. Perhaps it is just the color that gives the appearance that the black went down better, don't really know. I suppose the other thing to take into account here is what "grade of ballast to use. I am thinking perhaps a "fine" ballast that will settle better and will, perhaps, be less of a problem than the heavier medium grade????
 
Hi Tony,

The black is likely closer in color to the ties then the grey - thus it may appear "better", "tidier", whatever.

But there is also the possibility that the black may be a different material then the grey and reacted to the glue\water\etc in a different way.

Did I post this already?

http://www.dccconcepts.com/PDF_Downloads/cobalt_instructions.pdf

And if so, did you have a chance to read it (the part near the end about ballasting)? Even if you end up with a totally different method I think it is worth a read.

As to size that is personal preference.

I just purchased a bag of fine and medium in each of the Woodland Scenic colors as I begin my quest to find a way to ballast my layout so that I will look at the result and be satisfied. Many years in the past I built (but never finished) a couple of railroads and, being much younger, didn't have the patience to take the time to do it right. And as you might expect I was never satisfied with the result. I've seen pictures of other layouts so I know what I want it to look like - I just have to figure how to do it.

Don't overlook the possibility of mixing sizes and colors.
 
fcwilt,

Thanks for the link, it looks like it contains a lot of good information, not just about ballasting either. I also like your idea of mixing colors and "grades" of ballast. Right now I only have medium black and grey and fine brown; I'll have to experiment with them for the best over all look.

Aside from some, what appears to be standard techniques, much of the work falls back on a "slow and steady approach". I have all the time in the world, so that shouldn't be a problem.

You may well be right with respect the appearance difference between the grey and the black ballast as well. To be honest, the black ballast looks a little finer than the grey. Perhaps they is labelled the packaging? None the less, it seems a s though there are a number of options and a few fairly standard "must do's", so I am back to the practice track sections t get the best appearance I can. Once done, I'll post a few dots of the various attempts for you guys opinions and thoughts.
 
In the fiftes I lifed on a corner next to the Sante Fe mainline for fourteen years. I promise you all that I walked those tracks everyday. In the summer, bare foot. I still haven't figured out Zories, or Go-aheads ... or whatever you call them. BTW there was a lot of glass in the Santa Fe ballast maybe a tenth of a percent.

The deep gray ballest Sante Fe used went between the ties and under the rails. There wern't that many stones on the ties either. ATSF also burned the weed very often. I had a few spurs near my house and they were very overgrown, maintained maybe yearly. I have always tamped my ballast and kept it below the rail bottoms, never had any trouble, not on the turnouts either.


So maybe lay the ballast first, then the track on top of it...pushing, pinning and gluing the track down into/onto the ballast.


Affiliate Disclosure: We may receive a commision from some of the links and ads shown on this website (Learn More Here)

Back
Top
