The 60/40 Layout And Other Railway Related Things

ModelRailroadForums.com is a free Model Railroad Discussion Forum and photo gallery. We cover all scales and sizes of model railroads. Online since 2002, it's one of the oldest and largest model railroad forums on the web. Whether you're a master model railroader or just getting started, you'll find something of interest here.


I’m thinking more like the truck may not be swivelling enough to follow the radius of the curve, as in exceeding the minimum it will run on.
In the first video, the second passenger car is the same length as the Dome and Observation cars but that doesn't derail even if I put it directly behind the loco, and I've pushed each car individually round that curve without derailing.

I think in the morning I'll take them apart and swap out the weight for something less and try again I think they're just too heavy for the locos to pull.
If that doesn't work I'll try body-mounting couplers

My Intercity 125 has no problem getting around the curve and it's even longer.

Intercity 125.mp4
 
Last edited:
I'm a Genius !!! : 🤣 🤣 🤣 🤣

CN Cars Cured.mp4

Don't I wish, I'm a dumb💩 an idiot and various other names come to mind, why ?

Simple, I didn't weigh the coaches when the interiors arrived, I assumed, and we all know that's dangerous, that as the interiors were for this type of car, the steel weight would be the correct weight, WRONG.

The Dome, Observation and Passenger cars are 25.5cm and the Dinette coach is 21cm so the weight should be 170g and 145g respectively, the passenger and dome were 226.7g, observation car was 189g (I had to cut that one to get it to fit) the dinette was 156g so they were in total 141.7g over the recommended weight, which doesn't sound a lot but when you consider that yesterday that same loco couldn't haul two cars round the curve and today was hauling all 4, it makes a big difference.

The downside of all this is I now have to re-build the interiors as I used the weights for the floor, (note to self, use plasticard for flooring next time)
 
Last edited:


Yay! Glad you got it figured!
IMG_0304.gif


(one of my favourite happy gifs, lol)
 
Last edited:
Well, finally all the weights on the CN cars are within 9g or 0.3oz of the NMRA standard, although I did have a problem with the dome car derailing at odd points around the track, which was solved by swapping the wheelsets from 33" to 36" wheels.
Good to hear you got these issues sorted out.

would of been a shame to not be able to run these after all the hard work and time you spent on them!


Yeah, can be a pain, would've loved to have a Big Boy, but it's too big. 🤣
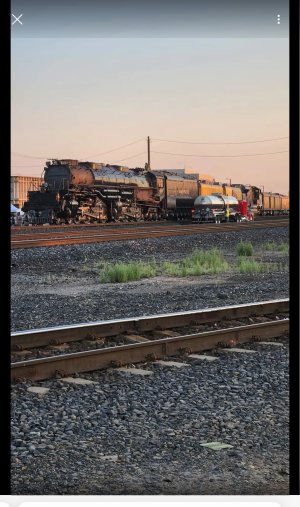
To give you a sense of scale, the first picture is of an oil tanker filling the Big Boy …. A full size semi truck oil tanker ….

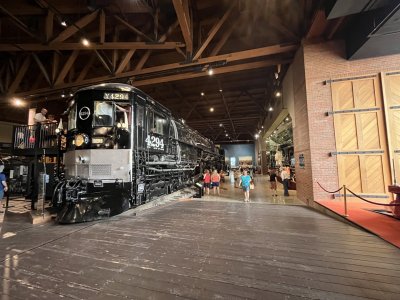
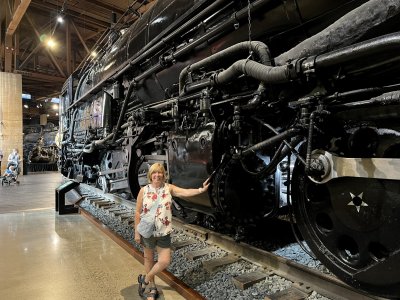
The next two pictures are the 4-8-8-2 Cab Forward at the Museum in Sacramento. My wife is 5’1” ……
 

Attachments

  • IMG_6489.jpeg
    IMG_6489.jpeg
    1.6 MB · Views: 241
  • IMG_6292.jpeg
    IMG_6292.jpeg
    530.5 KB · Views: 239
  • IMG_6299.jpeg
    IMG_6299.jpeg
    729.9 KB · Views: 264
To give you a sense of scale, the first picture is of an oil tanker filling the Big Boy …. A full size semi truck oil tanker ….

The next two pictures are the 4-8-8-2 Cab Forward at the Museum in Sacramento. My wife is 5’1” ……
I was fortunate to be there opening day 40 some years ago. The opening movie was well done. We went earlier this spring with our grandson and turned the corner and I exclaimed "That's the San Juan Central" it was really nice to see it displayed. My daughter asked how I could tell without seeing the placard. Somethings just stand out.
 
I was quite surprised to see, and recognize, layouts and modules from MRR magazine from decades ago.

Wonderful.

I think my favourite part of the third floor though was the “wall of trains” - mostly HO and N but full length trains, displays of locos and cars, full passenger consists, etc. it was mind boggling that they had been able to put all that together.
 
I am really not having any luck when it comes to my Caboose's, this is the Great Northern, and this is another one that someone has taken no care of at all (again) :mad: .

This is an easy way to know when someone thinks of them as merely "Toy's" and those of us who regard them as Models

View attachment 174513

Notice this has two different trucks.

View attachment 174514

Cleaned it all up. I've removed the trucks and used styrene as a filler where the trucks fitted, presently waiting for the epoxy to dry, I'll drill and tap them later.

View attachment 174515

Painted the weight after a suitable rust inhibitor was applied, the Chassis above in the foto is a doner, I'll only use the trucks from that one, when I find my box of wheelsets and find another axle, I don't use plastic wheels or axles, one wheelset on the original trucks is plastic, the other 3 I can use.

View attachment 174516

At some point I'll need to find a end Guardrail, or I may replace both.
I assume you are spray painting? Airbrush?

Where do you buy decals?
 
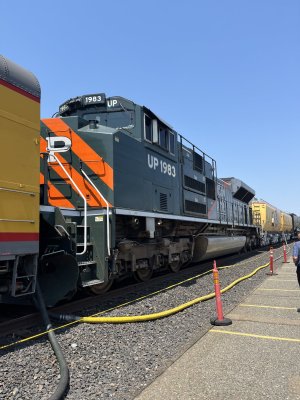
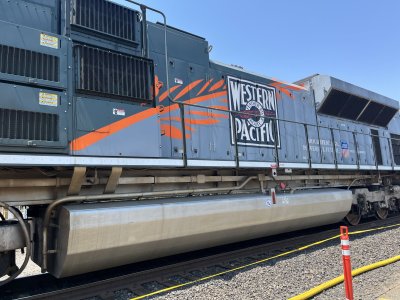
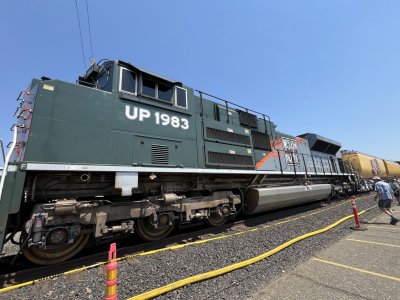
I'll do this in order, so first. the UP/WP Heritage arrived unpacked her and I admit, she is a beauty.

View attachment 174979

Had to look up how to remove the bodyshell so I could fit the decoder. It's an interesting arrangement, the pins at either end correspond to fitting in the top of the bodyshell to control the lights etc. never seen this before, at least you can't pull any wires loose.

View attachment 174980

I've already done a short run on DC so I know everything is working fine, well it did!
This is F0 and F3

View attachment 174986

If I hold F2 down as well, I get this.

View attachment 174987

There's no lights at the rear at all, regardless of which function button I push.

It took me a while to figure out what was wrong, 🤔 at least I think I know, this is a 21 pin 4 function decoder I've installed, methinks I need a 6 function decoder, Oh balderdash!! I'll have to wait another week now. :(
(TBH I didn't know this had ditch-lights):)
That looks familiar ….
 

Attachments

  • IMG_6259.jpeg
    IMG_6259.jpeg
    625.9 KB · Views: 259
  • IMG_6260.jpeg
    IMG_6260.jpeg
    594.3 KB · Views: 241
  • IMG_6249.jpeg
    IMG_6249.jpeg
    575.9 KB · Views: 231


Right, I decided to add some marker lights to my CN observation car, I mean, it can't be hard, can it ? It seems harder than I imagined, wiring the white nano LEDs was relatively easy, just solder them to the existing LED strip light, that worked, my problem came when I added the two red marker lights, I've had no end of issues getting these as well as the white markers and the interior lights working together, long story short, I've had to add a separate set of wiper pick-up, resistor, cap and bridge rectifier just to power the red marker lights.

View attachment 192885
View attachment 192886

Also added a dummy headlight.

View attachment 192887
I remembered these photos of your repainting some CN heavies as I was reading this …. Thought you may find it interesting.


Affiliate Disclosure: We may receive a commision from some of the links and ads shown on this website (Learn More Here)

Back
Top