ModelRailroadForums.com is a free
Model Railroad Discussion Forum and
photo gallery. We cover all scales and sizes of model railroads. Online since 2002, it's one of the oldest and largest model railroad forums on the web. Whether you're a master model railroader or just getting started, you'll find something of interest here.
Hi Fellow modellers. I've been slowly plugging away at my new layout. Its been a constant struggle Loop to Loop, the struggle I'm realizing is trying to mold my myself to sticking to rules of 30" max benchwork. I'm finding what I had on previous layouts where I made my own rules for depth so to achieve nice sized mountains around the perimeters just isn't working the way I'm doing it. Even when I made the bench work 30" and measuring up for fascia brought it outward which made me happy having a few extra inches on the corners but again just wasn't working for what my imagination wanted to create.
Have you guys came across this dilemma?
Is your layout an around the walls design?
Sent from my SGH-I337M using Tapatalk
I've always kept mine at 24 inches.i model no inclines but do have mountains in the background made of foam.track is closer to the front.
Sent from my SGH-I337M using Tapatalk
Sent from my SGH-I337M using Tapatalk
Not sure how you contain yourself to stick to 24 " and no inclines, although this time around I'm not doing tunnels which will bring down the inclines.
24 inches is easier to reach across to work on it.i find flat is a lot easier to work with also.where I model it's pretty flat.
Sent from my SGH-I337M using Tapatalk
Lynn , I have to say from looking at your last layout that if reach was a problem , you definitely figured out a solution . I found for myself that using the "tried and true " rules worked better for me as a guideline than as absolute . Thirty inches is not a problem for me to reach over because I am 6'-3" , my 5 foot nothing wife on the other hand is a different story . I also think there are a lot of other considerations as well . Height of benchwork is a big factor as well as operation . If the over 30 area is in the middle of a heavy switching district then you would have to think different about it than you would , say in a corner that was covered by a mountain landscape . Thirty inches at 42 inches high is a lot different than 30 inches at say , 54 inches high . So what kind of design have you come up with so far?
Hi Jim , its so nice to be back at it, while trying to do what I was doing before I did come to one realization which was mainlines with no turnouts is fine to be in the rear most ( past 30 inches ) and at the same time benchwork height also comes into play especially if I'm going to elevate the rails a bit and actually my wife pointed out to me that the benchwork looked higher than the previous layout and so I took her advice and lowered it to 49 inches as a starting point which the way I have modeled in the past tends to rise. My method last time was to get the rear scenery modeled and once complete move inward.
Lynn,
My layout is max 24", it's got an elevation difference of 4", tunnel, river and lots of industries.
Honestly though, there is one area where it's 30" wide, but that's at the end of a peninsula.
Hope this helps
Lynn,
My layout is max 24", it's got an elevation difference of 4", tunnel, river and lots of industries.
Honestly though, there is one area where it's 30" wide, but that's at the end of a peninsula.
Hope this helps
I've got pretty much same , same. Tried to keep it 24" or more on the mains, had to go 22" in some spots. Reach is key, all switches are within arms reach, long runs across the back wall. Widens out to 54" at the ends to horseshoe the mains back into the main layout. Some lines go down to 18" and 15" but not everybody uses those.
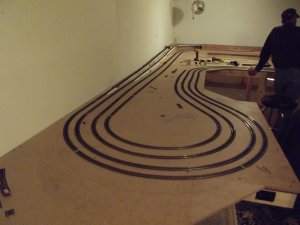
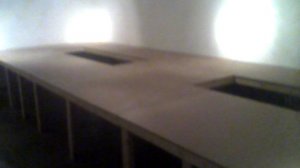
Access holes for scenery work and derailment/uncoupling fixes.
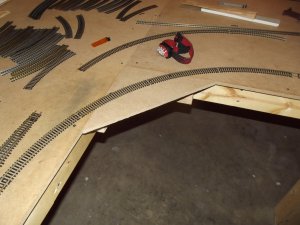
To keep my lines smooth around the corners I put in these helpers.
There's always a way, good luck and Happy Rolling!
I have some spots where the reach is deeper than 30 inches. I've tried to make the track work bullet proof in these locations; but, have found a step stool makes my deep reaches much easier to reach. I don't get where you guys feel grades and such make the reach more difficult. My highest elevation for the tracks on my layout is also the longest reach to get to and the stool has made it easy enough to reach. I also have a 24 inch long dowel that I glued a small block of balsawood to with foam rubber attached to the block; so, I can either pull back; or, push forward a derailed car so I can reach.
Tools can be helpful. I guess reach was something sort of common sense left to the modeler when I started. It became apparent as I built, that some of my locations where going to be a long reach; but, I figured I would find a way to remedy this problem and I did. Where did the rule of 30 inches come from? If it was in Armstrong's book "Track Planning for Realistic Operation", I must have missed that! Also, I have no parts of the layout that are in an actual corner up against a wall, so turn backs are reachable from the ends. I guess I feel if 30 inches makes sense, than go for it. However, keep in mind that tools can help out when you can't make 30 inches due.
Well-Known Member
Staff member
There's always one way to prevent corners being to deep to comfortably (key word there) reach into. Build a curved backdrop wall so nothing can, or needs to be built any further back.
Mark - Not sure that there is any documentation of the 30" rule, it's just what the average reach is. If I recall correctly, John Armstrong's book deals with track planning more than layout construction...I may be wrong as it has been some years since I read it before loaning my copy to someone who disappeared. Some of John's track plans have some inaccessible parts in corners. However they are in corners (like mine) where there is no track, just scenery. Put it in before the front of it is sceniced and never touch it again.
You're right about tools. For my upper level, I do use a stepstool for comfort and ease even when I can reach. There are also two corners that require the use of a 4' ladder; but again there is no track, just scenery. I have seen a tool that is a pole with a handle activated set of grips on the end to retrieve wayward cars. Not sure if it was homemade or purchased.
I'm with you on the grades, I don't know why that would make any difference.
Willie
Well I certainly am glad to see others have also done what I have done in the past. I always thought the same thing about an unreachable area being used for either tried and tested mainline or scenery . Looks like I will extend to what my imagination requires.
The majority of my layout is from 24" tp 30" with a couple of exceptions. In one yard area I am about 40' to the wall and before I started any scenery, I backed long trains through every possible track to make sure that the track work had no problems. Apparently the extra time I took to lay out the tard paid off as I haven't had any deraiments since it has been in operation.
I do have a bench I built years ago that allowed me to lay the track so far back and if it ever becomes necessary to get to the back of the layout, it is not a problem.
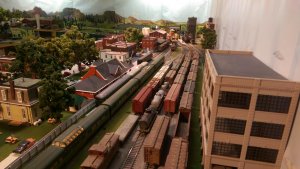
I also have an island that is around 70" across. This was necessary to maintain a minimum radius for a track dropping down to some hidden staging tracks. In this area there's not much but a town scene with all tracks within easy reach. Again, my bench is always handy if needed.
Hi Lynn, Good to talk with you again.
I've tried to keep most of my layout table top to the 30" dimension to keep the reach somewhat easy but I'm finding that in several areas the reach is greater such as the two loop ends which are about 48"s in width and an area the juts out in one area from the table top by an extra 15.5"s to allow a curve around a mountain. My main table top height is 45.5"s but my upper mainline is almost 9"s higher as I wanted some fairly steep grades to simulate Colorado as well as the separation between the the lower and upper line. I'm only 5' 9"s in height so I have a two step stool with a hand hold I need to stand on to reach over when spiking the upper back rails in place which is where John Allen came up with the name Akinbac Range and I think I'm going to be in the same situation. What do I mean think, I already was, in laying some of the rails in that back area! LoL but I do enjoy hand laid code 70 & 55 rail for my earlier time period. The Central Valley branch line molded tie strips help considerably with their tie plates for the rail to set in between. It's somewhat like laying flex track but then going back and adding the rail.
So I also find it very hard to limit myself to conform to set dimensions. In the lower area in front of the upper back area I just mentioned I also added an extension which will add about 4"s to the 30" table top to keep my Five Oaks Station from being right at the front of the layout as I am or was going to put a Tie and Plank Mill there but that might also be a bad thing? So, you see as I go along I'm revamping things to fit together better as things evolve without going too far from my original plan but it has changed to some extent to allow revisions to fit in.
So I'd say to stay somewhat flexible as to what your going to allow yourself.

Affiliate Disclosure: We may receive a commision from some of the links and ads shown on this website
(Learn More Here)



