Starting a grade: Will this work?

ModelRailroadForums.com is a free Model Railroad Discussion Forum and photo gallery. We cover all scales and sizes of model railroads. Online since 2002, it's one of the oldest and largest model railroad forums on the web. Whether you're a master model railroader or just getting started, you'll find something of interest here.


Looks good Dairystatedad. :-) ok guys - I will probably go with the ply wood onto risers - do you think standard liquid nails construction adhesive will be ok ? I ask because I already have alot on hand. :-). The Dap - does it set hard - or semi soft ?


Sent from my iPhone using Tapatalk
 
By the way, the two straight inclines actually will support a total of 3 parallel tracks. The center track will straddle the gap between the two inclines. It's not shown in the picture above, but as the incline gets higher I've filled in that gap with spackling as well. A single 6-inch-wide sheet of cork will cover the two straight inclines. I've put it down without adhesive a couple of times to check how well the center is supported, and it seems more than adequate.

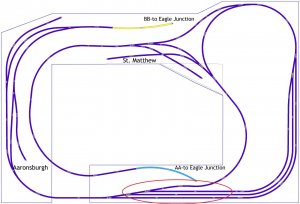
Here you can see the part I'm working on; it's circled in red:

WR+N-2014-04-12-STAGING AND LOWER MAIN-Copy 2.jpg
 
As long as it's foam-safe, the LN will be fine. LN for Projects is what I used to attach my Insulation foam. If that's the kind you are using and you have a lot on hand, then go ahead and use it.

But cheap *latex* caulk is fine, too, I've found.

This particular Dap -- it's a special kind, DAP "Patch N Paint" Lightweight Spackling -- does set hard, but only after a day or so. I don't think it would be useful as an adhesive -- it's more for filling gaps. (It's also got a weird consistency -- not at all like conventional spackle. It's very light and almost like Cool Wip.)

And since you're covering your inclines with plywood, I don't know that you'll need the spackling step anyway -- just make sure you DON'T start a piece of plywood where the grade starts so you don't have an abrupt change of angle.


8u3yqu2a.jpg
ymysu4a7.jpg

I have used this to adhere a test piece - we'll see what happens. :-) I guess my main concern is warpage with the wood, but if it is all secure & really - I am in a climate controlled area - I shouldn't be worried about that. You are right about the DAP - I don't need it, just curious :-). I think the LN under the plywood at the incline transitions will help me get it smooth. I am a little irritated at my impatience - due to the fact that I read somewhere (peel of the thin layer of plastic on pink foam board first). I did not do this & a small test piece I glued after the fact - the glue pulled the plastic right off. However - I may be lucky to the fact that I have glued my risers to a whole sheet vs. gluing partial pink foam pieces. The riser fell solid as heck - so I am leaving well enough alone :-).


Sent from my iPhone using Tapatalk
 
Yeah, they say foamboard is OK, so I think you'll be OK. RE warping, once you've laid the plywood in place, you could seal it either with a coat of polyurethane or with a flat latex paint. But if you have good climate control in your home that might not be a big deal.
 
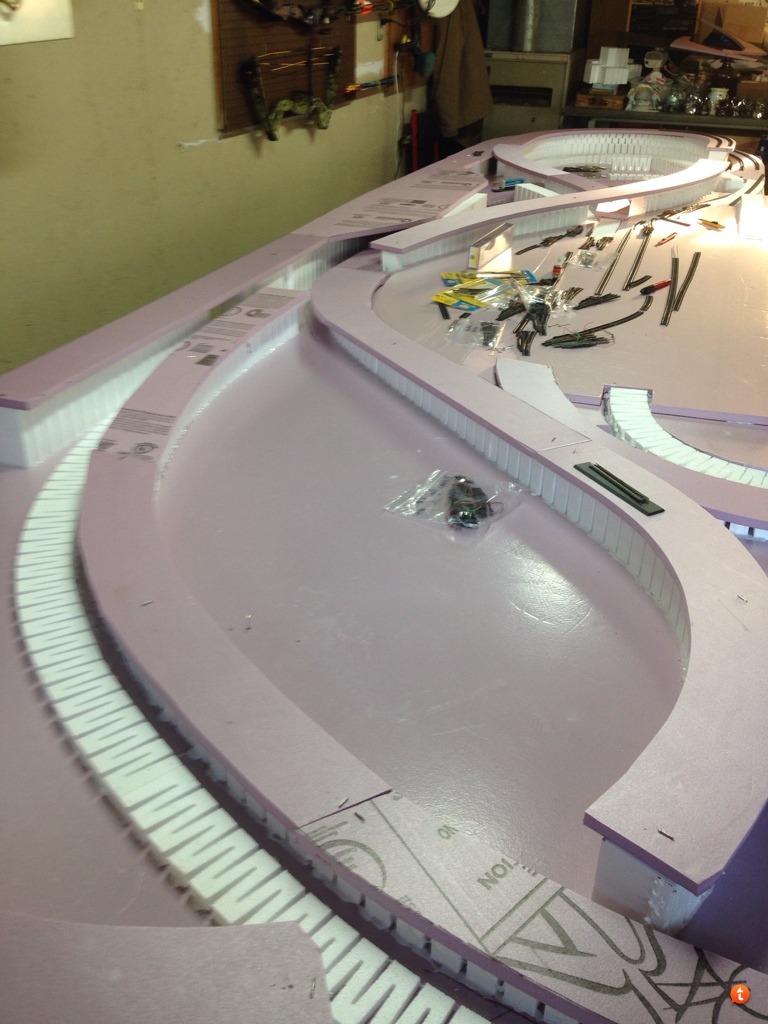
As for me... I followed through on the suggestion from Jim 68cuda's advice and, instead of the elaborate 'leaf spring' set-up I started this thread by proposing, simply spread on the lightweight DAP spackling at the beginning of the grade, feathering it out about 6-8 inches.

There was a bit of a learning curve to using it. One trick is that after initially putting a glop of stuff on, I needed to trowel it very very *lightly* so as to get a natural, feathered grade down to the foam baseboard. Too much pressure and you end up just wiping half the stuff away! The other trick is, although the spackle's made so you can paint over it within an hour, if you're sanding it YOU MUST let it dry and cure for at least 18 hours and more likely 24 or more.

Here's what it looked like -- I'll admit the picture looks pretty rough, but it's quite smooth and even to the touch, and moreover, with cork on it, any imperfections seem to be completely eliminated.

Looks good. Since you used my suggestion, I really hope you're satisfied with the results. Since my layout is built without a plywood base under the foam, I wanted to stick with lightweight materials. That's why I used the lightweight "Patch and Paint" but you could have used a standard spackle.
 
I might try regular spackle when this runs out, but I think the light weight stuff works well, once I got to know its particular properties. Thanks for the tip, too!

From the DairyStatePhone
 
You guys are great - thanks for the replies :-). I have plenty to keep me busy now Lol. Now I need to figure out how to put a profile pic on here :-). Have a good day.


Sent from my iPhone using Tapatalk
 
8y4yde6u.jpg

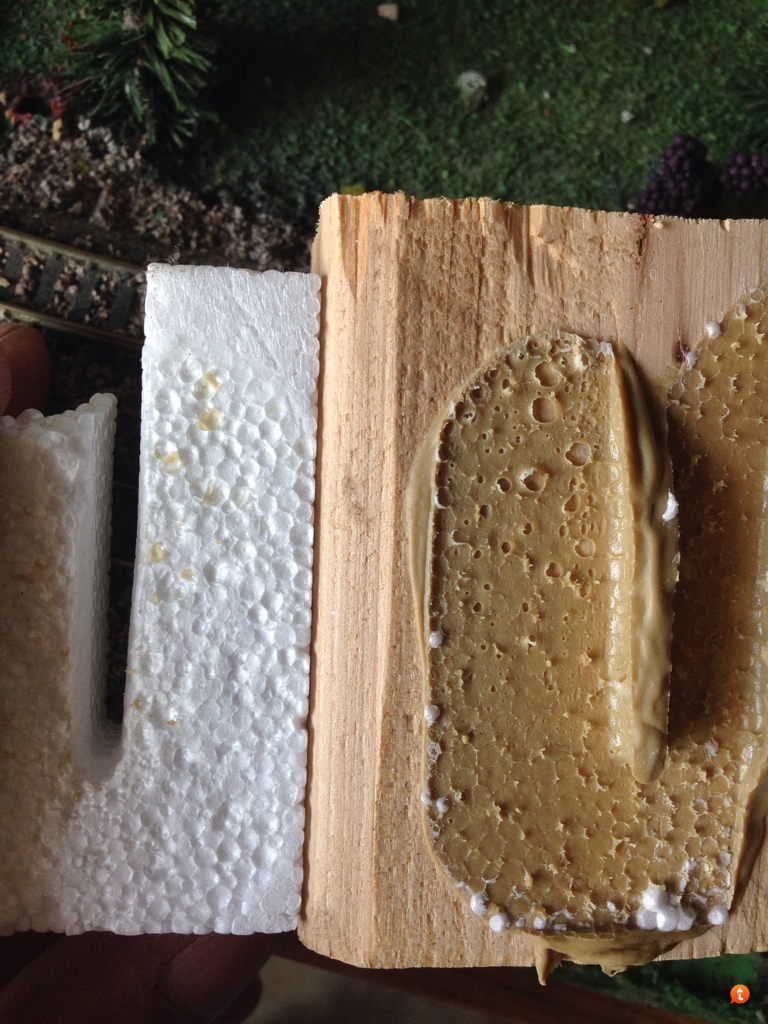
Ok - the construction adhesive is a bit too much for the foam. Back to the Loctite PL 300.


Sent from my iPhone using Tapatalk
 
Oh man -- sorry about that -- I was not thinking about the difference between the Extruded Foam and the sort of foam that WS makes its inclines out of. Sorry if I gave you a bum steer!


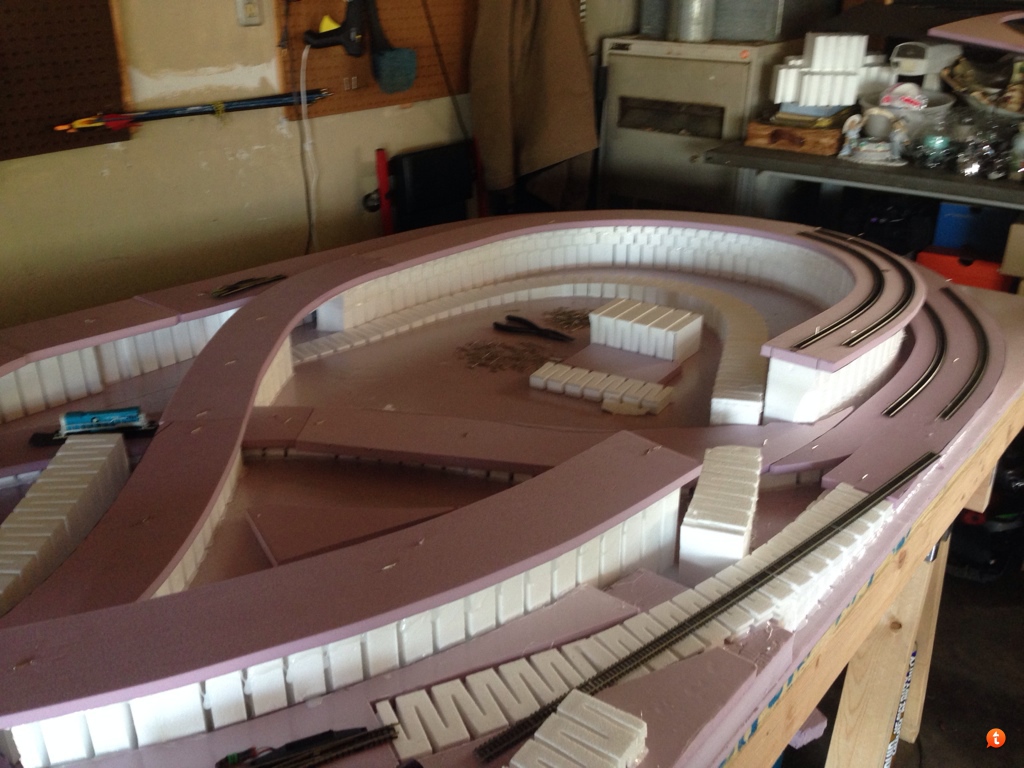
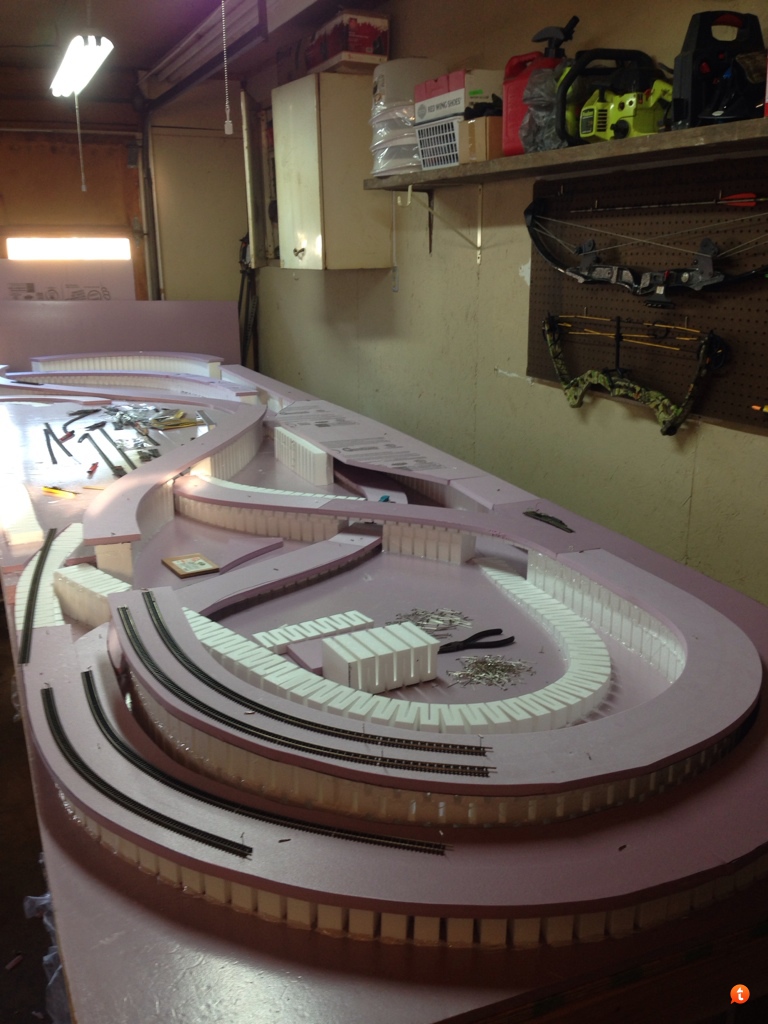
Things are going good - I ended up using foam board to widen my risers & I have them all cut - next step PL300. Foam to foam - the stuff holds like super glue :-). Once again - this is my first layout & I may not be doing it "by book" Lol, but it seems to be working for me. :-)
Hope you guys enjoy the pics & please feel free to comment - criticism is useful sometimes :-).
ga3any9a.jpg
zu4e7a5a.jpg
yve4yqu8.jpg
je7esugy.jpg
2yze9e2u.jpg
eha4u2ud.jpg


Sent from my iPhone using Tapatalk
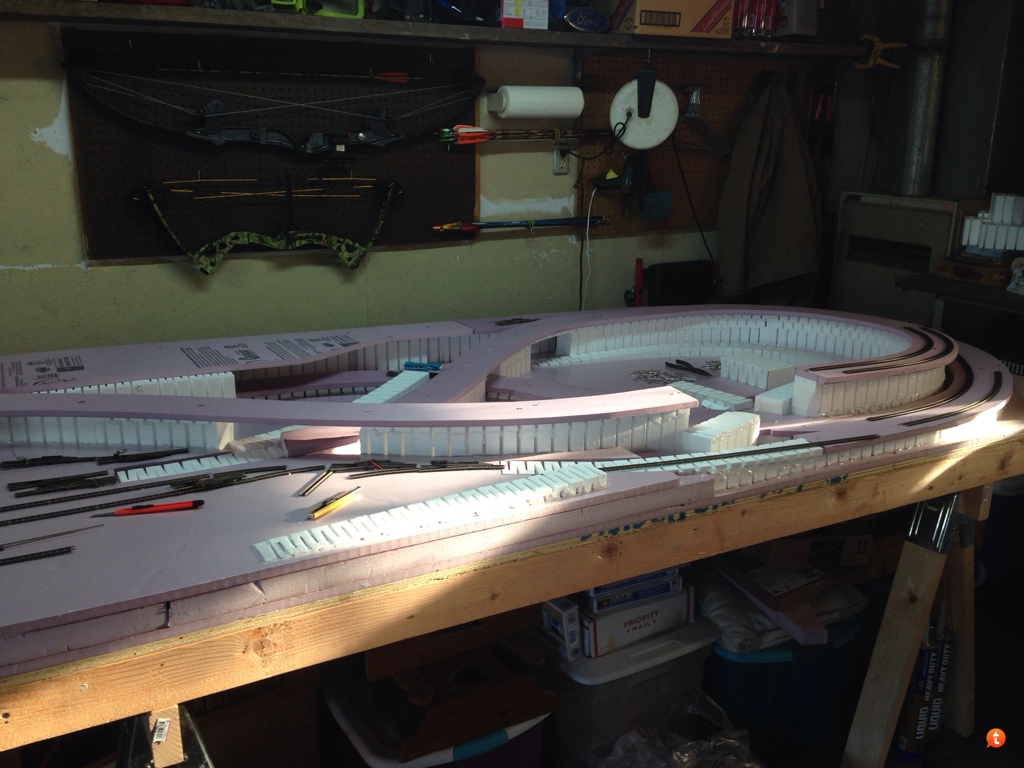
 
Looking good. But you need to peel that plastic film layer off the foam board before you glue it in place. Paint and glue for scenery won't stick to it and its a pain to peel off after other things are already in place.

Please don't ask how I know this :)

David
 
Looks good. It looks like you're using some staples to at least temporarily affix the foam board to the foam risers -- am I seeing that right? (If I am -- that seems like a good idea to me. If I'm not seeing it right, never mind :) )

And did you mention what you're cutting the foam with?
 
Thank you,
I am using 2" T pins to temporarily hold it. For the cutting I am using a small DeWalt razor knife. 1/2 way through on first swipe & all the way through on 2nd.


Sent from my iPhone using Tapatalk
 
Ah, T-pins. Got it. I use those myself ... Not sure why I didn't see them as such in your pix ... :o

I'm still looking for the perfect, cheapest way to cut foam. I'll check out the razor knife you use. The niftiest idea i've seen is in a video online where a guy took a wide metal putty knife/spreader and put a knife edge on the side of it. When he uses a thick level as a guide he gets very straight, square cuts easily.

I've used my saber saw to cut some foam but I don't like the way it flies everywhere and gums things up. I'm not excited about building a hot cutter, although there are lots and lots of plans online for how to do that. And while lots of people seem to prefer a serrated edge, I'm thinking a smooth edge, very sharp knife would be as good and more satisfactory for me.


Yeah - the razor knife works pretty good :-). I don't sweat the perfection too much on the straight lines - a steady hand & you can be within an 1/8". It mostly get covered or shaped on the edges anyways :-). I will mainly worry most about straightness - when I lay the roadbed/track. I think the knife was $7.00 at Home depot.


Sent from my iPhone using Tapatalk


Affiliate Disclosure: We may receive a commision from some of the links and ads shown on this website (Learn More Here)

Back
Top