Reviving a thirty year old layout

ModelRailroadForums.com is a free Model Railroad Discussion Forum and photo gallery. We cover all scales and sizes of model railroads. Online since 2002, it's one of the oldest and largest model railroad forums on the web. Whether you're a master model railroader or just getting started, you'll find something of interest here.


Really hot here in Virginia the last few days. But, despite the heat, my buddy and I have been trying to get the old blue Dodge ready for a big car show next weekend. That didn't go so well. In trying to get it running right, we adjusted the carbureator and adjusted the timing. There was no happy medium between engine pinging and a massive fireball exploding out of the carburetor. So now I'm back inside in the cool of the basement, working on the layout.

A couple days ago I used latex caulk to attach the first three inches of foam on the layout expansion. Then I ran out of caulk before I could add the top half inch contoured layer (where applicable). I had to let that sit for 48 hours with piles of magazines weighing it down. In places where the foam had been shaped to form a slope and the edge of the foam was razor thin, it wouldn't always lay flat in place. I had some three inch deck screws lying around and screwed those through the foam to hold it down in those areas. It worked well, and when everything is smoothed over with a thin layer of light weight joint compound or hydocal, the screw heads will be permanantly hidden.

So, while that was drying, I used the section I had cut out for a sloped road as a template. I put the foam pieces on plastic "No Trespassing" signs, and marked the shape of the road (leaving some excess to be trimmed down later). I put the pieces back on the layout to verify it fit. It was only because the roadway sits below the surrounding land that I had to perform this step before making anything permanant. I needed those foam pieces under the road surface as a template before I attached that foam in place.

So now I have the top 1/2" layer of foam to caulk in place both where the town will sit and where the blue farm house will be. I will need to set the track back in place first so that I get the location perfect (I neglected to mark it before taking it all apart). Don't want that foam too close to the track.

Once those additional pieces of foam are in place, and dry, then I will use Woodland Scenics Hydrocal or a tub of lightweight joint compound to smooth everything over, and to hide any joints in the foam. Once that's done, paint to hide the foam and plaster surface, and then I'll be ready to permanantly attach the track and drill holes for wiring. After that, I'll have one little train to run around the one inside loop of the new expansion. At least something will be running while I turn my attention to the track and wiring on the rest of the big layout.

Now to go open a new tube of caulk...

1783196437620.png


1783196657328.png


1783196684562.png


1783198433881.png
 
Last edited:
There's a local auction house on Main Street in my little town. In the ten years I have lived here, I had never been there (until now). They do on line auctions and local pickup only. I have on occasion, visited their website when there is an interesting old car parked out front. A couple weeks ago, it was a 39 Buick. This last weekend, I noticed a mid 90's Bentley Turbo R sitting out front. And though I have zero interest, I thought, "who in my little town has a Bentley?" And so, I looked at the auction on line. It was assumed to be a non-running car since there was no key (it ended up selling for $4000). But, while I typically don't look at the other items up for bid, this time I did. And, as it turns out, mixed in among the ugly jewelry, patio furniture, throw pillows and lawn implements, there was quite a bit of HO and O scale train stuff.

The auction always closes on Monday. There were a couple days left, so I decided to bid on a few items. The HO Bachmann Durango & Silverton train set still factory sealed in the box was a set I had seen on E-bay, but had not pursued since it was pretty much western themed. I did bid on it, but I was quickly out bid. It sold for $76. On E-bay, the boxed sets seem to be priced from $150 to $350. I bid on a couple Tech II controllers, but was out bid on those as well. I stopped bidding at around $35 and they both went for about a dollar more than I bid. I had already bid about what they seem to go for on E bay.

But, on a couple lots, I was more successful. My trains are mostly B&O. There was an Athearn "blue box" B&O locomotive that I got for $18. Its pretty basic (no lens for a light, no window glass), but it will be great to have as a backup if my other F unit dies. Then there was a Tyco/Mantua B&O 4-6-0 steam locomotive I wanted. When I was looking for a small B&O steam locomotive on E-bay a few weeks ago, I struck out. Thats why I ended up getting the Tyco Petticoat Junction train set. And I like that train, and don't regret the choice. But here was the exact same engine, but in B&O trim. I had to work to win that one. I won it with a bid of $48.44, and it came with four Walthers Great Northern Empire Builder passenger cars. My layout is pretty much mid-Atlantic region, so I don't have a use for those Walthers passenger cars, but, they do look nice. Perhaps I can use the interiors in my Athearn blue box B&O passenger cars.

1783438949533.png

1783438975487.png

1783439001212.png
 
Last edited:


Great score! I love the Tenwheeler, and you could make some GN or UP modeler very happy too.
The yellow observation car is actually Chessie System. Even so, I probably won't use it. It's a bit long to look right on 22" curves.


Meanwhile, It seems that every time I venture into the basement, I pick up the hot wire foam cutter and start shaving something off the new part of the layout. Looking at the stacked foam forming the layers of the layout surface, I figured the thickest area just looked too flat and square. Today, I shaved a bit of a slope near the corners of the layout where the track turned away from the edge.

But, as I was carving this slope at the edge, I was noticing how close to the edges a 22" radius curve brings the track on a 4' wide part of the layout. At the old house, when the layout was operational, I did have a clear plexiglas guard rail on one section where the track was dangerously close to the edge. With the layout now in the basement, a derailment wouldn't be to a carpeted floor. It would be a more than 4' drop to the concrete floor.

So, I've been thinking about making plexiglass guard rails again. But then, I was wondering if there might be a cheaper, easier alternative, that wouldn't interfere with the view. Since I've been gluing foam sheets together in layers, I now think I have a better plan than the plexiglass. I'll get some more 1" thick foam sheets. Then cut it into strips and glue the strips , 1" thick side up, to the side of the existing foam. That would add an inch of width between the track and the edge of the layout and continue the scenery a bit farther out. I could also shape the edge of those foam strips so that if the train derails, it would be an up hill climb to the edge of the layout. Anyone have any better ideas?

The down side is that it will add width to an already tall layout that is difficult to reach the middle. Also, while a foam edge could handle the weight of an HO train, I could never lean on the edge to reach the middle. It won't have the wood framework under it . On the other hand, if I do break off a foam strip along the edge, it would be easy to fix with a new strip of foam. It's not like I can lean on the edge of a plexiglass guard rail either. But a Plexiglax guard rail could be made to be easilly removed.

1783456191912.png

1783456820684.png

1783456849685.png


And this is where I had a clear plexiglass guard rail before. I'll probably still do the plexiglas guard rail here.
1783456894610.png
 
Last edited:
Well, you already know how the plexiglass would work, so it's a proven solution. The foam board would give the scenery feel. Could you not glue, but use some screws and fender washers to hold the foam in place, that way you could remove it if needed?
 
Next week, I'll start smoothing out the carved foam and filling in cracks on the new section of the layout.


Meanwhile, a slight diversion as I go off on a tangent. For those that were paying attention earlier in this thread, the layout was originally in an attic storage room. Then it was moved to a spare bedroom, holes were put in the wall, and it was then extended into a second spare bedroom. That was all before I moved ten years ago. And the layout is now in the basement of my current home.

This one part (on the far side of the bridge in the first pic) was originally stuck in a corner. There were mirrors on both walls of the corner, as can be seen in this photo. That was in the attic storage room. The mirror was halfway across an intersection, so the town houses that faced the mirror on one side of the intersection, were duplicated across the street (which also doubled in width in the mirror. )

1783547908183.png


Then, when the layout moved to a bedroom, that part was no longer back in a corner. But, it was against a wall on one side, so the mirror was installed on the wall as seen here. The town house with the dark red shutters is reflected in the mirror.

1783548588882.png


But now, the layout is in the basement and it can just about be walked around completely. This same little section, (that only ever existed to carry on the scenery into a corner) now sits out in the middle and can be walked around on three sides. No more mirrors. But, to make it work, I added a bit of wood framework and narrow strips of foam on top of that on two sides. I glued the foam strips in place yesterday. They will need to be paved over, but the structural work on this section is now complete.


1783553751874.png

1783553831394.png


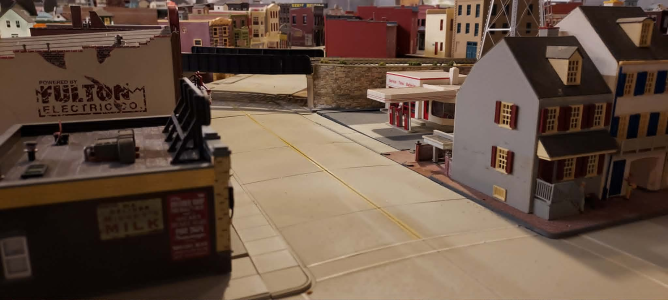
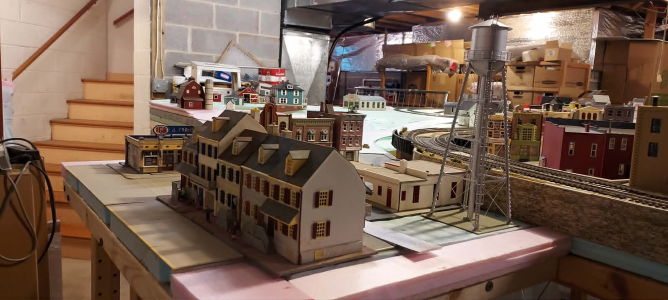
Since its no longer pushed back in the corner, there will be a bit of redevelopment going on as I've changed out most of the structures. But, the row of town houses and the corner drug store building ( with the fire escape) remain. Some of the structures that were originally on this little corner of the layout, have been moved to the village on the new expansion part of the layout.


1783553457970.png


1783553644822.png

1783553663552.png
 

Attachments

  • 1783553608775.png
    1783553608775.png
    1.4 MB · Views: 15
  • 1783553725059.png
    1783553725059.png
    2.1 MB · Views: 17
Last edited:
Slowly working my way around the 4'x10' layout expansion, with lightweight spackle and a putty knife. Filling in joints in the foam layers, and filling in low spots and holes to improve the over all contours.

Probably one more evening of this, then I will let it all set up a few days. Once good and dry, I'll need to either sand it smooth, or use a damp sponge to smooth it out. Then it'll be ready for paint.


1784589247417.png
1784589264523.png
1784589277284.png
1784589294780.png
 
A little side tracked today as I woke to find a large broken branch blocking my driveway. It's still attached thirty feet up, so I can't deal with it myself. Waiting for a tree service to come cut it down.

Meanwhile, looking at Facebook Marketplace, I saw this architectural model. Thought it was kind of cool, and the vehicles are clearly Wiking and Herpa 1/87 scale models (so its HO scale or very close to it). Sadly there would be no way to incorporate it into my own HO layout. besides, its in Connecticut, and I'm in Virginia. So I'll pass on this miniature, but maybe someone else can see some potential in the model, or the structures on it. Let me know if anyone pursues it.

I would be interested in seeing it up close to see how the model maker did the water and the rocky shore.

Looking at Google street view (intersection of Post Road/US RT 1, and Wilton Road in Westport, Connecticut), the brown clapboard building is an art gallery, the yellow clapboard building is an antique store, and the brick building on the side street (with the tower attached to the back) is an old fire station converted to comercial use. The body of water is Saugatuck River.


If the link doesn't work, perhaps adding this part after typing in facebook.com/ would work
marketplace/item/1030675169938044/?rdid=aBJZJYmVlKQpQASU&share_url=https%3A%2F%2Fwww.facebook.com%2Fshare%2F14m8jndLsX3%2F#

1784658333962.png


1784658763033.png

1784658775005.png
1784658786196.png
1784658806592.png
1784658816770.png
1784658831528.png
1784658842646.png
1784658852244.png
1784658863670.png


Here's the text of the ad:

National Hall Historic District Architectural Model​

$750
Listed 4 weeks ago in Trumbull, CT
Detailed one-of-a-kind architectural model of the Westport waterfront development. This piece is constructed on a sturdy wood base and is housed under a custom acrylic display case. The model depicts the corner of Riverside Ave, Wilton Road, and Post Road West with intricate brick-textured buildings, miniature figures, vehicles, and landscaping. It measures 62.5 inches long by 46 inches wide with a total height of 13.5 inches.


And as a reminder, This is NOT mine.
 
Last edited:


It's really hard to tell from these photos, but I am making progress. I started smoothing out the areas I had covered with lightweight spackling. Other than the sloping driveways, it doesn't need to be perfectly smooth. It will have ground cover over it. But the sanding is easilly removing the obvious evidence of the putty knife applicator I used for the spackle. The roadway will be painted plastic, so I didn't cover that area.

What I found works best is to wipe a barely damp sponge over the spackled area, and then sanding with a dry piece of sand paper (I had 220 grit on hand). It takes very little effort to start seeing results. It's working really well around the blue farm house and around the farm equipment dealer. I found that the spackle around the white house was a bit thicker in areas, and it was too soon to do much sanding in that area. Compare these pics to those in post #48.

The other areas I spackled were done a few days later. I'll wait a few more days before continuing.

1784768020388.png

1784768057924.png
 
Last edited:
Tree company came out and cleared the downed branch. Their bucket truck was out of commision. Took the guy a while to climb up high enough to get to the branch. It's kind of nice to be able to use my driveway again. But then, today, my nephew told me he's leaving a boat at my place for a week next month. He's moving the boat from a friend's place in Tampa, to his place in New York. He will be in town for family stuff and doesn't want to haul the boat around Washington, DC for a week. He saw this picture of the driveway now that its clear, and realized the 30' long boat on the trailer, is too tall to go under the branches. Some quick measurements in the dark tonight, and it looks like the 9+ foot wide boat trailer will go through a 11 foot gate in my fence so he can park it in a field out front. That is if he can make the turn on the street and get the whole rig straight enough to go through the gate. I had no idea the boat he's bringing would be that big. The neighborhood HOA should love this!

Meanwhile, I took another step forward on the 4x10 addition to the layout. I got paint on it. Thirty years ago, building the original layout, you could go into Home Depot, and there would always be a section of assorted mixed cans of paint that were rejects. Back then, I would just pick some shade of gray, green or brown to cover the unnatural pinks, blues and whites of the foam and spackle landscape. No such luck this time. So I picked up two rattle cans of Rustoleum. One gray, and one brown. Knowing some paints eat foam, I took some foam scraps outside and test sprayed them. Deemed "safe", I then moved to the basement to spray the layout. I sprayed the gray anywhere there would be track, roads or driveways. Then, I sprayed everywhere else brown. Since its gonna be covered with ground cover, ballast and plastic roadways anyway, I overlapped and obsured some of the gray with the brown. It didn't have to be perfect.

But, standing up and spraying the scrap foam, on the ground outside, is different from standing up next to a four+ foot high layout and spraying. On the actual layout, I was apparently holding the can much closer to the foam surface. Some of the foam did react to the paint, or at least the propellant in the paint. But, I was lucky. It didn't melt the layout. I think I can move forward with attaching the track without any repairs to the foam underneath the track.

1784946092710.png

1784946218768.png

1784946121723.png
1784946137724.png
1784946158933.png
1784946181048.png
 
Last edited:
So now that I'm ready to start attaching the track to the base, and run wiring, I have a question. I'm using Atlas track and Atlas rail joiners. Most of the joiners just don't seem to be tight enough for a good consistant electrical connection. With the track joined, should I attempt to tighten the joiners to the rails with a needle nose pliers? I don't remember loose rail joiners being an issue when I started on the original part of the layout thirty years ago.
 
Went by the True Value Hardware store in the next town over to pick up some water filters for my well water. While there, I decided to go ahead and pick up the latex caulk that I'll be using to attach the track to the foam and to pick up a few more plastic yard signs (No Trespassing, For Sale, etc) that I would be cutting up for the rest of the roads on the new part of the layout. But, that hardware store is a True Value Hardware and their signs are metal. Concerned that I might not find the plastic signs when I need them, I then went to the local Ace Hardware in my own town. Ace had those plastic signs I would need.

When I got home, I decided it would be easier to at least cut out the pieces of roadway before attaching the track. So, I put down some wax paper to trace the roads I had previously drawn directly on the foam layout. I added extra area for the businesses along the main road and for parking for those buisinesses. Then I took the wax paper templates and taped it to the blank side of the plastic signs. Then I cut through the wax paper and the plastic to make the pieces of road. I cut extra pieces for those buildings to sit on, allowing extra material for the sidewalks out front. As this is a rural area, I don't actually plan to have any curbs or gutters along these roads. These roads are just lying in place for now, the same as the roads I had previously cut out. When its time to do scenery, I can trim the road pieces more precisely.

Now when I attach the tracks to the foam, I'll be able to attach and trim the pavement up to the rails for the crossings. I'll probably go ahead and spray paint the white plastic an appropriate asphalt color for the roads and an appropriate concrete color for the walkways in front of the businesses. That will make do until its time to do the scenery and make the plastic roads permanant.

1785209610370.png
1785209631163.png
1785209650058.png
1785209676919.png

1785209706251.png
1785209741856.png
 
I checked my hobby desk. I had a leftover Testors rattle can of light aircraft gray, and another of dark aircraft gray. I went ahead and sprayed the sidewalk sections with light aircraft gray and the road surfaces with dark aircraft gray (barely had enough dark aircraft gray to get a single coat on all the road pieces). Then I placed the roads roughly back in place on the layout. Now this section looks surprisingly complete, even though it has a long way to go before I'll be ready to trim and attach the roads, and do the scenery.

And yes, I know my priority right now should be the daunting task of attaching the track, securing rail joiners, and wiring it up. But, this step was really quick and easy. And it made a noticable improvement to the appearance. Now, there really is nothing else I can do before the track and wiring. Is it kind of backwards that I've done this much on the scenery preparation prior to actually having the track attached and wired?

The rest of this week I'll be mowing, and house cleaning, in preparation for family coming into town for a visit. In my case, house cleaning also includes cleaning the detached garage/ work shop. When ever I have visitors, we may start out in the house, but always end up spending more time out in the garage (and the garage is a real mess). Probably won't get started on the track and wiring till after they leave the end of next week. But thats okay. The family isn't likely to even get down into the basement to see the train layout.

1785265673567.png
1785265711761.png
1785265761488.png
1785265860296.png

1785266089211.png

1785968191401.png
 
Last edited:


Jim, the scenery was there before tracks existed in the real world. It gives you inspiration, and it looks GOOD. I will have to look for that Testor's Dark Aircraft Gray, looks like a very versatile color. Is the Light Aircraft Gray the sidewalks in the first and third pictures?


Affiliate Disclosure: We may receive a commision from some of the links and ads shown on this website (Learn More Here)

Back
Top