New Layout for LASM

ModelRailroadForums.com is a free Model Railroad Discussion Forum and photo gallery. We cover all scales and sizes of model railroads. Online since 2002, it's one of the oldest and largest model railroad forums on the web. Whether you're a master model railroader or just getting started, you'll find something of interest here.


That's a big improvement. Like it. appl.gif
 
Like the trees Lasm and it is amazing what can be done using house hold items - especially when being used by someone who knows what they are doing. Great work mate.


Sweet-Chuck, Hawkes, Chet, Tony--Thanks for commenting on the pics!! Rico--the trunks were made from some 3/8" dowell purchased at Walmart, some sort of chinese wood. Maybe I could have found some pine at the lumber yard. I shaved them down with a knife first and then scraped the trunk with a medium toothed jig saw blade to get some texture.
 
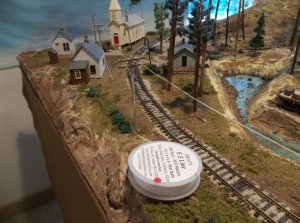
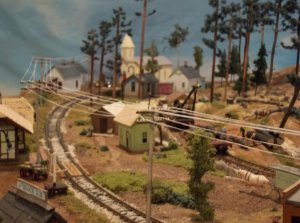
My new ez line came in the mail last week and here are some pics of putting the stuff up, I am thinking I could have gone with the N scale size rather than the HO size because it seems a little big.

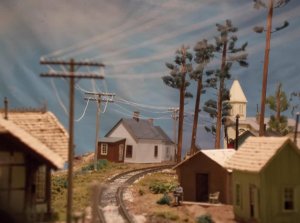
At least it shows up. The white color sticks out a lot more than the black thread I used on the other part of the layout, which just about dissapears

Here I am just starting with the first lines. They suggest stringing about 5 poles and glueing the ends, then glueing the middle insulators:
utilitylines2 001.jpg

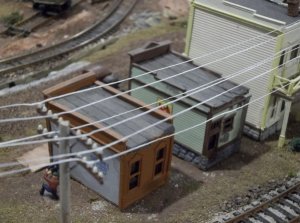
The wires are strung here, it is a lot easier to get the lines taught then to leave a sag in them. I wanted the sag but it is dufficult to match with all the wires:
utilitylines2 003.jpg


utilitylines2 004.jpg


I will reglue the one length that drops so low.
utilitylines2 005.jpg


I will use up this product but haven't decided if I am going to redo the area with the home made black thread (several posts back) or if I should experiment with buying a roll of this ezline in black or gray and the smaller diameter?
 
That is really looking good. I had thought about adding utility wires but I'm sure that I would probably reach into the layout and screw them up.

That's a great addition.

......................................... Chet
 
I would agree that white is to white and black is to dark, so that leaves grey.
Instead of buying new thread, couldn't you cut lengths and spray them with light grey paint or even metallic grey?

I like how it fits on the layout, nice
 
Agree with Hawke, one is too bright, the other too dark. Might be worth trying the N Scale Grey and see if that looks any better. Failing that, and if you want an honest opinion, I think I would go with the "black rather than white" if I were to stay with HO scale wire. The black may not show up as well BUT the white seems to be too obvious to me any way.
 
Chet-- this stuff has some real stretch to it and if you snag a sleeve on it, it gives quite a bit. However, it takes a long time to string it up. It wasn't really difficult, but no matter what it took time to string each line.

Hawkes-- I thought about using a marker or paint to color the line, and may try it--

but driving around a lot today I noticed that some of the utlilty lines do look white when the light is right

I am thinking that the N scale size would have maybe been better.

Thanks for commenting!


Hey logan,

I don't need to drive around, I just need to look out the window....lol
On a sunny day, the sun shines on the wires making them look white,
but on a cloudy day, they look very grey (more metallic grey or light grey)
looking at them as I'm typing.

Like I said, string them up with a weight at the bottom and use spray pain.
Don't know what it would look like, but I would also use some white chalk powder and rub it along the thread for some sort of weathering.

I still haven't done any cause I'm debating if I'm going to start over my layout.............been 3 weeks
 
. The black may not show up as well BUT the white seems to be too obvious to me any way.

One of the problems is how it looks in the photograph versus is how it looks when standing the room. The white actually looks cool and you can see it, where the black is invisible. And standing a couple feet away, the white lines do look much thinner. Probably because they are pretty thin.

This is part of why most people don't put on the lines.
 
I still haven't done any cause I'm debating if I'm going to start over my layout.............been 3 weeks


Starting a new layout is a lot easier than you may think...I think it is the scenery that takes up tons of time and requires constant adjustment, partly because as you work more you get better ideas and techniques so keep on raising the bar.

I have some new ideas but decided to get more practice on this layout.
 
One of the problems is how it looks in the photograph versus is how it looks when standing the room. The white actually looks cool and you can see it, where the black is invisible. And standing a couple feet away, the white lines do look much thinner. Probably because they are pretty thin.

This is part of why most people don't put on the lines.

Point taken things do look different in "real life" than in photo's, that's for sure. Bottom line is what looks right to you, that's really all that is important. Either way, the lines do look great :)
 
. Either way, the lines do look great :)

Thanks Tony, I added a few more lines last night and refined my technique to speed things up a little. Also got this huge brainstorm of making some black/gray dye for the lines to tone them down a hair for the photography. Something I can easily apply to the lines that are in place.
 
logan, try it on a piece before doing it on your layout
black/gray might be to dark, black might take over the grey
When I want light grey, I mix 1 black to 4 white, therefore adding 1 black to 1 grey would make it darker
start with white/grey than grey and if not satisfied, black/grey

Just thinking out loud
Good luck
 
logan, try it on a piece before doing it on your layout
black/gray might be to dark, black might take over the grey
When I want light grey, I mix 1 black to 4 white, therefore adding 1 black to 1 grey would make it darker
start with white/grey than grey and if not satisfied, black/grey

Just thinking out loud
Good luck

Good idea, I was thinking about running a test, comparing the diluted black acrylic pigment and some duluted water india ink mixture. I was just going to add water until the color seemed washed out enough.
 
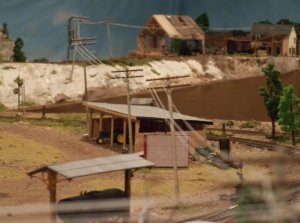
Here is a pic of some more utility lines and some of the wire I have been stringing, in my revised method I run about 10' of line and get the tension right so some sag is evident, then glue only the ends. Next I go along and glue each insulator, that way I am better able to get the wires to match:

View attachment 51079


Affiliate Disclosure: We may receive a commision from some of the links and ads shown on this website (Learn More Here)

Back
Top