ModelRailroadForums.com is a free
Model Railroad Discussion Forum and
photo gallery. We cover all scales and sizes of model railroads. Online since 2002, it's one of the oldest and largest model railroad forums on the web. Whether you're a master model railroader or just getting started, you'll find something of interest here.
Greetings,
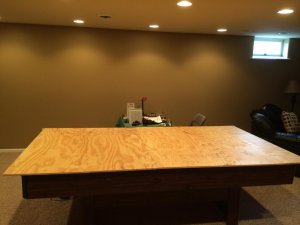
First, let me say that I've been browsing this site for several months now getting ideas for the layout that my son and I are embarking on. We (Santa) bought him a Life Like elevated rails set for Christmas 2013. After having fun with it for a while, he decided that it was time to go bigger, right up Daddy's alley. Originally, the set fit within an older pool table, but the new layout wasn't going to. So, off to the drawing board.
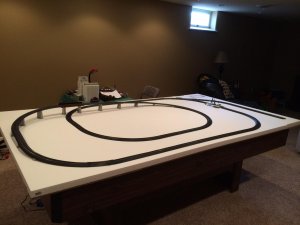
Our plan is to put together a simple single track loop layout. It's much more modest than most on here, but with a six year old, you need to start somewhere. As time goes on, we can always add another sheet and more track, but my goal is to make this a well detailed 9'x5' layout to start with and go from there. We're using as much of the original LL set as possible because it came from Santa after all (including the Power Loc track

). I'll be logging our progress on the setup from time to time and appreciate any feedback and input that you can give.
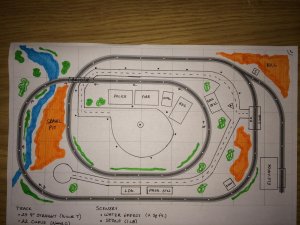
So, here's what we're starting with, as laid out with AnyRail and my fancy hand drawn art work. Construction will start in earnest in the coming days and weeks. Stay tuned if you have an interest in our layout.
Nice start, straight forward, clean with lots of options.
The only thing I will say is you need to consider being able to reach all parts of the layout with regards the track in particularly. You may have to redesign the front (or rear) section so can physically reach the track work, perhaps more of a "dog bone" layout than an oval.
Other than that, it is a nice firt plan and looking forward to following along with your progress.
Appreciate the input Tony. I don't think I'll be putting the layout back against the wall for now because of the access issue. It's sort of "mobile" because it's mounted on an old pool table.
Starting On The River
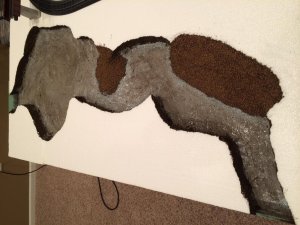
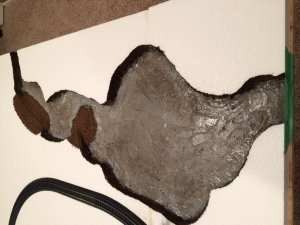
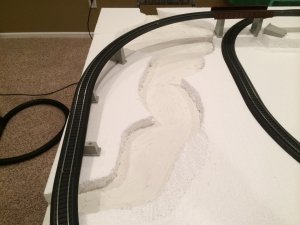
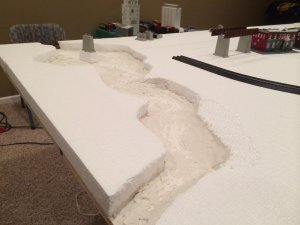
Since I'm still waiting for more electrical supplies to arrive at our home, I decided to start working on the river portion of the landscaping this weekend. The river path was cut through the foam with a sheet rock saw to give the appearance of a jagged shore line. We used the same saw to form the “beach” area in the lower right part of the river.
After cutting out the actual river, I started adding texture to the bottom with spackling, which will still take a few more coats to get just right. Once that’s done, the river bank and river itself will be painted then sand will be added to the beach and sand bar area in the middle right. We will add sticks and twigs to act as fallen trees then the water kit will be poured into the river bed. Don't know how much time I'll get to work on things the rest of this week and weekend, but will post more pictures as things happen.
Very nice first layout. Many newcomers try to cram as much track into their plan as space allows, making for a visual and maintenance nightmare. Your plan allows to run a train with a little height variation for visual interest and you can switch the spur when it suits you.
I would have gone with extruded (pink, green, blue) foam from the git, but if you're not doing a tremendous amount of sculpting, the white foam will probably be fine.
Welcome to the forum, glad to have you onboard!
Great looking layout, thanks for sharing it with us.
Beachbum is spot on! When I first started I had a convoluted mess! Can you say spaghetti?
I would have gone with extruded (pink, green, blue) foam from the git, but if you're not doing a tremendous amount of sculpting, the white foam will probably be fine.
Thanks for your feedback Beach and Bruette. I did a ton of research before starting this, but completely screwed the pooch when it came to buying foam. Had the white junk home and cut before I realized my mistake.
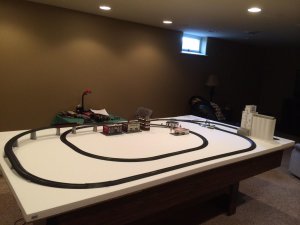
With this being my first layout, I wanted some expansion flexibility built in. With the branch line on the right side, I can either expand right or back with another sheet and still have the ability to link everything together. With my son helping me (a six year old), I wanted to start on the smaller side so he didn't get overwhelmed. My hope is that he gets so into it over time that we need to expand!
I have yet to do any scenery and I have a question, maybe stupid but I'll never know unless I ask.
What is the difference between white foam and the colored foams and the different applications of each?
What is the difference between white foam and the colored foams and the different applications of each?
My understanding is that extruded foam is smaller celled and higher density than the white foam. It's supposedly easier to shape and sand if you're going to make hills and scenery out of the stuff. That makes sense as when I was cutting out the river area, at times, larger chunks would come out, versus the more perfect cuts you'll get with the extruded. Since I've already paid for the white foam, I'm going to try it out to make rolling hills and will report back with how it worked. I can always go buy a damaged sheet of extruded from Menard's and use that instead.
The white foam is also called "Beadboard", as it is made from small styrofoam beads. Our old club in Mobile Al, used this as a scenery base way back in the late 70's and 80's as the pink and blue wasn't available at that time.
Best thing to cut and shape this stuff with is a hot knife. The blades can be obtained in woodburning kits from a craft store, or you can use a Surform tool or even a regular knife. Just be sure that you have a shop vac ready to go, if you use the last two tools!
Northern Pacific history enthusiast
I saved a bunch of the white foam that packed some kitchen cabinets that we bought and had to assemble. Then I saw Iron Horseman used screen and I have an old screen door under the house that I cannabilized. I will try to put the foam and screen together and make something of our junk.
Thanks for showing that the white stuff can be used. lasm
Louis,
The basic difference between the "white foam" and the "colored foam (EPS)" is the density of the foam.
For Model Railroading purposes, either is fine to use; HOWEVER, (and to me this is a big however) EPS (colored foam) is much easier to use, cleaner to use (in terms of it being cut) and can be sculptured better for creating your scenery. Colored foam cuts much cleaner than the white stuff, which tends to "break apart" rather than tolerate being cut unless you use a Hot Foam Foam Cutter.
Due to the colored foam being "denser" than the white stuff, it takes being painted much better as well, using a 100% NON Petroleum paint of course.
Emptypockets,
Just because you have used the white stuff for your base, doesn't prevent you from using EPS foam for your other scenery, and that is something I would do just to make life easy for your self.
Good to know you guys are making the white bead board work for your layouts. Maybe I'm not on the wrong "track" so much after all? I'm planning on working on the layout some again tonight and will post more pics afterwards. Dang, this model railroading gets in your blood!

Spackling Complete
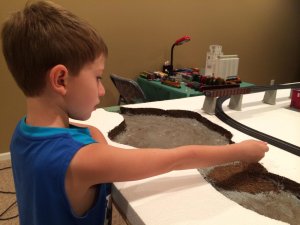
Tonight, we got around to doing the final coat of spackling for the river bottom texture. We went through much more of it than I was planning to and hopefully, the end result is worth it. It doesn't look like much now, but paint will make things look more realistic...at least I'm hoping!
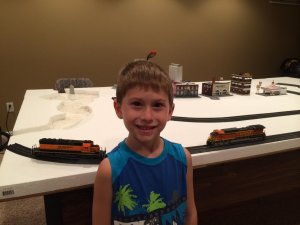
My six year old son Cameron posing with two of our new engines: a Kato SD40-2 on the right and an Athearn AC4400CW on the right. He's been a pretty good little helper so far and is always around for a smile of encouragement.
I'm going to give the spackling at least a couple of days to fully harden before painting, which I believe is my next step. Stay tuned!
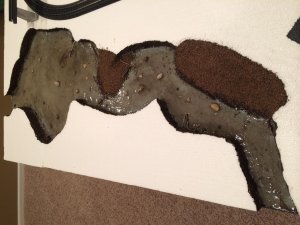
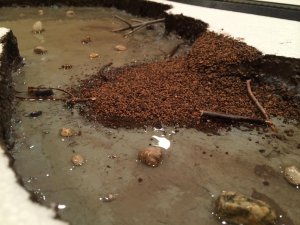
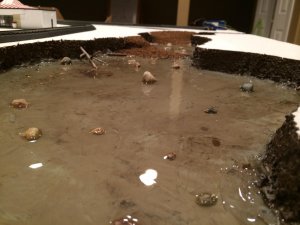
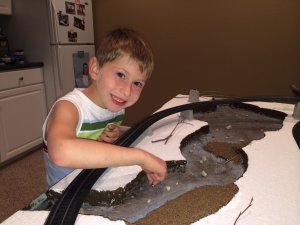
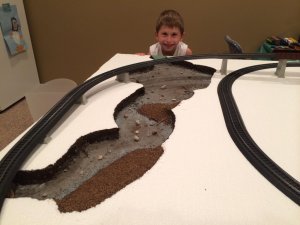
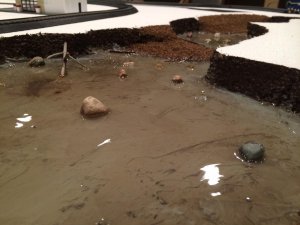
Tonight, Cameron and I put the finishing touches on landscaping the river area. We placed some stones to mimic boulders and sticks to copy large downed trees and branches. Then, I did a final touch up of the paint to finish things. Now, all that’s needed to completely finish things is to fill the void with the simulated water solution, then off to other parts of the layout. Hoping to get the water solution put down over the weekend, if time permits.
Great looking work and its even better to see the little guy enjoying too!
Looks like that is one heck of a big river! Nice job to both of you guys.
-
Layout18.jpg
148.3 KB
· Views: 368

Affiliate Disclosure: We may receive a commision from some of the links and ads shown on this website
(Learn More Here)