
You are using an out of date browser. It may not display this or other websites correctly.
You should upgrade or use an alternative browser.
You should upgrade or use an alternative browser.
My HO "L-Shaped Switching Layout" (96"x92"(16" Shelf Width))...
- Thread starter justn2trains
- Start date
ModelRailroadForums.com is a free Model Railroad Discussion Forum and photo gallery. We cover all scales and sizes of model railroads. Online since 2002, it's one of the oldest and largest model railroad forums on the web. Whether you're a master model railroader or just getting started, you'll find something of interest here.


...................Thanks G!

Affiliate Disclosure: We may receive a commision from some of the links and ads shown on this website (Learn More Here)

justn2trains
Member
I got a temporary bridge put in so I could make it a loop.
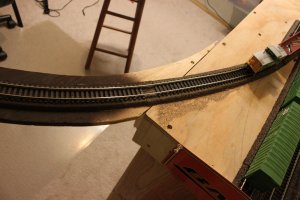
Bridge is 4" wide.
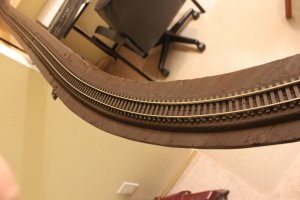
The radius by the grain elevator is 24" and the one close to the camera is about 26".

Made a little more bench work to allow for more of a radius.

Bridge is 4" wide.
The radius by the grain elevator is 24" and the one close to the camera is about 26".
Made a little more bench work to allow for more of a radius.
justn2trains
Member


justn2trains
Member
This section will be a BNSF maintenance facility, holding gondolas, heavy equipment and extra stock.


justn2trains
Member
Few shots of me figuring out the road to the flour mill....the grain trucks will have their own dirt road that comes off this paved road.

I am going with a 3" wide road.


I am going with a 3" wide road.
justn2trains
Member
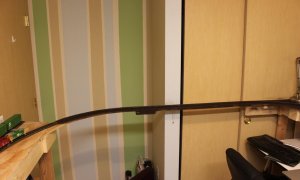
Few more views of the bridge.

justn2trains
Member
Got started on the road, and did some testing on the scenery.


I wanted to do something different for the access road to the Grain Elevator. Thoughts on the colored rock for the dirt road? Look ok?

Here is what I used for the dirt road, on the side of the road I just used dirt from the back yard.

I wanted to do something different for the access road to the Grain Elevator. Thoughts on the colored rock for the dirt road? Look ok?
Here is what I used for the dirt road, on the side of the road I just used dirt from the back yard.
justn2trains
Member
Few more shots of the dirt road.


justn2trains
Member
Doing some testing on the mainline.


justn2trains
Member
Got the gravel parking lot at bit done in the scrap yard.


This will be a small mechanic shop.

This will be a small mechanic shop.
justn2trains
Member
Started on the ramp for the gravel road to the grain elevator....doesn't have to be too fancy....it will just get ballest on top of it later(just needs a sanding and maybe another coat of joint compound).


justn2trains
Member
Thanks! Yeah, I been meaning to hit Home Depot....I have seen some plexiglass there that I could rip down to 3" strips....just been busy with the holidays.Scrap yard area starting to look good! Might want to add some sort of guardrail(s) to 'the bridge' so your equipment doesn't take 'the dive' if you have an 'oops.' You've done a lot in a small space!
justn2trains
Member
your moving along real good now justin. looks good
...................Thanks G!
justn2trains
Member
I got some facia up and some track weathered.
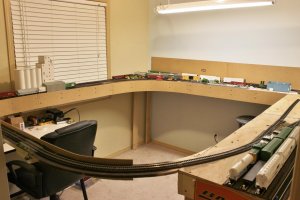
I know, I used a few screws...lol.


On the bridge, the facia sits a little higher....incase of people bumping the bridge and causing a derailment or etc.

I know, I used a few screws...lol.
On the bridge, the facia sits a little higher....incase of people bumping the bridge and causing a derailment or etc.
justn2trains
Member
The height of the facia is 5.2, it gets a little thinner when it hits the bridge.


justn2trains
Member
Quick view on how I braced the radius.

View of my my wiring, I put a ziptie around the blue connector...I just didn't have one installed in this picture.

I nail in some hangers to keeping the wiring up and tight.

I will be adjusting the yard section a bit...I will make the right track isolated from the mainline so the yard switcher can move cars around and have the mainline clear.
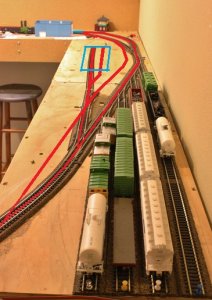
View of my my wiring, I put a ziptie around the blue connector...I just didn't have one installed in this picture.
I nail in some hangers to keeping the wiring up and tight.
I will be adjusting the yard section a bit...I will make the right track isolated from the mainline so the yard switcher can move cars around and have the mainline clear.
justn2trains
Member
Picked up an new Athearn covered hopper and TTX boxcar.


justn2trains
Member
I also picked up BNSF yard tractor(Athearn) and a FJ40(forget what brand).


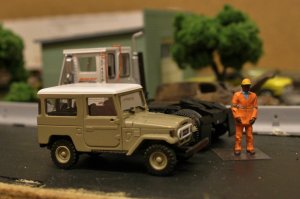
Affiliate Disclosure: We may receive a commision from some of the links and ads shown on this website (Learn More Here)