Long term project plan for N scale

ModelRailroadForums.com is a free Model Railroad Discussion Forum and photo gallery. We cover all scales and sizes of model railroads. Online since 2002, it's one of the oldest and largest model railroad forums on the web. Whether you're a master model railroader or just getting started, you'll find something of interest here.


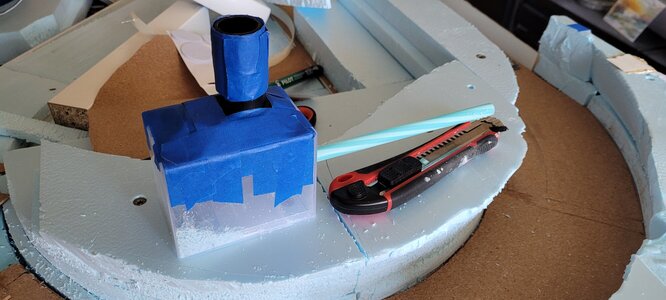
Made a vac filter today using an old screw box, a pair of tights and a straw. When I rasped at the cork I just could not bring myself to bin it.
Would it make good ballast if I can make it grey somehow?
I was thinkin the dust might pass as "rust powder" anyone tried that?
Also if i save the fluff from rasping the styrofoam is it possible to treat than so i can use it as foliage?
 

Attachments

  • 20230520_130559.jpg
    20230520_130559.jpg
    296 KB · Views: 207
Last edited:


Can’t help you with the styrofoam fluff other than it will be absolutely everywhere, but I can tell you I use the cork bits from my surform to fill in between double track roadbed.
Its actually XPS fluff so while yes it IS a nightmare and gets everywhere!!, it is not nearly as bad as the EPS polystyrene stuff, as it is heavier and less likely to stick to everything statically like EPS does. It actually has a very foliagey texture to it, so will save some and see if it works to make it dark green and yellow somehow.
 
I know you're past the point of needing the first of my suggestions, but the second may help.

Screen Shot 2023-05-21 at 10.59.46 AM.png


For anyone cutting sheets of foam, I saw (pun intended) this trick on trains.com from Gerry Leone. grind the teeth off a jigsaw blade. Make it sharp-ish, but doesn't have to be razor sharp. You'll cut through foam board with almost no mess. Great for shaping or cutting down large pieces.

For shaping and cutting smaller pieces, get a hot wire foam cutter. Here's a US link to Amazon for some. Check your local hobby store, or favorite online vendor for one.

 
Your making great strides.

The rocks look great. I tried to do the foam route, but just didn't have the knack for it. I see you have it!
With foam a hot wire cutter is essential (edit: for precision needs, otherwise not so much), no need to buy one, i just made my own out of an old laptop charger a couple of nuts and bolts, a spring, some croc clips and some nichrome wire that you can buy pretty much anywhere for cheap (this is the best type of wire as it is stronger when hot), guitar strings work kinda but are more expensive and not as strong when hot.
A home made one is better than a bought one for 4 reasons:
1) It is MUCH cheaper, always good.
2) You can design it and readapt it easily to match your exact required jigging.
3) You can design in your own rheostat by simply putting a crocodile clip on the wire, the shorter the distance the hotter it gets so can eliminate all that nasty smoke and have a slower but smoke free melt.
4) Its cool and you made it yourself :D
I will post some pics of how i made mine if you are interested for future trials. Litterally took me < 30 minutes.

 
Last edited:
With foam a hot wire cutter is essential, no need to buy one, i just made my own out of an old laptop charger a couple of nuts and bolts and some nichrome wire that you can buy pretty much anywhere for cheap (this is the best type of wire as it is stronger when hot), guitar strings work kinda but are more expensive and not as strong when hot.
A home made one is better than a bought one for 4 reasons:
1) It is MUCH cheaper, always good.
2) You can design it and readapt it easily to match your exact required jigging.
3) You can design in your own rheostat by simply putting a crocodile clip on the wire, the shorter the distance the hotter it gets so can eliminate all that nasty smoke and have a slower but smoke free melt.
4) Its cool and you made it yourself :D
I will post some pics of how i made mine if you are interested for future trials. Litterally took me < 30 minutes.
You just exceeded my ability to play with electrons at home and not burn something down in the process. ;)
 
I know you're past the point of needing the first of my suggestions, but the second may help.

View attachment 168893

For anyone cutting sheets of foam, I saw (pun intended) this trick on trains.com from Gerry Leone. grind the teeth off a jigsaw blade. Make it sharp-ish, but doesn't have to be razor sharp. You'll cut through foam board with almost no mess. Great for shaping or cutting down large pieces.

For shaping and cutting smaller pieces, get a hot wire foam cutter. Here's a US link to Amazon for some. Check your local hobby store, or favorite online vendor for one.

Hmm interesting hack that. I use 3 methods so far, the main one is a "stanley knife" that is a branding like "a hoover" not sure what it's name is in the trade, but it has a magazine of 60mm retractable blades (I think you can see it in one of my pics). Nice thing about this, i can score once then twice then the blade just glides itself each time i use a "click" of the blade to make it longer. But you can only cut up to 50mm thich.
The second is a hot wire cutter. Both make 0 mess, but problem with the wire cutter you are more restricted on size.
but i can imagine this would be good for getting a section rough cut quick, especially if too deep for the knife method..
I have got a jigsaw, so might try this.
PS: a breadknife works alright too, but you have to put pressure on the offcut side so the foam does not "squeeze" the blade.
 
Last edited:
You just exceeded my ability to play with electrons at home and not burn something down in the process. ;)
Haha yeah there is that, but very little chance of starting a fire as long as you keep a clean clear area and of course remember to switch it off when not in use (soldering iron rules and just good old common sense).
XPS will only catch fire at a much higher temp than we are talking here, and it needs a constant flame to burn uness it gets extremely hot enough to supply it's own re-ignition. You can try this (OUTSIDE!) by holding a lighter to some XPS foam. It will melt, eventually turn black and burst into flame, but as soon as you take the lighter away, it should (if it is insulation foam) cool back down faster than it can heat itself and extinguish. They would not allow it to be used in buildings otherwise. EPS might be different, have not tried it with that, but being the same plastic, just "foamed" differently i can imagine the result would be similar.
Just dont soak either in benzine.. that is a different beast all together lol. (That is what napalm is i think :eek:)
 
Last edited:


I hated using hot wire to cut foam. I found a nice thin long sharp blade to work very well.
For the most part i agree, especially for carving sceneery, it seems a blade does it well, I just cannot get the high precision with a knife though, no matter how i try. I prefer the wire for cutting my roadbed sub-surface (which i then put down cork on), i have done it in sections with a (around +-2%) gradient and it is perfecty level across the bed (except where i want to slightly super incline "cant"? the curves whch i can feed through the cutter going "round the bend" so to speak).
For most cuts though i find my knife that is pictured with my vac filter box works great, and much faster than the wire cutter.

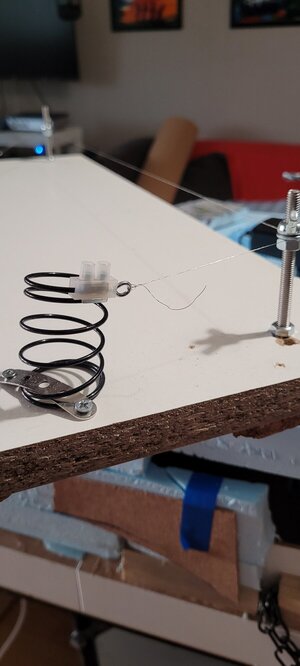
This is what I use, one wingnut clamps the nichrome tight, the other just loosely holds it at height so the spring can take the tension. By moving both up and down I can get a pretty accurate gradient cut to a range of heights.
I can also adjust the heat by putting the crocodile clips at varying distance so totally avoid all that smoke and smell you often get from retail ones with no heat adjustment.
It literally cost nothing because I had the parts lying about. I suppose that spring could be replaced by some large strong rubber bands and a metal loop to stop the wire cutting them. Basically anything to buffer the tension would work.
 

Attachments

  • 20230522_211625.jpg
    20230522_211625.jpg
    184.7 KB · Views: 214
Last edited:
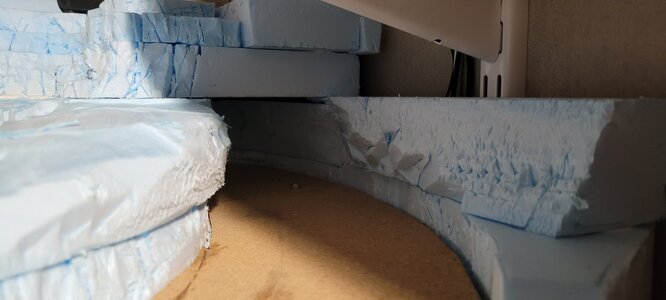
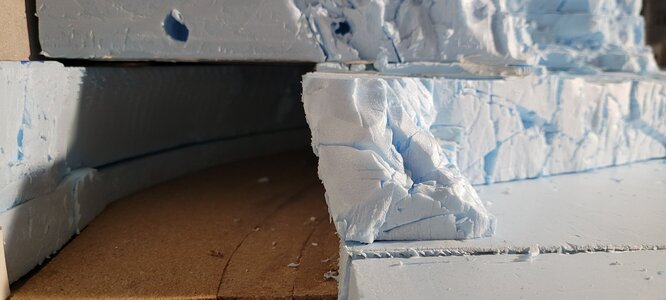
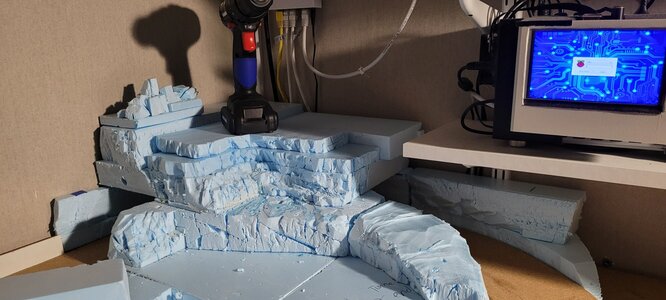
Started carving my removable "mountain" bit.
I think rather than the 3 track portal, which I did find a prototype for, it seems it is not really that "prototypical" so have decided to go with a natural cave!! There seems to be more examples of that, and many of them have more than room for 3 lines.
Still a total WIP, but let me know what you think of this idea.
PS this whole section is removable. (I will have a mechanism to raise it up on a couple of subtle chains.
 

Attachments

  • DiJ0nOyW0AAVvVr.jpg
    DiJ0nOyW0AAVvVr.jpg
    222.5 KB · Views: 221
  • teh-13017-39.jpg
    teh-13017-39.jpg
    188.3 KB · Views: 217
  • b5b7d998825b377daf0a842101fc8c90.jpg
    b5b7d998825b377daf0a842101fc8c90.jpg
    145.2 KB · Views: 210
  • 20230603_235205.jpg
    20230603_235205.jpg
    177.5 KB · Views: 216
  • 20230603_235214.jpg
    20230603_235214.jpg
    249.6 KB · Views: 212
  • 20230603_234342.jpg
    20230603_234342.jpg
    331.4 KB · Views: 216
  • 20230603_235246.jpg
    20230603_235246.jpg
    207.8 KB · Views: 214
I like it! I think what you have is a great looking start.
Thanks :)
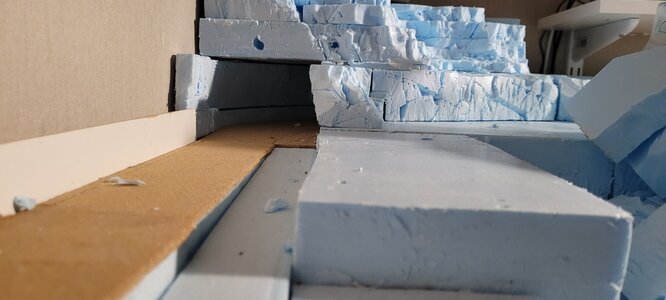
the cork bed is going to be my earth layer rather than "railbed" as i am using kato unitrack. So at some point i am going to wash all the cork with a dark brown wash (or grey-stone depending). I like using cork anyway as it really takes that nasty plastic noise away that you get with prefab railbed, (well, at least running at high speed which is my primary rail-interest 😃).
Eventually it will be built up to hide the ethernet switch in the background, The tunnel will also go a little further under the shelf to around where you can see "tunnel exit" written on the bit that will not be raiseable.
 
Last edited:
I like the idea of using cork for earth. Will be interesting if it does take color easy.
It should do, i will let you know :D It is pretty impervious but i sand it and i think an acrylic wash should take hold without an issue.
Otherwise i will go with a more pale/dry earth.
 
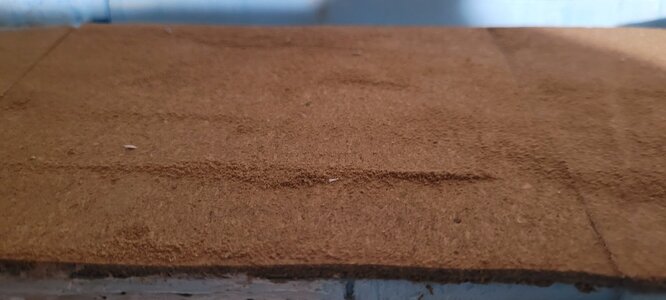
This is the natural colour/texture I am getting on an un vacuumed section of it.
I save all the stuff I vacuum up with my little filter box. I am thinking of trying to somehow bleach it or paint it to use as ballast to add a little "chaos" to the kato unitrack ballast. But this is the natural colour and could pass as mud as is,.. I think, although I will try to make it a bit darker somehow, or should i stick with it as is?.
Those section gaps tend to mostly disappear when i put some pva in there then just sand the surface with glue still wet, which i have not done yet here.
 

Attachments

  • 20230604_011011.jpg
    20230604_011011.jpg
    214.6 KB · Views: 211
Last edited:
Well my Mallard arrived! I am not sure about "excellent condition" as stated :confused:... and the wheels were filthy LOL
After some TLC i managed to get her running reasonably slow and smooth and she only got stuck once going uphill really slowly (before the turnout near the end of vid).
That said i am happy with it and definitely has a place in my collection.
Anyone know if that noise is normal? I am running it on a Kato SX basic 12V controller until i can afford something more and i have read that the DC from this controller is "noisy" and makes certain brand's motors noisy with it, or is that just normal for an old model? I remember my hornby trains having noisy motors for the steamers, but cannot tell if it was the same. That said the Kato trains run like silk.
 
Last edited:
Ok.. After even more TLC and a bit of contact grease on the pickups and it is a little better :)

So here is a likely -way- over scale speed pass and a slowdown that would probably kill everyone... but it has to be done 😆

That noise though :o it sounds like it is derailed but it isn't :confused:
 
Last edited:


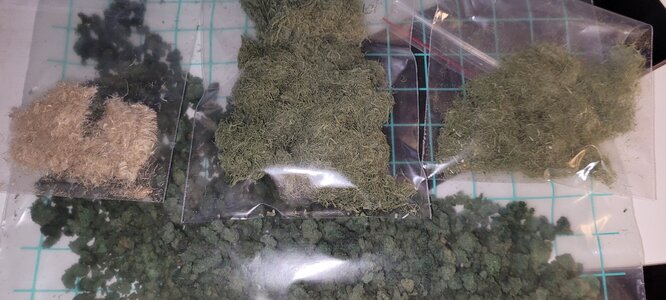
Had a go at making some home made flocking out of some hemp rope, cloth paper and bathroom sponges. 😀
Kinda happy with the result so far. Have been trying to record the 'recipe' so I can make more of it. But that's kinda hard because I kept messing up and adding stuff by "feel" :confused:
What do you think?
This is 2 types of grass yellow and green (left& right), one for hedges/bushes (center) and a some one one for leaf coverage (although might try and grind that smaller)

Oh and PS I now have my own grinder so she can't moan now. 😁
 

Attachments

  • 20230612_233713.jpg
    20230612_233713.jpg
    361.2 KB · Views: 213
Last edited:


Affiliate Disclosure: We may receive a commision from some of the links and ads shown on this website (Learn More Here)

Back
Top