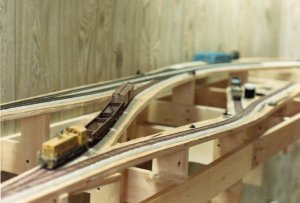
How do you go a grade into a curve?

ModelRailroadForums.com is a free Model Railroad Discussion Forum and photo gallery. We cover all scales and sizes of model railroads. Online since 2002, it's one of the oldest and largest model railroad forums on the web. Whether you're a master model railroader or just getting started, you'll find something of interest here.


Warpiper

Member
Hi All,

How do you combine a grade into a curve? I was looking at 2 options. One, cut the straight run and curve into the same piece of plywood but my concern is that the curve part will be at an angle once elevated. Second, cut the straight run out as one piece, the curve run as a second piece, and then try to connect the 2 pieces. Not quite sure how to do that without making the joint uneven. I'm going with a 3% grade. Thanks.
 
If you're doing it "cookie cutter" there shouldn't be any joints. It would be a smooth transition instead of a shape angle between 0% to 3%.
 
I built my layout using the old cookie cutter method. I have a grade going into and including a curve. Using half inch plywood, I cut the sub road bed into the desired radius. A splice was necessary to complete the curve. Using a scrap piece of plywood cut to the width of the sub roadbed and about 5 to 6 inches lonf, I just drove screws through from the top of the sub roadbed into the scrap with is what i would call the splice piece and it is strong. Just make sure the the splice isn't where the support riser meets the sub road bed. Take the cab ride in my signature below and you'll see how smooth it is. I have numerous splices on the layout.


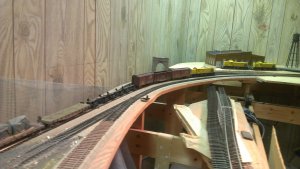
I don't have many photos of my layout with out scenery, but in the photo below, you can see splice at the top under the round house. In this instance, I had to Lose a quarter of an inch because I wanted to bring the track to ground level into the yard, but the splice can be seen.

IMAG0538.jpg The next photo I found is a little closer.

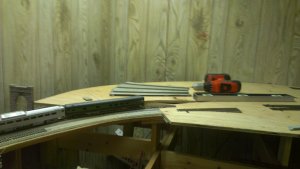
IMAG0240.jpg In this particular case, I had no choice but to have the riser going into the splice. The splice piece was first screwed into the riser and then the sub roadbed screwed into the splice.
 
Last edited by a moderator:
You can cut the plywood section with the curve, but you have to screw risers onto the joists below it to force the curved end onward to meet the grade you need. It means forcing it. You cut risers out of 1X2 to the correct length so that you can clamp it to the joists in such a position that it forces the curve to continue the grade. This must be done carefully so as not to impart a greater grade or a reduced one. When you know the grade is being maintained, clamp the riser there, and drive at least two wood screws through it and into the joist. You'll need more joists to do this because, as you can see, the curved end wants to curve downward. Because of this, the greater the grade, the worse the problem on a curve, and you can end up breaking the plywood. Therefore, the joists must themselves be rather robust...probably 1X4 on a minimum, and never more in length than about 20" if possible.
 
Here you can see how I put my grades in the curves. I used small pieces of wood (1 x 2 risers mentioned by others) to get the 2% slope. This is a 32" radius so used up a lot of real estate to maintain the gentle slope.

[video=youtube;JCTcpJ2Ffe8]https://www.youtube.com/watch?v=JCTcpJ2Ffe8&t=14s[/video]

hope this helps.
 
The risers are important establishing and maintaining a smooth grade as well as super elevation if you are building that into the track too. Install your risers so that you can adjust them after your track is secured to the roadbed.
 
How do you combine a grade into a curve?
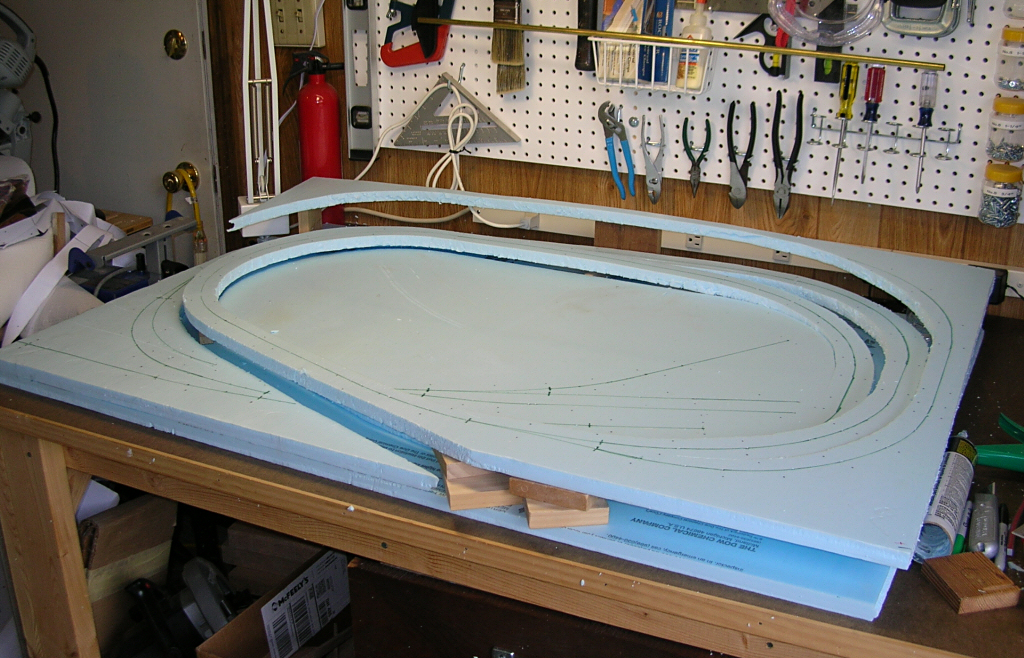
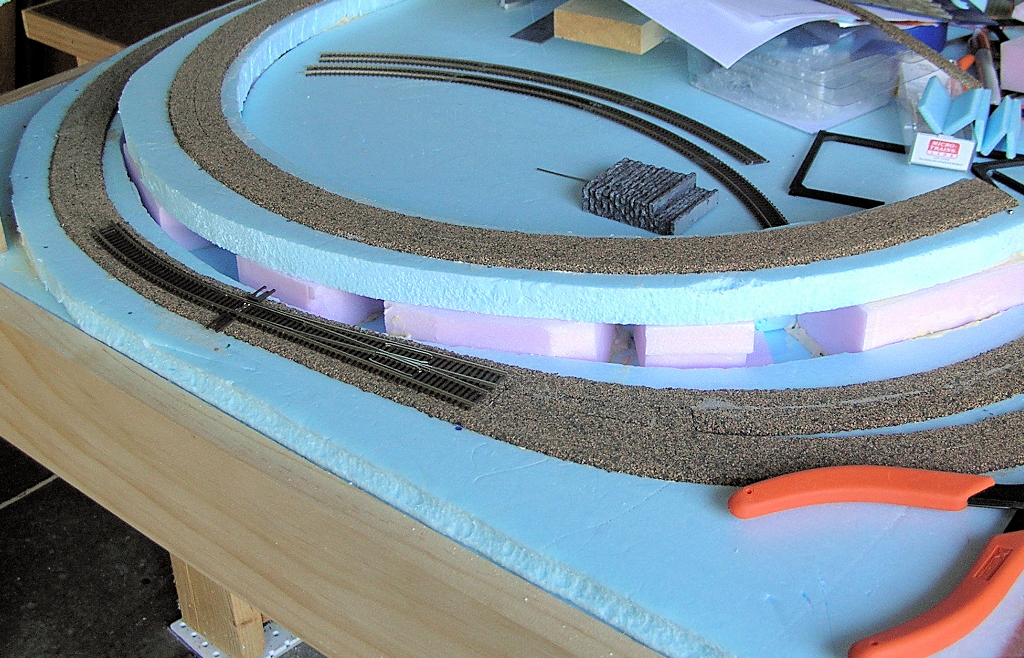
The cookie-cutter method makes it fairly easy to create a nice, smooth grade on a curve. Below is an example using foam sub-roadbed.

You can do the same thing with plywood.

- Jeff

cookie_cutter2_big.jpg


grades_1024.jpg
 
Here's another old photo of the same area before any scenery was put in.

Cookie Cutter20160115_15080676.jpg

Using the cookie cutter method you'll get an automatic easement at the top and bottom of the grade also by solidly attaching the top and bottom of the grade and then attaching the risers to the sub roadbed. Also what I did was to give my curves slight super elevation very slightly twisting the subroadbed with the riser screwed into the sub road bed and by using a level, giving a little twist before screwing the riser to the benchwork. My curves are greater than 40 inches except for one area in a town where I had limited space and had to drop the minimum radius to 32" to make everything fit.
 
If you're doing it "cookie cutter" there shouldn't be any joints. It would be a smooth transition instead of a shape angle between 0% to 3%.

Hi Andy,

Thanks. I'll have to figure out how to get that length and shape out of a piece of plywood.


I built my layout using the old cookie cutter method. I have a grade going into and including a curve. Using half inch plywood, I cut the sub road bed into the desired radius. A splice was necessary to complete the curve. Using a scrap piece of plywood cut to the width of the sub roadbed and about 5 to 6 inches lonf, I just drove screws through from the top of the sub roadbed into the scrap with is what i would call the splice piece and it is strong. Just make sure the the splice isn't where the support riser meets the sub road bed. Take the cab ride in my signature below and you'll see how smooth it is. I have numerous splices on the layout.

Thanks Chet. I appreciate it. Love the cab ride. You have an awesome layout. That must have take a while to put it all together. And thanks for all the pictures, those definitely give me some ideas.
 
Last edited by a moderator:
You can cut the plywood section with the curve, but you have to screw risers onto the joists below it to force the curved end onward to meet the grade you need. It means forcing it. You cut risers out of 1X2 to the correct length so that you can clamp it to the joists in such a position that it forces the curve to continue the grade. This must be done carefully so as not to impart a greater grade or a reduced one. When you know the grade is being maintained, clamp the riser there, and drive at least two wood screws through it and into the joist. You'll need more joists to do this because, as you can see, the curved end wants to curve downward. Because of this, the greater the grade, the worse the problem on a curve, and you can end up breaking the plywood. Therefore, the joists must themselves be rather robust...probably 1X4 on a minimum, and never more in length than about 20" if possible.

Hi Crandell,

Thanks. That's good to know and good advice. I've used plywood before on many projects but I've never tired bending it. Should be an interesting experience.
 
Here you can see how I put my grades in the curves. I used small pieces of wood (1 x 2 risers mentioned by others) to get the 2% slope. This is a 32" radius so used up a lot of real estate to maintain the gentle slope.

[video=youtube;JCTcpJ2Ffe8]https://www.youtube.com/watch?v=JCTcpJ2Ffe8&t=14s[/video]

hope this helps.

Thanks for the video Dave. That looks like it's going to be a great build.
 
The risers are important establishing and maintaining a smooth grade as well as super elevation if you are building that into the track too. Install your risers so that you can adjust them after your track is secured to the roadbed.

Thanks Ken. Didn't think about making the risers adjustable but if I goof a little, that would be a good way to make some corrections.
 
The cookie-cutter method makes it fairly easy to create a nice, smooth grade on a curve. Below is an example using foam sub-roadbed.

You can do the same thing with plywood.

- Jeff

cookie_cutter2_big.jpg


grades_1024.jpg


Hi Jeff,

Thanks. I was thinking of foam but wasn't sure how pliable it would be. Also wasn't sure how easy it would be to mount motors for the switches.

Oh, I love your avatar.
 
Last edited by a moderator:
Hi Jeff,

Thanks. I was thinking of foam but wasn't sure how pliable it would be. Also wasn't sure how easy it would be to mount motors for the switches.

Oh, I love your avatar.
Extruded foam -- if not too thick -- is pliable enough to create any reasonable grade. Although my layout is N-scale, I got the idea from a HO modeler who uses this technique. He used 1-inch foam for his sub-roadbed, while I used 3/4-inch foam for N-scale.

The stuff you want is extruded foam used in home building. It is usually blue or pink and occasionally green, depending on the manufacturer. I have found it locally in several thicknesses including 1/4-inch, 3/4-inch, and 2-inch. I've made use of all three thicknesses on my layout. I cut the 1/4-inch with a utility knife, the 3/4-inch with a serrated steak knife, and the 2-inch with a table saw and a miter (chop) saw.

You should avoid the white beaded foam. It is more brittle and a LOT messier to work with.

I live in New England for 25 years, starting just about the time the B&M was being absorbed into the Guilford system.

- Jeff
 
Extruded foam -- if not too thick -- is pliable enough to create any reasonable grade. Although my layout is N-scale, I got the idea from a HO modeler who uses this technique. He used 1-inch foam for his sub-roadbed, while I used 3/4-inch foam for N-scale.

The stuff you want is extruded foam used in home building. It is usually blue or pink and occasionally green, depending on the manufacturer. I have found it locally in several thicknesses including 1/4-inch, 3/4-inch, and 2-inch. I've made use of all three thicknesses on my layout. I cut the 1/4-inch with a utility knife, the 3/4-inch with a serrated steak knife, and the 2-inch with a table saw and a miter (chop) saw.

You should avoid the white beaded foam. It is more brittle and a LOT messier to work with.

I live in New England for 25 years, starting just about the time the B&M was being absorbed into the Guilford system.

- Jeff

Thanks Jeff,

I'll have to play with it. I couldn't find any of the blue or pink foam but did find some 1/2" green extruded foam at our Lowes. I'll get some next time I'm there.

I'm originally form New England myself. Grew up in Gloucester in the 70's and remember seeing the B&M run. Used to take the T into Boston all the time. Boy did that ride rock back and forth. Could almost get sea sick riding it! LOL!!


Affiliate Disclosure: We may receive a commision from some of the links and ads shown on this website (Learn More Here)

Back
Top