Coffee Shop XXXV-12/3/2012

ModelRailroadForums.com is a free Model Railroad Discussion Forum and photo gallery. We cover all scales and sizes of model railroads. Online since 2002, it's one of the oldest and largest model railroad forums on the web. Whether you're a master model railroader or just getting started, you'll find something of interest here.


Good evening all,
It was a fairly cold day here in the foothills of Coarsegold, I think the temp was 42°F with a fair amount of moisture to it. It's suppose to drop to 36°F tonight which means that we possibly could get snow but no mention of it per Wungnd Weather but with all the moisture I'm rather surprised it hasn't been foggy in the mornings.


I got busy and did some need calking over the two bedroom windows on the East end of
my home and around the frames sides too. By the time I finished at around 4:00Pm it was getting quite cold out side and a good hot bowl Beef Chinese noodles with vegtables and a Polish Sausage took the chill off. Now I need to take two of the storm windows off and put new plastic sheeting in them to help seal things up better. I guess that will be a job for tomorrow.

Say WJLI,
Thanks for your compliments even though my hurried effort at covering up the background was was rather crude at best. That's the reason I decided many years ago to switch over to hand laid track and making my own switches is the appearance of it especially with the weathered rail although most of the rail I've seen out here in Calif. has been more of a medium to dark Rust color but I can always do a little rail painting here and there.

In hand laying my rail I also made the decision to use code 70 for the main line and code 55 for passing sidings and spur lines.

Also in buildinng my own switches I can build them to fit the situation which is a great help. Once in a while I have a point break loose, as I did on the foreground switch as the Left point rail let go but re-solidered very easily.

Thanks again and very nice gesture for the Marines and Toys for Tots! Hoorah!
 
Last edited by a moderator:
Good Morning...

Good Morning! from Tipton IN.

It's friday, December 14, 2012

Morning_Coffee.png


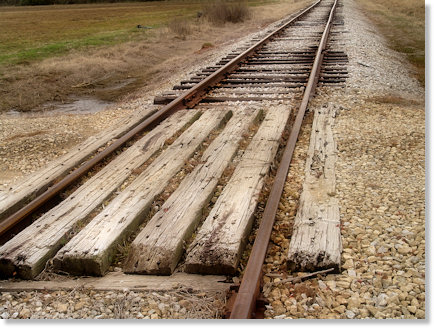
old-railroad-tracks.jpg


:cool:

Tipton.gif

TIPTON[/QUOTE]
 
Okay I'm testing to see if I can post pictures from photobucket. This a small model train factory in russia.

Mike


data_zpsabad35c4.png


Good morning guys,
It's about 2:30 Am and the temp is down to 30°F and with all the moisture in the air it very cold out there!

No work on the layout today but I'm planning to later today.

Take care and everyone have a great day!


Say Mike,

Glad you were able to post your picture from Photobucket, I've been using them too only I'm working with the new Beta version which seems to be fairly good but I noticed a bit of irregularity when posting pictures.

I redid the background on this shot and then resaved it under a new name but notice now it has double [IMG] before and after where the prior picture only 1 before and after so I'm not sure what to make of that? I do know that when I first came across that was when the only thing that would show-up was a small image until the Double [IMG] was on either side of the image address.


[IMG][ATTACH=full]93791[/ATTACH]
 
Last edited by a moderator:
Good Morning

It is kind of dark out...but it is going to be a sunny day anyhoooo....high of 44F expected...

We had some excitement last night...seems that a hit and run driver clipped next door neighbour's hedge and went into their backyard...but before anyone could get to the car..s/he backed up and took off down the street. The car had few branches and things attached to it though....
 
Good Morning Happy Friday!

Right now, it's 34F at Lakehurst NAS, going up to a "Sunny" 50F this afternoon.

Finished most of my personal shopping yesterday, so the pressure's off. Now I can enjoy the season.

Enjoy your day.


Good evening all,

Say WJLI,
Thanks for your compliments even though my hurried effort at covering up the background was was rather crude at best. That's the reason I decided many years ago to switch over to hand laid track and making my own switches is the appearance of it especially with the weathered rail although most of the rail I've seen out here in Calif. has been more of a medium to dark Rust color but I can always do a little rail painting here and there.

In hand laying my rail I also made the decision to use code 70 for the main line and code 55 for passing sidings and spur lines.

Also in buildinng my own switches I can build them to fit the situation which is a great help. Once in a while I have a point break loose, as I did on the foreground switch as the Left point rail let go but re-solidered very easily.

Thanks again and very nice gesture for the Marines and Toys for Tots! Hoorah!


I'm not brave enough to try hand laying rail, however, I do like working with Code 70. We have been planning on moving to a milder climate, so my current core layout is a temp. The "extensions" are designed to be portable. The initial basis was to use Code 83 and fit in code 70 for sidings, but in comparison, code 83 now appears "clunky" Perhaps I will try some custom switches on the next one.

Code 70 and code 55 help set your theme, definitely, an effect you cannot get with stock flex and "panel switches".
 
Good afternoon. It's 58° and mostly cloudy. The high will be 62°.
condmc-1.jpg


I've been down at my parents place all morning. First for breakfast then to be on hand while the tech from the cable cut the cable and phone service for the old half of the house then ran cable into into my fathers office then set up the modem in there for the internet and phone service for the new half of the house.

The mail carrier brought me a big box today. It's chock full of old freight cars, a few old locos and some containers. I've already done a preliminary sorting. There were a few things that even I can't use but the vast majority of the stuff has possibilities. One of the locos is a large Mehano diesel that's got many years of age. The former owner has told me that he'd love to see it running again, so that's going to be a priority. I haven't opened it up yet to see what what it needs but I'd imagine the main thing would a new motor.

Just getting ready to pack up now and head back home.

P1010028-4.jpg
 
The loco I'm working on this evening is a Mehano Alco Century 628 (C628), a rather enormous Lehigh Valley Snowbird, Cab #638. It's a 6 axle diesel, 4 axle pickup, 4 axle drive. The appearance of the trucks, motor and drive lead me to believe this is a product from the late 60's to mid 70's. I could be mistaken. The drive is similar to early Athearn shaft and gear drive. The motor is 3-pole. I somehow managed to break one of the universal joints during the inspection. I used an Athearn universal as a replacement. I had to cut the Mehano shaft a little shorter to fit but it works. The loco didn't run at first but after a tear down and a good cleaning and light lube it now runs quite well and has a fair pull. The wheels are a bit of a problem. Can you say 'Pizza Cutter'? They do OK on most of my track but on turnouts they tend to lift and bump. Right now I'm trying to do something about the lights. They light up the thin white shell like a couple of fireflies on steroids. I've applied some black paint inside the shell at the problem areas. I hope it's enough. I'll see if I can make a short video of it running later. At this point the only part I've replaced is the universal joint I broke.
 
The loco I'm working on this evening is a Mehano Alco Century 628 (C628), a rather enormous Lehigh Valley Snowbird, Cab #638. It's a 6 axle diesel, 4 axle pickup, 4 axle drive. The appearance of the trucks, motor and drive lead me to believe this is a product from the late 60's to mid 70's. I could be mistaken. The drive is similar to early Athearn shaft and gear drive. The motor is 3-pole. I somehow managed to break one of the universal joints during the inspection. I used an Athearn universal as a replacement. I had to cut the Mehano shaft a little shorter to fit but it works. The loco didn't run at first but after a tear down and a good cleaning and light lube it now runs quite well and has a fair pull. The wheels are a bit of a problem. Can you say 'Pizza Cutter'? They do OK on most of my track but on turnouts they tend to lift and bump. Right now I'm trying to do something about the lights. They light up the thin white shell like a couple of fireflies on steroids. I've applied some black paint inside the shell at the problem areas. I hope it's enough. I'll see if I can make a short video of it running later. At this point the only part I've replaced is the universal joint I broke.

If you look closely, you will probably see that Life Like Century shares a lot of common designs with the 1970's AHM GP18. This is one of the engines I repowered with an Atlas/Roco turntable motor. At the time I made the modification, I wondered if the cost of the motor was more than the engine was worth. It did run a lot better with the new 5 pole motor, though.
 
I just took a look at the last few posts I've made here and elsewhere, and realized the migraine I have is adversely effecting my attitude. Heading off to lay down in a dark quiet place until it eases up. Good night.
 
I'm not brave enough to try hand laying rail, however, I do like working with Code 70. We have been planning on moving to a milder climate, so my current core layout is a temp. The "extensions" are designed to be portable. The initial basis was to use Code 83 and fit in code 70 for sidings, but in comparison, code 83 now appears "clunky" Perhaps I will try some custom switches on the next one.

Code 70 and code 55 help set your theme, definitely, an effect you cannot get with stock flex and "panel switches".


WJ
Depending on what era your modeling, you make a very good point that the smaller lighter rail sure does help to set the theme and add to the realism considerably. IMHO

Contrary to what you might think, Hand Laying Track isn't all that hard to do at all. If your interested I can help you to learn what to do and you probably have most of the basic tools already.

I prefer using Wood Profile Ties by either Railcraft/Micro Engineering and I like their rail too which all of mine is from many years back.

The main things you'll need is a good set of track gauges that will hold the rail fairly decently while working with them and a pair of fairly pointed needle nose pliers for spiking and some curved templates in the radius/s you be using, I tried to standardize on a 20" radius, as well as straight template. These can be as simple as some poster board cut to the desired patterns you desire. Just be sure to have your templates the width or the rails so you can draw fairly accurate tracks lines to follow when gluing down your ties. Central Valley also makes some black plastic curveable tie strips that interlock slightly on the end and they also make curvable switch templates.
In both cases these finely detailed tie strips already have the tie plates molded in place assuring you of the proper rail spacing so possibly rail gauges may not be necessary? The switches are really not all that hard to build edither with a little guidance.

It can be very enjoyable knowing how to build your own switches not to mention a lot less costly! Of course I should mention that I'm just working in [DC] which makes it a lot simpler too.

Where abouts are you located? You can send me a PM if you care to?


I just took a look at the last few posts I've made here and elsewhere, and realized the migraine I have is adversely effecting my attitude. Heading off to lay down in a dark quiet place until it eases up. Good night.
I hope your head feels better. Migraines are a drag to say the least.


Mike


Affiliate Disclosure: We may receive a commision from some of the links and ads shown on this website (Learn More Here)

Back
Top