Building the Pinnacle Creek Mining & Timber Co. RR

ModelRailroadForums.com is a free Model Railroad Discussion Forum and photo gallery. We cover all scales and sizes of model railroads. Online since 2002, it's one of the oldest and largest model railroad forums on the web. Whether you're a master model railroader or just getting started, you'll find something of interest here.


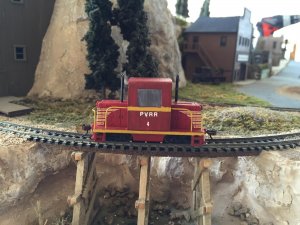
Last%20curve_zpsl53rldvu.jpg


These two are on the top half of my Top 10 list....stunning photos young man, stunning!

 
Jim, Is this that new table top layout you were talking about? Its coming along fine. I am looking forward to this build! I guess i can learn as i watch! Dan
 
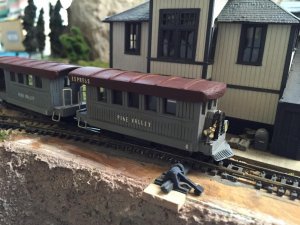
image.jpgimage.jpg

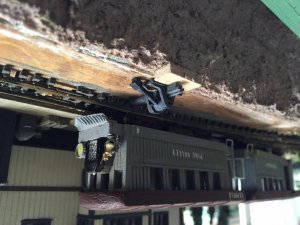
Jim, remember this photo? I decided it wasn't my favorite either. Just didn't look right. So, I modified a passenger car and used the chassis from to 40 Ton and came up with this. Needed something simple for my passenger service. Bill:D
( don't know how I got the upside attachment in here) lol
 

Attachments

  • image.jpg
    image.jpg
    189.7 KB · Views: 459
Last edited by a moderator:


Dan, I stated earlier that this is an example of how you should build yours. I think it will make a nice picture class for all interested. This not the new layout. I built this for a fellow in Iowa.

Which leads to this new photo. Once all the plaster cloth is dry I then paint the entire layout with Woodland Scenics Earth Undercoat. I DO NOT use latex for this job because it deadens the overall look of the layout when all the ground covers are applies. Earth Undercoat can be watered down somewhat. It results in a translucent covering like show below. Also, you can see I attached the rocks with WS Foam Putty. Differences in color here are normal. They will all be covered. Notice to the green pond bottom. Jim :)

IMG_4892_zps118diore.jpg
 
Last edited by a moderator:
Milwaukee Road, I don't understand. Is there a Pine Valley in Australia?
Jim, thanks. I appreciate the kind words. Any progress in your train room? I know you said it might be Oct. before you start construction of the new layout. Bill:D
 
Not much Bill. It is total disaster area. Crap all over the place. My wife and I took down the last of the backdrop this morning. Tough job this, feeling the way I do, but I'll get there. Jim:)


Toot, there is probably a Pine Valley everywhere. There is one 30 miles from me. According to your map it is no Cooma however, but it does boast a petrol station. lol Jim:eek:
 
Not much Bill. It is total disaster area. Crap all over the place. My wife and I took down the last of the backdrop this morning. Tough job this, feeling the way I do, but I'll get there. Jim:)
I too am having troubles as well. Facing probable knee replacement surgery in then near future. Can't stand for any length of time, so my progress is slow as well. The old joints are just worn out. I have some vehicles to build and paint and some figures to paint to keep me busy. (Have a magnifier for that). We always seem to persevere no matter what the circumstances. Best wishes to you, Jim.
By the way, I have enjoyed all of your photos. I have them saved them in a file on my computer for future reference. All of your photos are magnificent! Bill:D
 
Last edited by a moderator:
OK Jim, I am in trouble now!!! My wife thinks i am crazy and ready to call my ptsd doc. I striped down the board. Its back to almost pure white. I didn't remove the track in the back tunnel as it doesn't get any type of scenery. I got the top piece of foam that was for the logging camp. It will get plaster on it too. Then i will glue it to the rest of the layout and then plaster the seams. I am having one issue. I cannot get the log dump to come loose. I am afraid of breaking it. I will cover it and plaster around it. I cannot afford to buy another. I am still in shock myself with all the work i had put in so far. I will get over it. Now i wonder if my wife will?? I have a couple of shots of the 'damage'. Now if my wifey won't kill me when i am in bed.......View attachment 50246View attachment 50247
 
Dan, I assume you made it through the night? Most wives of hobbiests think we are few cards short of a full deck so I'm not too worried about it. Another thing, you've not quite grasped the concepts I'm presenting. The WS Green Undercoat in the pond is just that, undercoat not the final step, but the first in making realistic looking water areas. What that means is this painting covers up white and enhances the layers of ground covers.


Moving on: this photo shows the application of the LAYERS of ground covers that must be use for reasonable scenery. One layer or two will NOT do your layouts justice. Notice the many different colors on the layout now. Probably 4 or 5 layers and not a bush in sight yet. Jim:o

IMG_5002_zpsetli3fjf.jpg
 
Last edited by a moderator:
OK, I got that. I can't see the pond here but i know what you mean. The layout has what looks like three different colors here. Starting to look like the earth for sure. I also like the rock formations too. Do you use a wetting agent here or white glue? I got the idea of it though. I plan to steal your idea for the background mountains. I am already work on the forms to get it where i want it. Am getting all the things i need to get the board and mountains ready for undercoat once the plaster is done.
 
Dan, I generally put a good dab of white glue behind each rock casting. I explained earlier about the WS Foam Putty.

Next up after all your spray gluing and shaking ground covers on it is time to test fit your track. I outline my track with a pen here and there to keep it all lined up. Not too critical a step, but we want our track to come out even. Jim:)

IMG_5004_zpsxiycc2db.jpg
 
Last edited by a moderator:


So you place the track down and trace it then if it looks right, then remove it so you can do more scenery right.


Affiliate Disclosure: We may receive a commision from some of the links and ads shown on this website (Learn More Here)

Back
Top