ModelRailroadForums.com is a free Model Railroad Discussion Forum and photo gallery. We cover all scales and sizes of model railroads. Online since 2002, it's one of the oldest and largest model railroad forums on the web. Whether you're a master model railroader or just getting started, you'll find something of interest here.
Congrats on the win, Scott. Great looking layout Jim. Love the way you do your scenery. Do you mention anywhere how you make your trees. I was wondering what you use for the foliage on the big spruce trees. I want to try and find it here, in the Great White North. Great picture. I thought it was taken with natural light from your skylight. The only thing I can suggest to improve the photo would be to weather your trucks, wheels and couplers. Other, than the road not being finished, that is the only thing that tells me it is a model. Great work. Ron
Thanks fellows. I don't pretend to know it all and welcome all comments on my work. Like my father said, 'Sometimes we see best through the eyes of others.'
rlundy, I believe the trees start way back on Page 3. At least it is all explained in the earliest pages. The branches and leaves are Caspia. Call an art store and see if they stock it in the dried plants section. Jim
I've been following this recently as I'm fairly new to this forum. It has been instrumental in helping me with my own layout. There is a lot of great stuff in here. Your work is excellent ! Keep it up.
Great photos and great contest. Unfortunately, I missed it as I've been in recovery mode from surgery and I didn't realize that your goal would be reached quite so soon. Darn! I tried to find six, but could only find 4. Congrats to Scott and his wife.
I love your photography. Do you recall where you discussed the program you use to get the great depth of field?
David
David, Hope you are well now. As for the photo program it has been discussed a few times here. I use Helicon Focus. I'm not selling anything so I will say that there maybe better programs out there these days. I started with HF and see no reason for me to change. There are free programs, even HF if they still offer it, but all the "Free" programs don't usually include 'everything' you need to really get the job done. My HF ultimately cost around $120. Best money I've ever spent so I'm a happy customer. Try any of the "free" ones online and see how that works. You can try the product, Helicon Soft, out for free. Jim
Hey Jim,
Great photo as usual. I appreciate your work and gives me inspiration,since I am a novice at best, any tips or ideas are greatly appreciated. Again thanks for the contest, it was a lot of fun.
Jim, and other members. I finally have some money for paint and some lumber! Looks like Wednesday is my "Builders Emporium" day! I will start a thread and begin with some photo's, maybe of a can of paint and a pile of lumber. Finally.
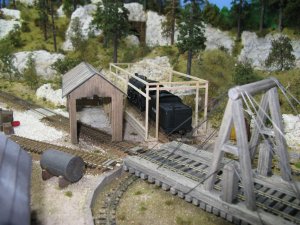
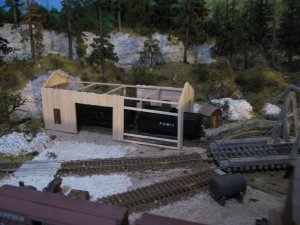
Ah... San Diego, civilization, only 368 miles away. I'll be happy to call that LHS for you and complain. Engine house looks great, as we all knew it would. Thanks again Jim for all the ideas!
JimT, Some would call San Diego County the end of the line for livability in the whole world. I've been most everywhere and the North Island of NZ and some areas of the Costa del Sol in Spain are close!
RR, Belching Beaver? I'm too old for that kind of sex stuff now! Jim
Geez, I'm probably lucky I don't know what any of that means!
Next Up is making BRIDGE TRACK.
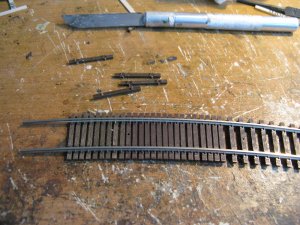
One of the more tedious jobs in this hobby is making bridge track. On the other hand, not much more makes your layouts standout more than bridge track. It shows you went the extra mile to present a more 'realistic' layout than the next person. In the photo below you can see bridge track ties along with regular ties. Some the reasons for close ties are less chance of rails going out of gauge, people can walk more safely, and it makes more work for us!
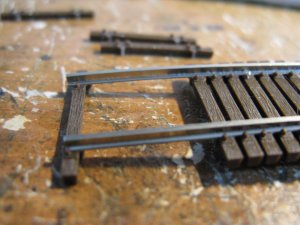
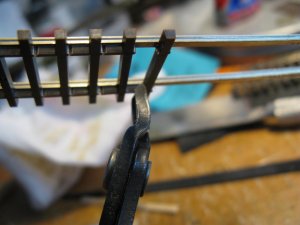
To make this track you must cut out the plastic between the ties first on the track you want to keep as bridge track, and some ties from another piece of track that will end up just two rails. Use sharp cutters. I cut one side then the other side and slide the ties together on the track you will use. Cut all the ties you'll need off the other track. Be careful pulling the cut/free ties off the rails. You want to keep the molded spikes in place. Generally if you break even one spike the tie goes in the trash.
Once you have all your ties cut it is time to slide them on to the bridge track you are making. This is not the easiest of operations. I like to raise the bridge track slightly. Then push it carefully through the spikes.
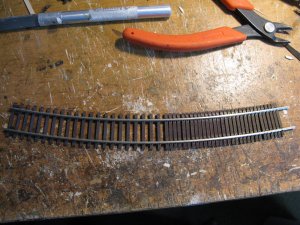
When you have finished adding ties you must leave room for the rail joiners. I cut off the spikes on the ties and shallow out the spike plates to allow the ties to fit under the joiners. Below you see half of the bridge track. Believe me it is twice as easy than a full bridge track piece! Keep your patience and you can do this. Yes, you can use flex track, it really doesn't matter where the ties come from or to where they go. Jim







 Good one!