Building the Pinnacle Creek Mining & Timber Co. RR

ModelRailroadForums.com is a free Model Railroad Discussion Forum and photo gallery. We cover all scales and sizes of model railroads. Online since 2002, it's one of the oldest and largest model railroad forums on the web. Whether you're a master model railroader or just getting started, you'll find something of interest here.


Looks like the subterraineous rock is going to determine the TT's structure.

Good point! The land my house was built on had lots of large, hidden rocks which proved to be quite a pain. I imagine this area was part of a nasty ice floe millions of years ago. Looks like the TT "builder" will have pretty much the same issue.
 
RR, Nothing a good saw won't take care of!

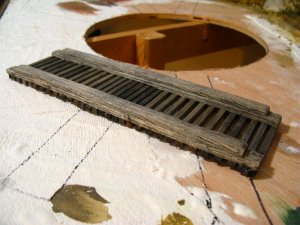
Speaking of Turntables: Here is the first look. It is supposed to be around 50-60 years old. Jim :)

IMG_5939.JPG
 
Last edited by a moderator:


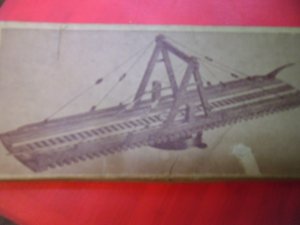
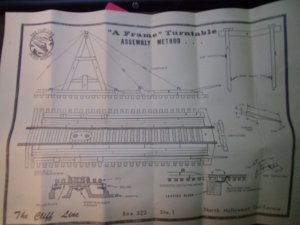
Jim, you mentioned that you are leaning toward a single gallows for the layout. This is a photo of an "A" Frame Turntable by The Cliff Line. This is something I picked up at a train show, maybe 30 years ago and have never put it together. Some of that might be the intimidation factor, you know old style wooden kit with what seems like hundreds of small pieces. Anyway, just an idea or something to think about. - Chris 014.JPG016.JPG
 
Chris, Excellent. Mine will hopefully look just like this one when I finish. I don't have any instructions so I'm just building from pictures. Jim:rolleyes:
 
Thanks 05S, much appreciated.

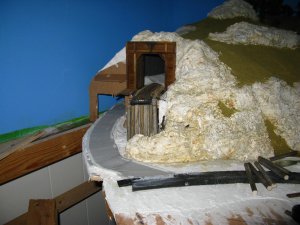
Back is a bit better this day so I put the turntable to the side and poured my first road. I use Woodland Scenics Smooth It and added a bit of WS Black. I can always make it darker if I need to by a black wash. This road is out in semi-desert so it gets a lot of sun and is bleached out. You can also see the grade crossing and road will run along the front edge of the layout because of the turntable. Also note the rocks are changing color. Jim :)

IMG_5942.JPG
 
Last edited by a moderator:
Thanks 05S, much appreciated.

Back is a bit better this day so I put the turntable to the side and poured my first road. I use Woodland Scenics Smooth It and added a bit of WS Black. I can always make it darker if I need to by a black wash. This road is out in semi-desert so it gets a lot of sun and is bleached out. You can also see the grade crossing and road will run along the front edge of the layout because of the turntable. Also note the rocks are changing color. Jim :)

IMG_5942_zps50c568b4.jpg
Coming along nicely there Jim. That will work just fine it looks like.
Mike
 
Jim, looked-maybe not close enough-anyway ...
Were you able to keep the 22 radius on all of the main line?
Was looking at the 'horseshoe curve' on the upper left and the curve from the end of the trestle around the corner in the upper right.
Looks a little tight on your drawing .. Page 165.
 
Sherrel, Yes, it is all 22" r. I don't know how I was able to do it with my back and all, but I did. Goes to show that 22"r can be used on a small layout in a small room. Jim:)


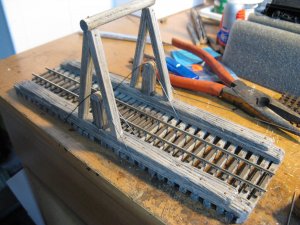
Remember the turntable? I'm not quite finished, just some wires to go on the bridge. I thought you might like to see the progress so far. Jim:)

IMG_5944.JPG
 
Last edited by a moderator:
Stoker, Not to worry. The track will be 'spiked' down. Actually, many turntables had track ties nailed to the bed of the turntable. This was very common in the 18th Century. If you search old photos you can find a few. Most had the ties covered with boards so they where safer to walk on. Anyway, this turntable is in 1940 or so so not ties.

Rotation will be with my finger. This turntable is a 'push' type and will have push bars. Remember it is not finished yet.

I guess the 'mechanism' will be a wire spool cut in half and placed in a hole in the base. There will be a circle of track with wheels on the ends. As for wiring and electrics that is a subject way beyond my knowledge base, but any of you are welcome to come and wire it up for operation. Jim:)
 
One thing that jumps out at me as looking amiss is the ties on top of the cross members of the bridge. A minor point, I know, but handlaying rails directly onto the bridge would definitely go a long way towards realism.

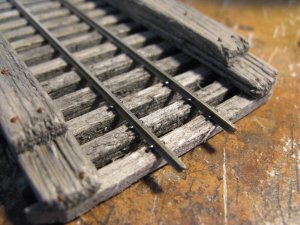
I noticed the same thing right off the bat ..
I'm sure that we will not notice it when finished.
 
Oh Yeah! Looks more realistic - don't think back in the day, they would have "wasted" un-necessary ties?

Really like how you have finished off the beam ends!

Better file off the ends of that rail - looks as if they were just nipped off?
 
Last edited by a moderator:
Looking good! And I agree with Sherrel that your distressing of the beams looks very natural, as well as the grey color. As far as the nipped rails I am assuming you are leaving them wild until you have the pit and mechanism done so you know exactly long they will need to be.


DUUH !! Should have thought of that!


Finished 'spiking' today. I respect all those who are using different track laying systems. However, I will not be inclined to do this again. Jim:D

spiked_zpsdac7f013.jpg
Photo gone missing. Sorry. Jim
 
Last edited by a moderator:


Affiliate Disclosure: We may receive a commision from some of the links and ads shown on this website (Learn More Here)

Back
Top