ModelRailroadForums.com is a free Model Railroad Discussion Forum and photo gallery. We cover all scales and sizes of model railroads. Online since 2002, it's one of the oldest and largest model railroad forums on the web. Whether you're a master model railroader or just getting started, you'll find something of interest here.
Seriously, whatever works for you is great. No one can argue with the quality of your work. But I do find that statement very surprising. I would think % would be a more useful metric because it tells you directly how much distance you require to attain the height you desire, and the calculation is so simple. Obviously, I am missing something.
On the other hand, I think your report about the capabilities of your equipment is revealing. There are lots of warnings about not making grades too steep, but it's clear that at least some scale model mechanisms are capable of handling much steeper grades than others are...
Erik, Please do the math for me. Y = 4" X = 114" % = ?
I just hit 69 and my brain doesn't seem to function like it used to. I used to be able to do this type of math problem in my head, today I can't even remember formulas or most math conventions. Sorry. To make up for these mental issues I resort to other methods. I use an inclinometer. On this incline it registers 1 degree at the bottom and never higher than 2.8 degrees. Overall average is 2.5 degrees. I know of no HO locos that could not make it up 2.5 degrees hauling a modest consist. Remember my railroads are limited to a 10'x11' bedroom. I can't run Challengers or locos like that. I run small steam pulling up to 6 or 7 cars. I'm making this layout with 22" radius curves to allow for a 2-8-0 Consolidation. The whole layout will end up as one big curve. I haven't seen yet where even a single piece of straight track will go other than turnouts. Even with these curves I feel that 2.5 degrees and whatever its equivalent in % will be well within the running guidelines of my loco fleet either HO or On30.
So you or somebody do the math. Now I'm interested to know the %. Jim
And I didn't do that in my head... The calculator is my friend
And please understand, I wasn't being critical or attempting to second-guess you. I was just so surprised and intrigued by your approach because of all the strict cautions I have run across about trying to stay under 3% grades. Your experience is evidence that such rules aren't as ironclad as they might seem.
Like you, I'm expecting to run small consists and short locos. I'm working pretty hard to keep my grades under 3%, although I've seen magazine project layouts that include stretches of 4% grades. The biggest message I get from your post is, maybe I can relax a little bit. (My layout space is limited to 8 feet by about 12 feet, so we're in pretty similar constraints.)
And if what I do is only half as successful as the layout you just took down, I'll be happy and relieved indeed.
Erik, No worries. As far as my mind is slipping away I couldn't conceptualize the fact the 4 was divided by 114. I used to know this, but alas not anymore....
So it is 3.5 %. I won't forget, I hope, how to do this math this time, 'cuz I can always find it here. I suspect the left side of the layout will be around 3% or less.
I like folks being surprised and intrigued at my approaches to the "norm." While my mind seems to be slipping away, I do take comfort in believing that I'm a pretty smart guy. You would be very surprised at some of the famous model railroaders that have contacted me about scenery and such. No bragging, but if I can get through this layout physically, and now I guess mentally, I will call it all a day. It will have been a good 10 year run and hope this thread will be around for whomever. Jim
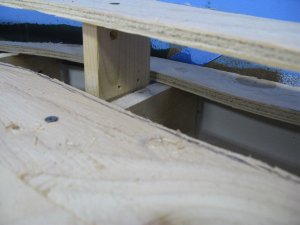
There is the conventional way of using risers to elevate the cookie cutout roadbed. This picture shows this method.
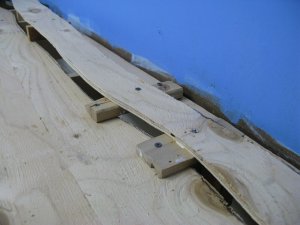
Let us not forget I and many other modelers are ailing in different ways. Here is a simple fix to avoid the conventional under the layout approach to risers. Simply add wooden blocks of the appropriate dimension and slip them under the cookie cutout road bed like this:
This method doesn't have to be pretty, just functional. It will all be covered up by scenery anyway. Jim
Well, as someone who started in the hobby as a teen, then spent most of my adult life in the armchair side of the hobby until finally, now, starting on a layout as I begin to drift down the downhill side of the 50-year-mark... I can safely say you probably have a lot more stuff to forget than I've ever even learned yet.... My hat is off to you.
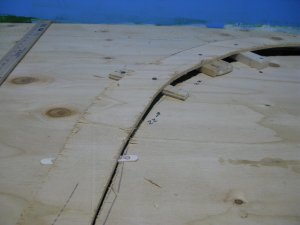
This is the tool that they were using at my new club to cookie cut the ply,(several brands available) it has the advantage of depth control so you can cut across bearers and the blade diameter is small, so it can be manouvered to cut curves.
Not suggesting ypou should rush out and buy one Jim, just for the benefit of others who might want to use this method.
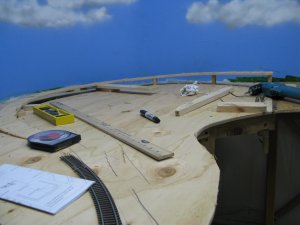
Almost finished laying the plywood tops. This photo shows the main focal point on the Southern Division the canyon. I had to rearrange the bench work a bit. Mainly I just cut out the supports so except for one board I have a layout in two sections. I will have to add some wood to support the canyon so this project is far from over.
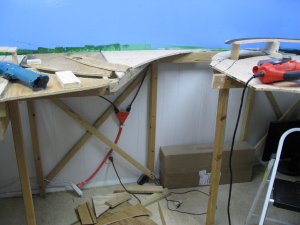
Also I lugged the 4'x8' piece of plywood in for the left side. In the background you can see work on the incline being done. This incline will be 2 degrees in slope.
You know, Jim, We could have been doing this instead!
My son is bringing a 37 footer down from Frisco.
He went up with his equipment in a one- way rental car.
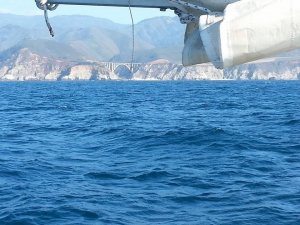
Very cool bridge, looks like it would have been one big pour!
Stoker now that you mention it I have seen it in commercials.
Jim I'm still admiring your clouds!
I will pass. I still wake up at nights traumatized by the roads I drove over the mountains in Yellowstone National Park 2 years ago with DairyStateMom and DairyStateKid-M.
I've seen pictures and film of California's hwy 1 and it looks like to has some spectacular scenery. Especially with the ocean views. Erik, you mentioned Yellowstone and it is quite beautiful. I guess everyone has their favorite scenic drives, mine is from Durango to Silverton and then on up to Ouray. Now that is spectacular, especially if you have time to take some of the jeep trails. Oh, and let's not forget Silverton to Telluride by way of Black Bear Pass. - Chris
I was down at the club (I say "down" 'cause it's south of me) where they are using this method and noted something that if possible should be avoided. One of the joints between the plywood sheets was smack bang in the middle of the top transition back to level and though the joint had been braced with another piece of ply underneath, there still was a slight peak at the joint. As trackwork is approaching fast, I hope a bit of planing and sanding takes place beforehand.
Oh, no question. We had a wonderful week visiting there. But heights and I don't get along so well. We took a spectacular bus tour one late afternoon into the evening and saw amazing wildlife. But some of those curvy mountain roads were all I could manage, and that was just as a passenger. Then, two days later I had to drive a segment that was easily as challenging, though it was a lot shorter. And of course, drivers don't get to just stare at the scenery. ...
I was down at the club (I say "down" 'cause it's south of me) where they are using this method and noted something that if possible should be avoided. One of the joints between the plywood sheets was smack bang in the middle of the top transition back to level and though the joint had been braced with another piece of ply underneath, there still was a slight peak at the joint. As trackwork is approaching fast, I hope a bit of planing and sanding takes place beforehand.
Hope you pointed that out .. If they were not aware!
They should have used a 10-12 inch splice underneath with glue, clamps, and a min of 4 staggered screws.