ModelRailroadForums.com is a free Model Railroad Discussion Forum and photo gallery. We cover all scales and sizes of model railroads. Online since 2002, it's one of the oldest and largest model railroad forums on the web. Whether you're a master model railroader or just getting started, you'll find something of interest here.
My suggestion about the sawsall (called reciprocating saws here) was for cutting through timber framework beneath the layout (thought I saw you say something about that, can't find it now). If you find you can't reasonably sandblock by hand to reduce the hump, then something like this could be the go http://www.toolcrib.com/blog/2010/03/belt-sander-comparison-pc-vs-bosch-vs-makita-and-more , but only if you can beg, borrow or hire (won't suggest the 4th alternative, musn't advise anything illegal). Don't your miners have some scale size dynamite?
T.C. The reason I'm not rich is all the N and Z track ends up in the garbage can. Different layouts always had different ballast coloring. I'm not into recycling my layouts.
Toot, I think Sawsall is a brand name that has gone generic here. I've not forgotten your comments earlier in the week been really busy and lost touch with them. I never had that kind of a sander. I'm only an 'adequate' carpenter so I never invested in one. I like the fool's gold layout reference.
Looks like all foam under this section of track. Remember way back in thread I said I had about 6 feet of foam left over? So this job may be easier than I thought originally. There seems to be a lot of tension in the track at this point. Hopefully my glue job will keep it all down. Jim
Hope it turns out to be a relatively easy fix and the source of tension is found, otherwise your loco crews might be naming that section "the launching pad".
Well, after 3 days of reading I finally got to the end of this thread and my head is swimming with ideas. I'm exhausted. Now I'm headed back to basement cleaning. I'm carving a 14x24 area out of my woodworking shop. All the 20 year old stuff from the attic is coming down. I'm starting my first layout in 20 years. I'll be 73 in a month and I hope I live long enough to finish something. Hadn't been to a hobby shop in 20 years. Now that's a rip van winkle experience that I don't want to repeat.
187, Welcome to the thread. If you can afford it get someone to make your room 'right' so you can actually start building. At 73, you will have to get going. I don't know what your plan will be, but I would recommend something that will not fill your space available.
I'm 68 and that is a reason I build so quickly.
As for the bright foams on the lake bed depending on the light and camera angle they may not photograph well. #705 is the key photo. Glad you found it. Jim
In post/picture #172 there are single strands of weeds that mostly poke straight up from between the rails. Is this the static grass product? If it is how does it manage to still poke up after you wipe it from the ties? Could you give a little better description of the technique? Is the static what causes it to be erect and why doesn't wiping it off of the ties make it flatten out? Some of it appears to be coming up from the ties. That only adds to the realism.This would make a great 30 second video.
187, Check out post #798. I shows the #172 photo with an update. In the two photos no electronic static grass device was used. If you shake the Woodland Scenics Static Grass container vigorously you will create some electricity and some of the grass will stand up.
I do indeed wipe the ties with my finger. It doesn't get all the static grass up, but just enough for some realistic possiblities. I also use grass tufts from Scenic Express. Those are the clumps you see.
I have to go to the dentist in a couple of minutes, but I will add some stucco patch to a WS rubber mold and see what happens. Good question.
Am I to understand that in the second pic of #798 that the main difference between the left and right tracks is the finger wipe? Of course that would be minus the clumps which you added to the right side . Would the clumps have been added last after the various ground covers and the grass?
187, Actually the only difference between the two photos is the adding of additional tufts and other foliages. The original static grass applications and treatments are the same.
I could do a Jill Poke. I didn't do one in my N scale layout which was my last "logging" layout. I had the perfect spot for one, but I hadn't heard of this technique back then. Because of my small layout room I find that if I'm going to do HO then mining is more suited to the space I have. IF I do another layout it to will be mining. Jim
187, Yes. It is drying as I type this. I did it the day you mentioned it. Unlike hydrocol which can be taken from the mold after a couple of days, I'm letting this get 'rock' hard. I don't know if it will break if not completely dry. Maybe tomorrow I will take it out. Jim
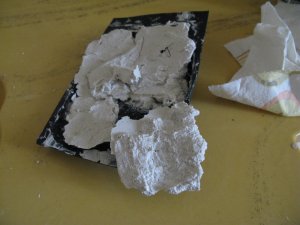
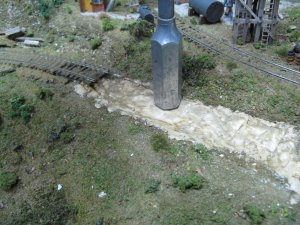
After four days of drying I will give stucco patch a grade of C- concerning use in moulds. Problem is that it will likely take over a week of drying in the sun and in the house at night to dry. The photo shows reasonable results from the shallower part of the mold.
Bottom line. If it is summer and hot this may work. For me, it is not worth my time waiting for drying. I would stick to lightweight hydrocol. Stucco patch is so easy to work with and if you need many rocks and cliffs it is the least expensive alternative. All you need to do is scribe it with a blade and you have a reasonable result. Rocks come in all sorts of formations. I'm not sure you can go wrong freelancing. Jim
187, No problem. It was something I should have tried a year ago!
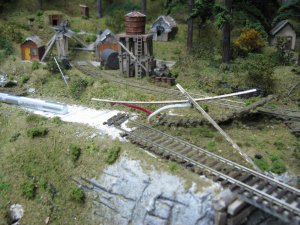
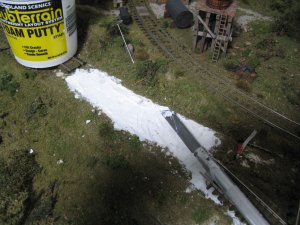
Back to the hump issue. This photo shows me patching the gaps in the foam risers with WS Foam Putty. I'm not going to put down a layer of plaster cloth on this section for a couple of reasons. One, I don't need any more 'elevation' in this spot. I would have had to shave the foam a 1/64 of an inch and my blade is dull. So I will employ this fix. Two, I'm curious as to the glue holding down the track on foam as opposed to plaster cloth. Always trying to learn something!
When this dries I will color it, then glue the track down. Jim
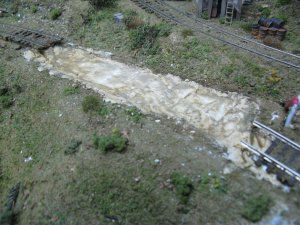
I added some Woodland Scenics Earth color this morning. If you check out the previous foam photo you will see that this finished product is mostly smooth.
Here is a hint: I did not sand this and get dust all over the place. Instead while the foam was rewetted with WS Earth color I used the flat end of my Exacto saw handle to make it smooth by rubbing back and forth. Tomorrow this will all be hard and dry and no vacuuming mess. Jim