ModelRailroadForums.com is a free Model Railroad Discussion Forum and photo gallery. We cover all scales and sizes of model railroads. Online since 2002, it's one of the oldest and largest model railroad forums on the web. Whether you're a master model railroader or just getting started, you'll find something of interest here.
I got a call one day asking if I do layouts. Sure. I want it for my reception area of my business, construction. Okay.
So off we go in at least 3 parts.
Part One:
Since many visitors here are newcomers I thought this layout presentation should go over everything from start to finish. Not all have time to get the whole picture from the beginning of this thread so you regulars can look at this as a refresher and new folks can see how this is all done.
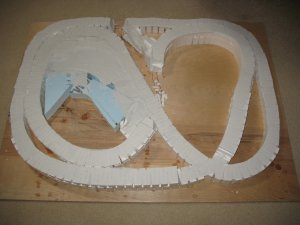
I had my board and I laid out some track to get an idea.
I liked what I saw so I traced the track. The owner didn't want a representation of Iowa, but would like mountains an things. All up to ME.
After tracing I had guidelines for placing the foam. In my mind and on a piece of paper I cannot find now, I laid the foam knowing what I wanted.
Next some plaster cloth over the foam.
Then because of weight all landforms are newspaper.
Thanks Ed, Yes, it is Z, summer of 2009. I'm coming to the end of Z to show all of you. One more small layout to Virginia. Then it is on to N scale. Jim
Thanks for the link Toot. I'm not shy about saying how much I appreciate the work of others. This fellow knows his stuff. It always amuses me how modelers differ in their ultimate outcomes. I really like the building that narrows between the tracks. I've not seen that before. Good stuff. Jim
After the plaster cloth dries it is time to fit the track.
Then add the rocks. These are made from Woodland Scenics molds using their lightweight hydrocal. I simply glue the rocks on with WS Foam Tack Glue and fill in the seams with WS foam putty.
Next after drying overnight I always cover my plaster cloth with WS Earth paint. I never use latex as it ultimately make your layout look dull and lifeless scenery wise.
Now the ground cover. I use at least 5 layers of shaken ground covers. Usually more like 6 or 7 layers. No matter what there will be still places where the WS Earth shows through. However this paint has a translucence that is missing with latex.
After most of the ground cover is on it is time to lay the track down. For this I always use WS Foam Tack Glue. Eileen's glue is okay too. At this point I also hook up power and see if a train will go around.
Tree testing.
I enjoy this step as it shows your layout's potential. Good to have all this in the brain first before the glue dries! Jim
The mind's eye is certainly a useful tool in the virtual toolbox. Maybe they could come up with something like that to add to the software available with these virtual reality viewers for those not so naturally blessed.
Toot, I've done some seminars for NMRA for years and have been asked the same question. To me, all this gets into our brains because we've experienced the areas we model. Wilderness travel is a plus and I've done plenty that, but it is no different than Ayer's Rock area. By being there we learn if we open our eyes. So maybe not so naturally blessed is the answer but maybe more open eyes wherever we go?
RR, Next time you will see all the rock blended in. Until then use those few above and realize that like most rocks they seem simply 'stuck' in place on the hillsides. That is because that's what rocks do; just stick out.
Blending them in is no problem. Once attached to wherever with glue and then WS Foam Putty you simply finish your pours of scenic material on the putty, it has the same plaster qualities of plaster cloth, and when all the different shakes of material are done they look right. No mystery and very easy. Finishing off your work with a bush or two will cover any spots that seem suspect to you. Sinchy. Jim
ON ANOther note. We seem to be nearling 700,000 views for those counting. Next Contest will be at 750,000 views. This seems to have a better 'ring' to it. Jim
Moving on to the back side of the layout you can see more of the ground covers and rocks.
Some bridge building. Brass.
Starting to look like something now.
The owner wanted a small village scene. Including a church, a post office, a house and a fire department. Plus some other extras like lights. Going here.